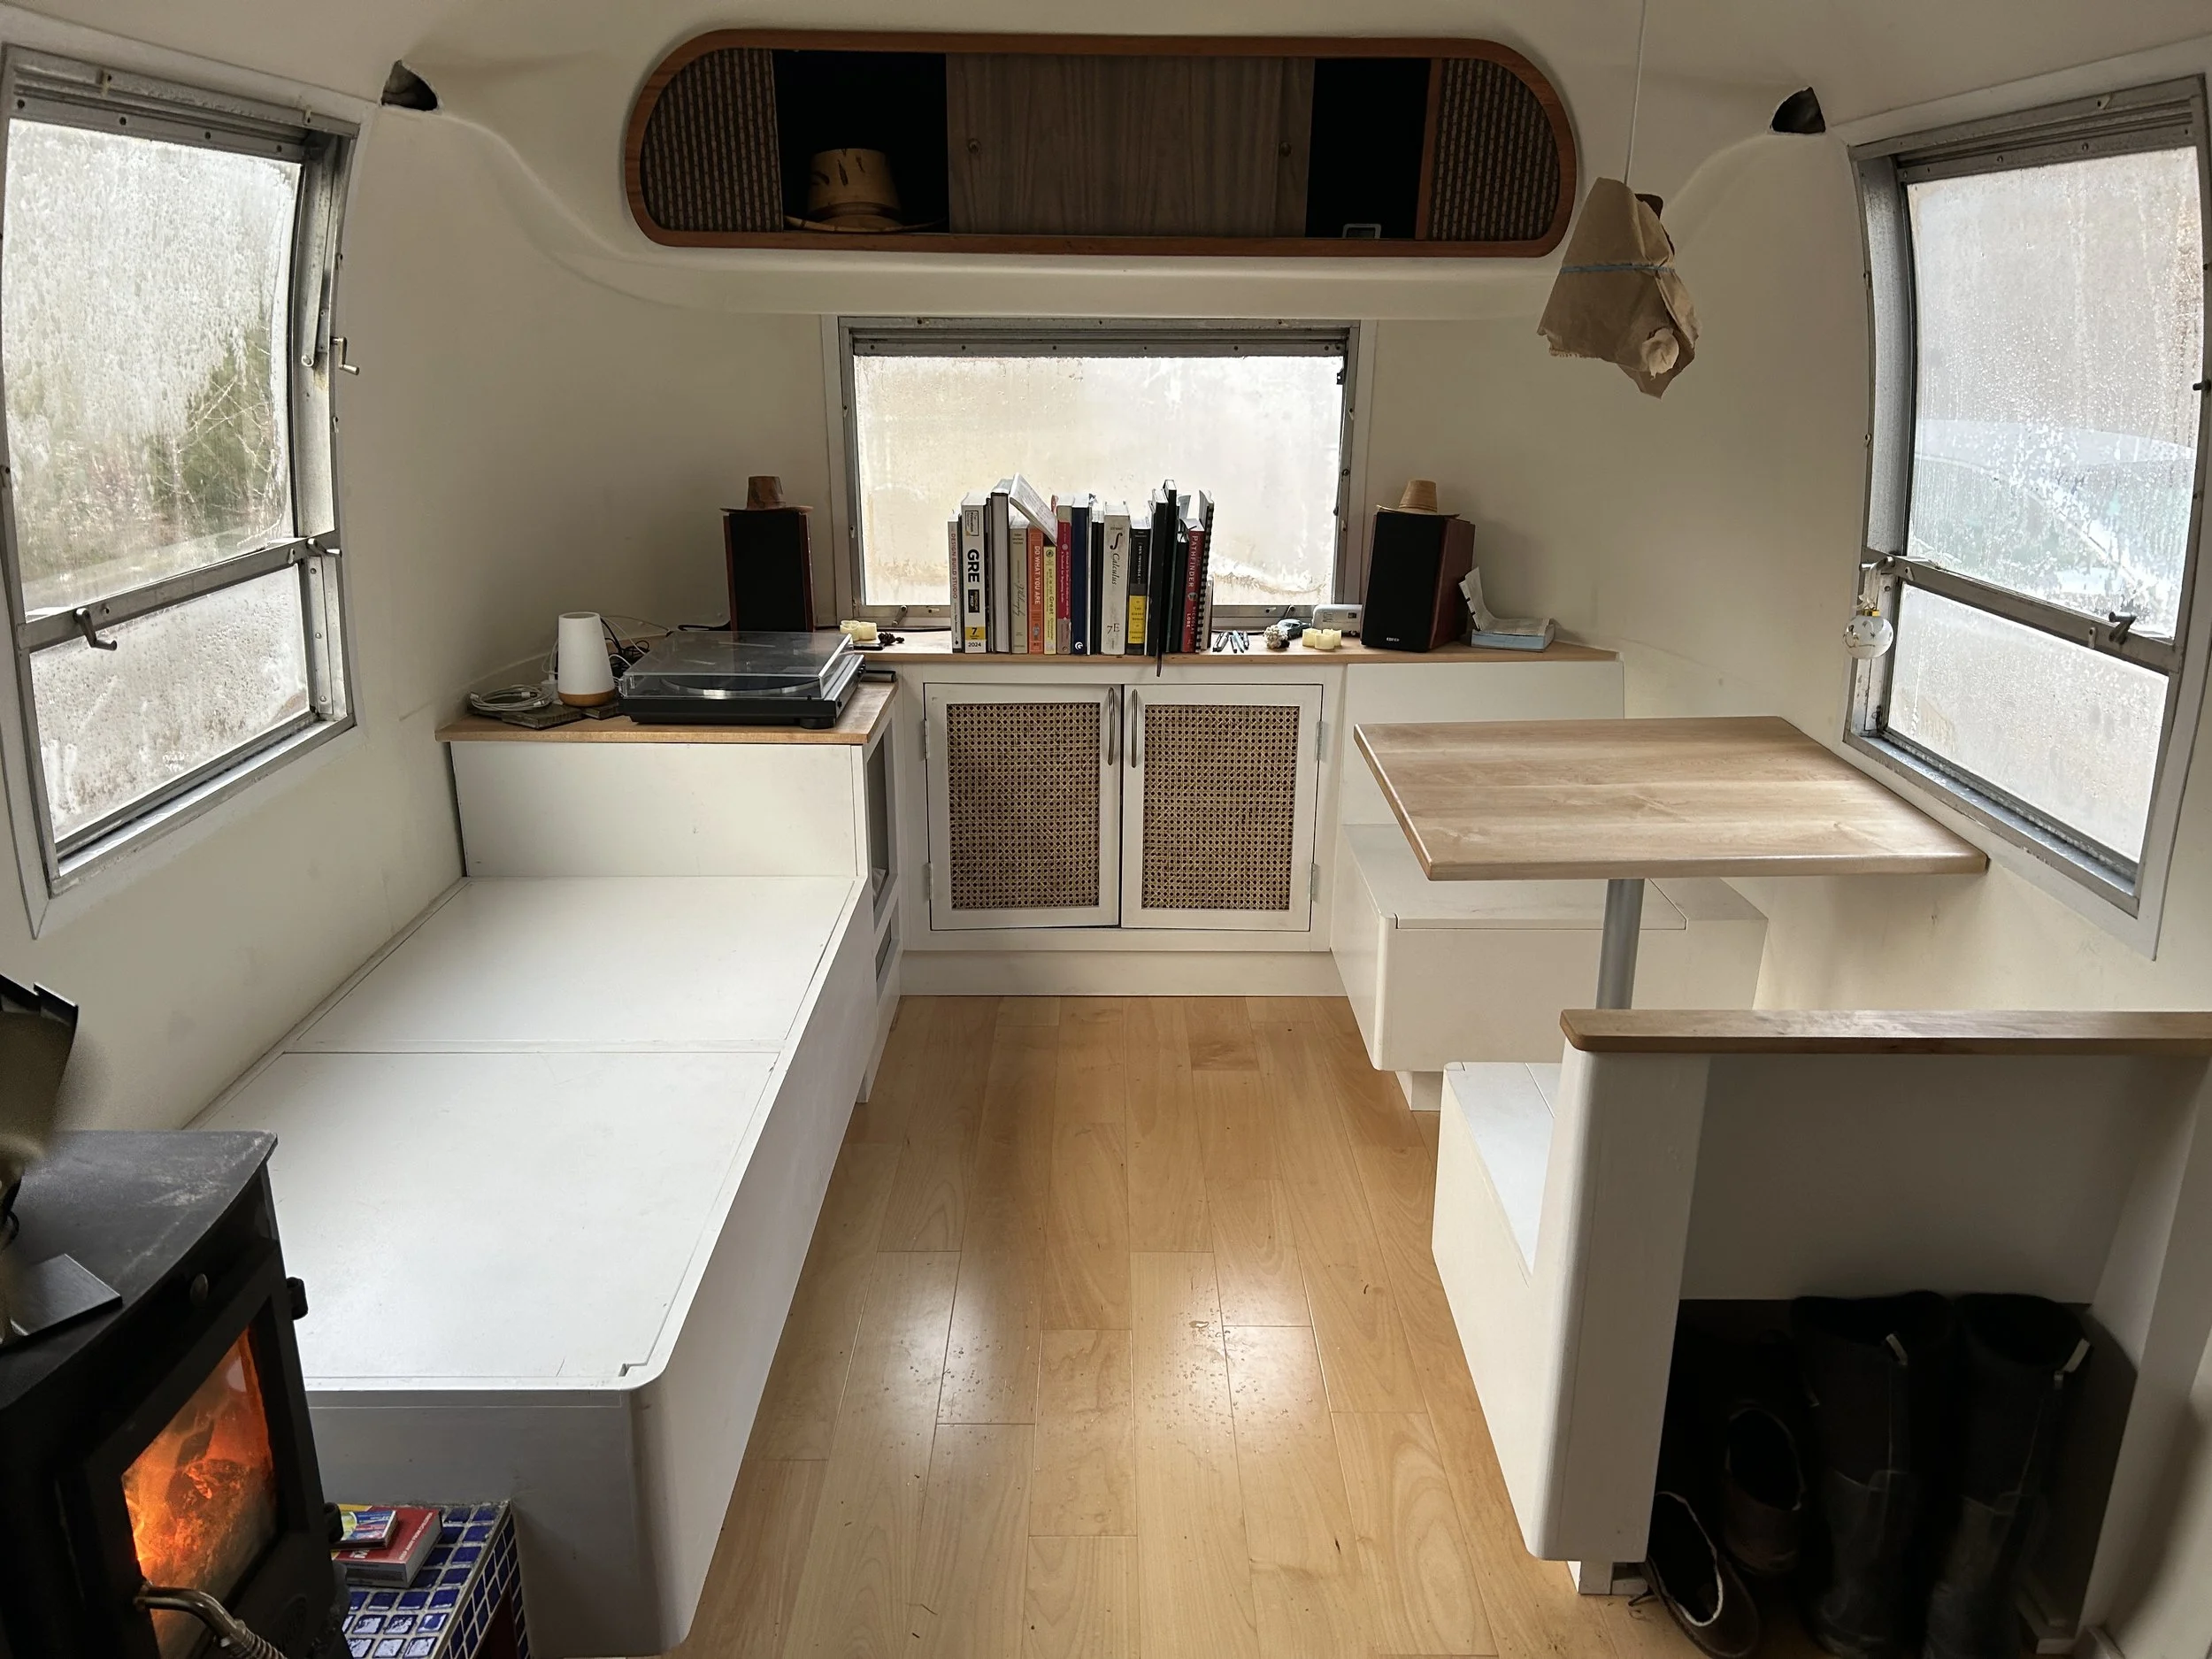
This past winter, I was commissioned to create some custom upholstery for my friend’s airstream. He completely renovated it himself, designing and creating all the systems and custom carpentry. When he described his intention to add some cushions, he confessed that soft goods was not his area of expertise. Considering the beautiful aesthetic he already established, I felt strongly compelled to create custom upholstery that would match the quality and detail of the rest. Here is a picture of the airstream before we started.
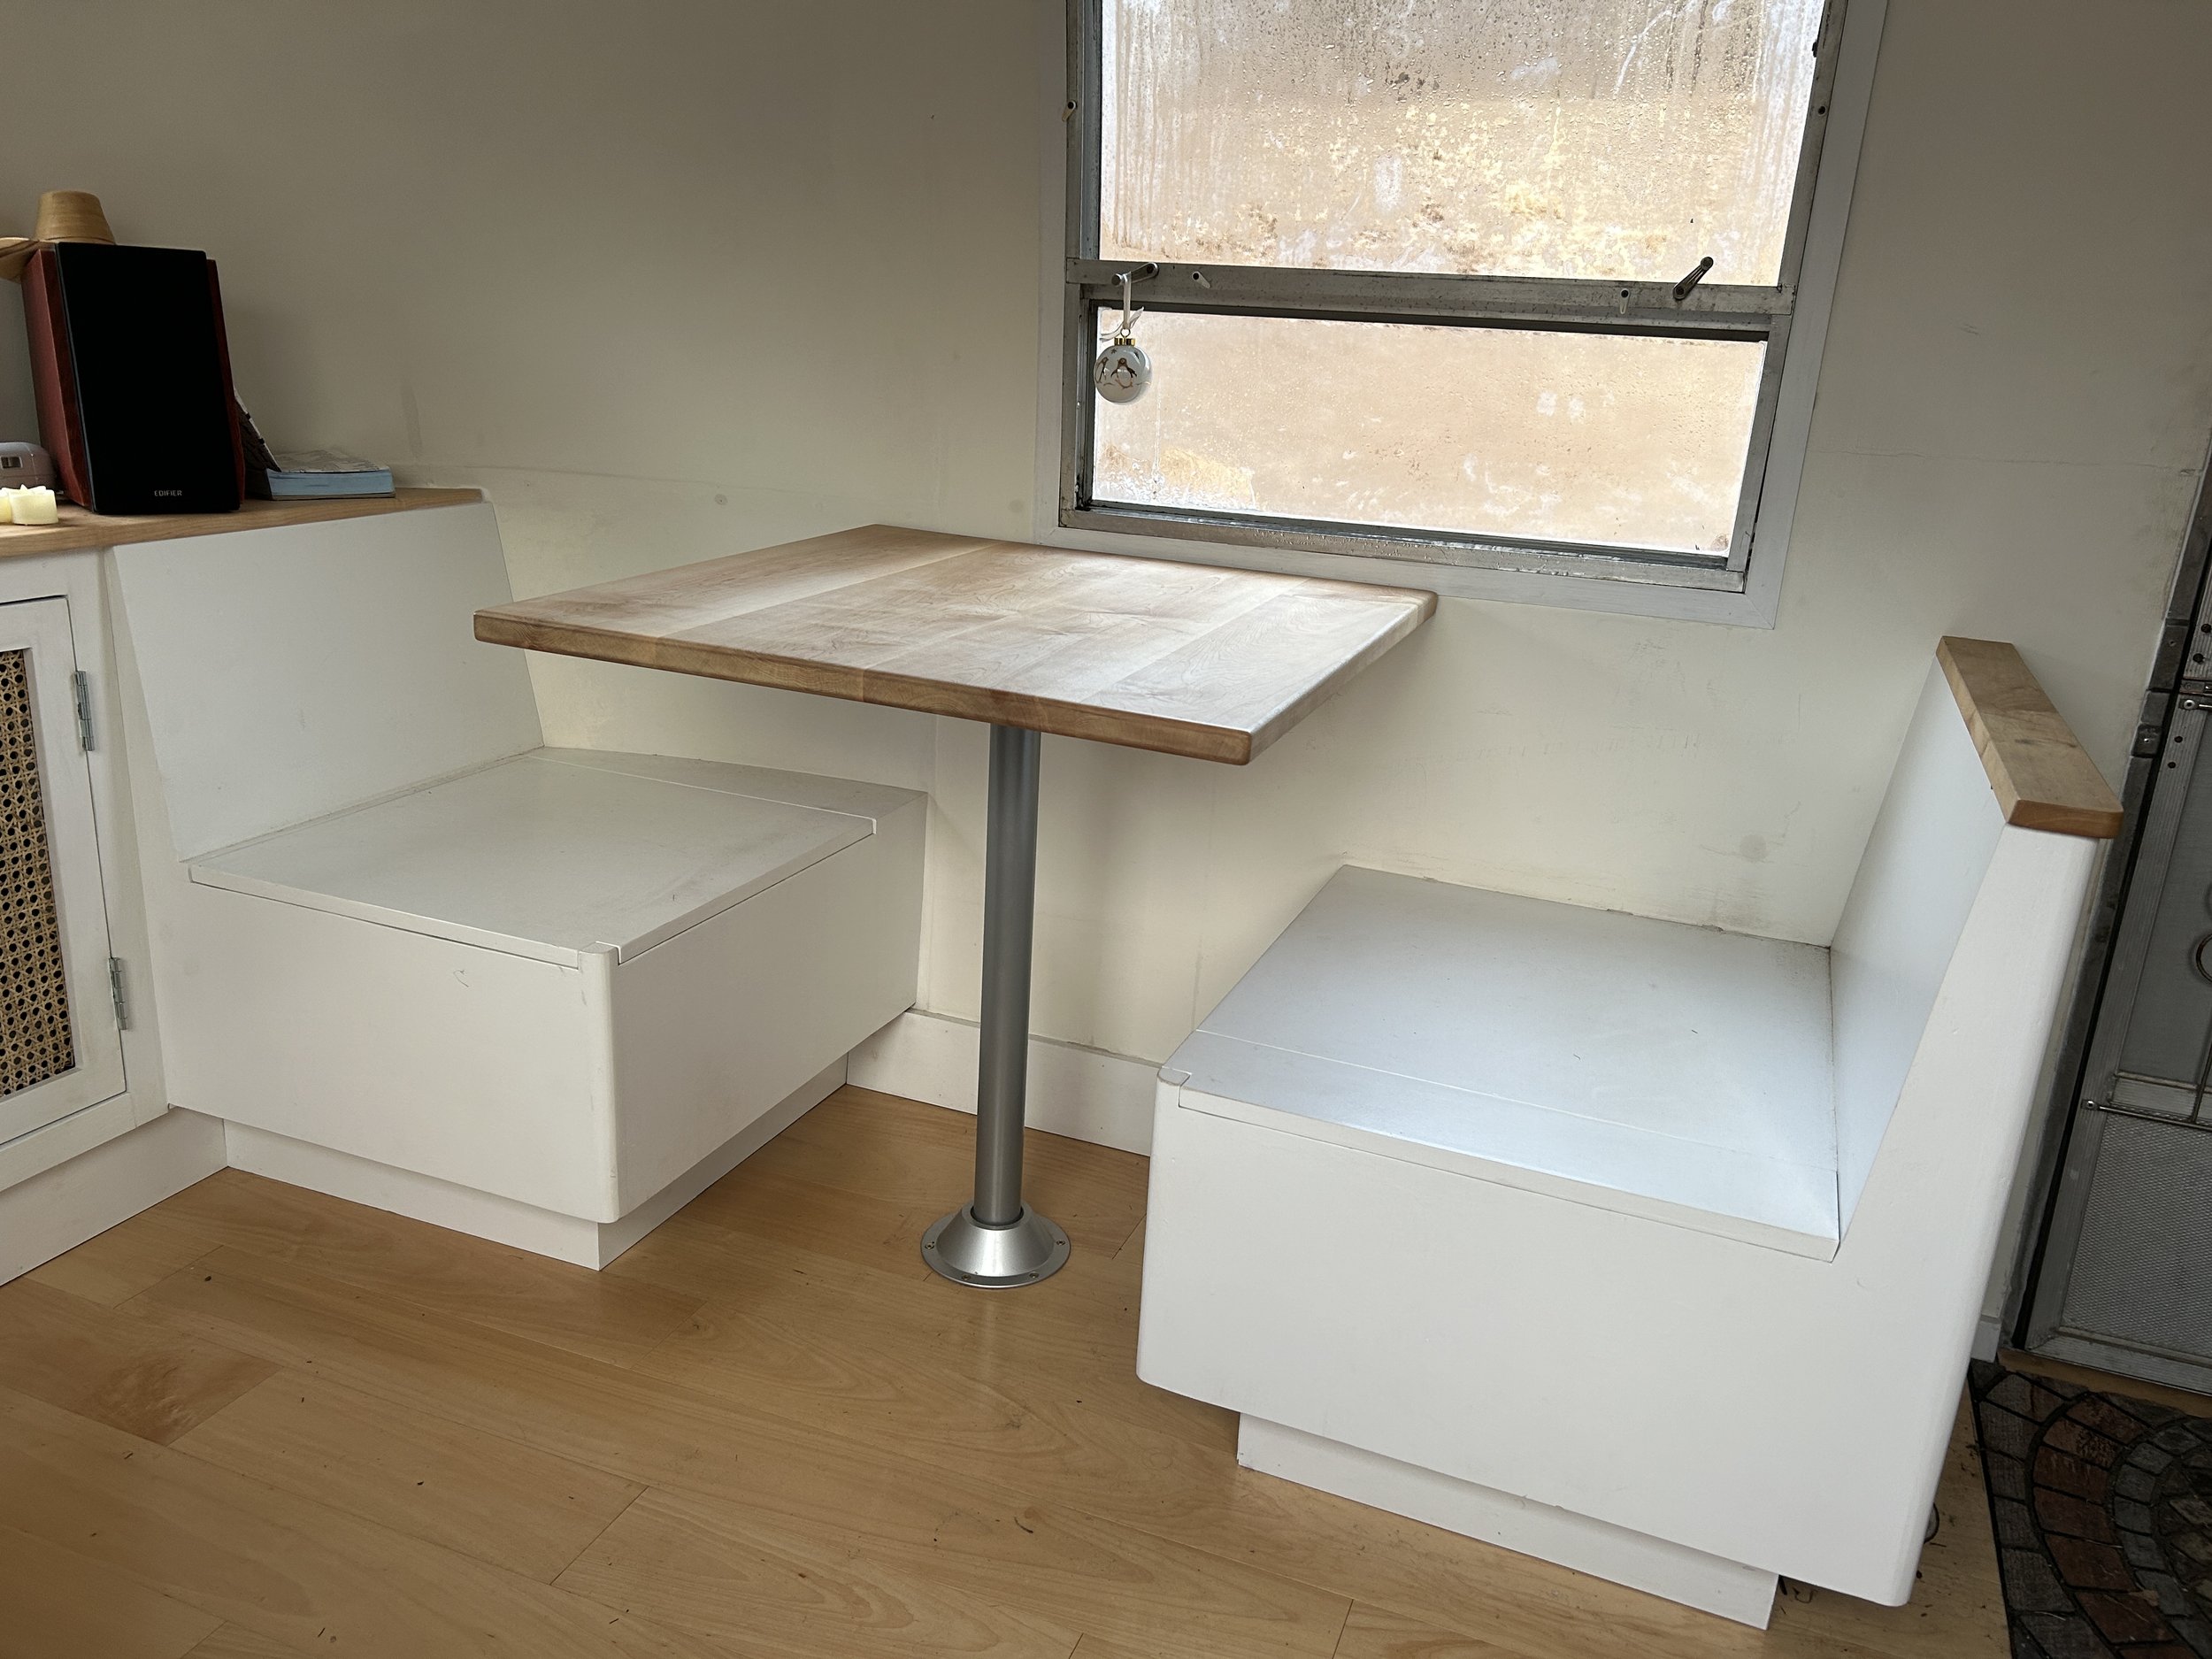
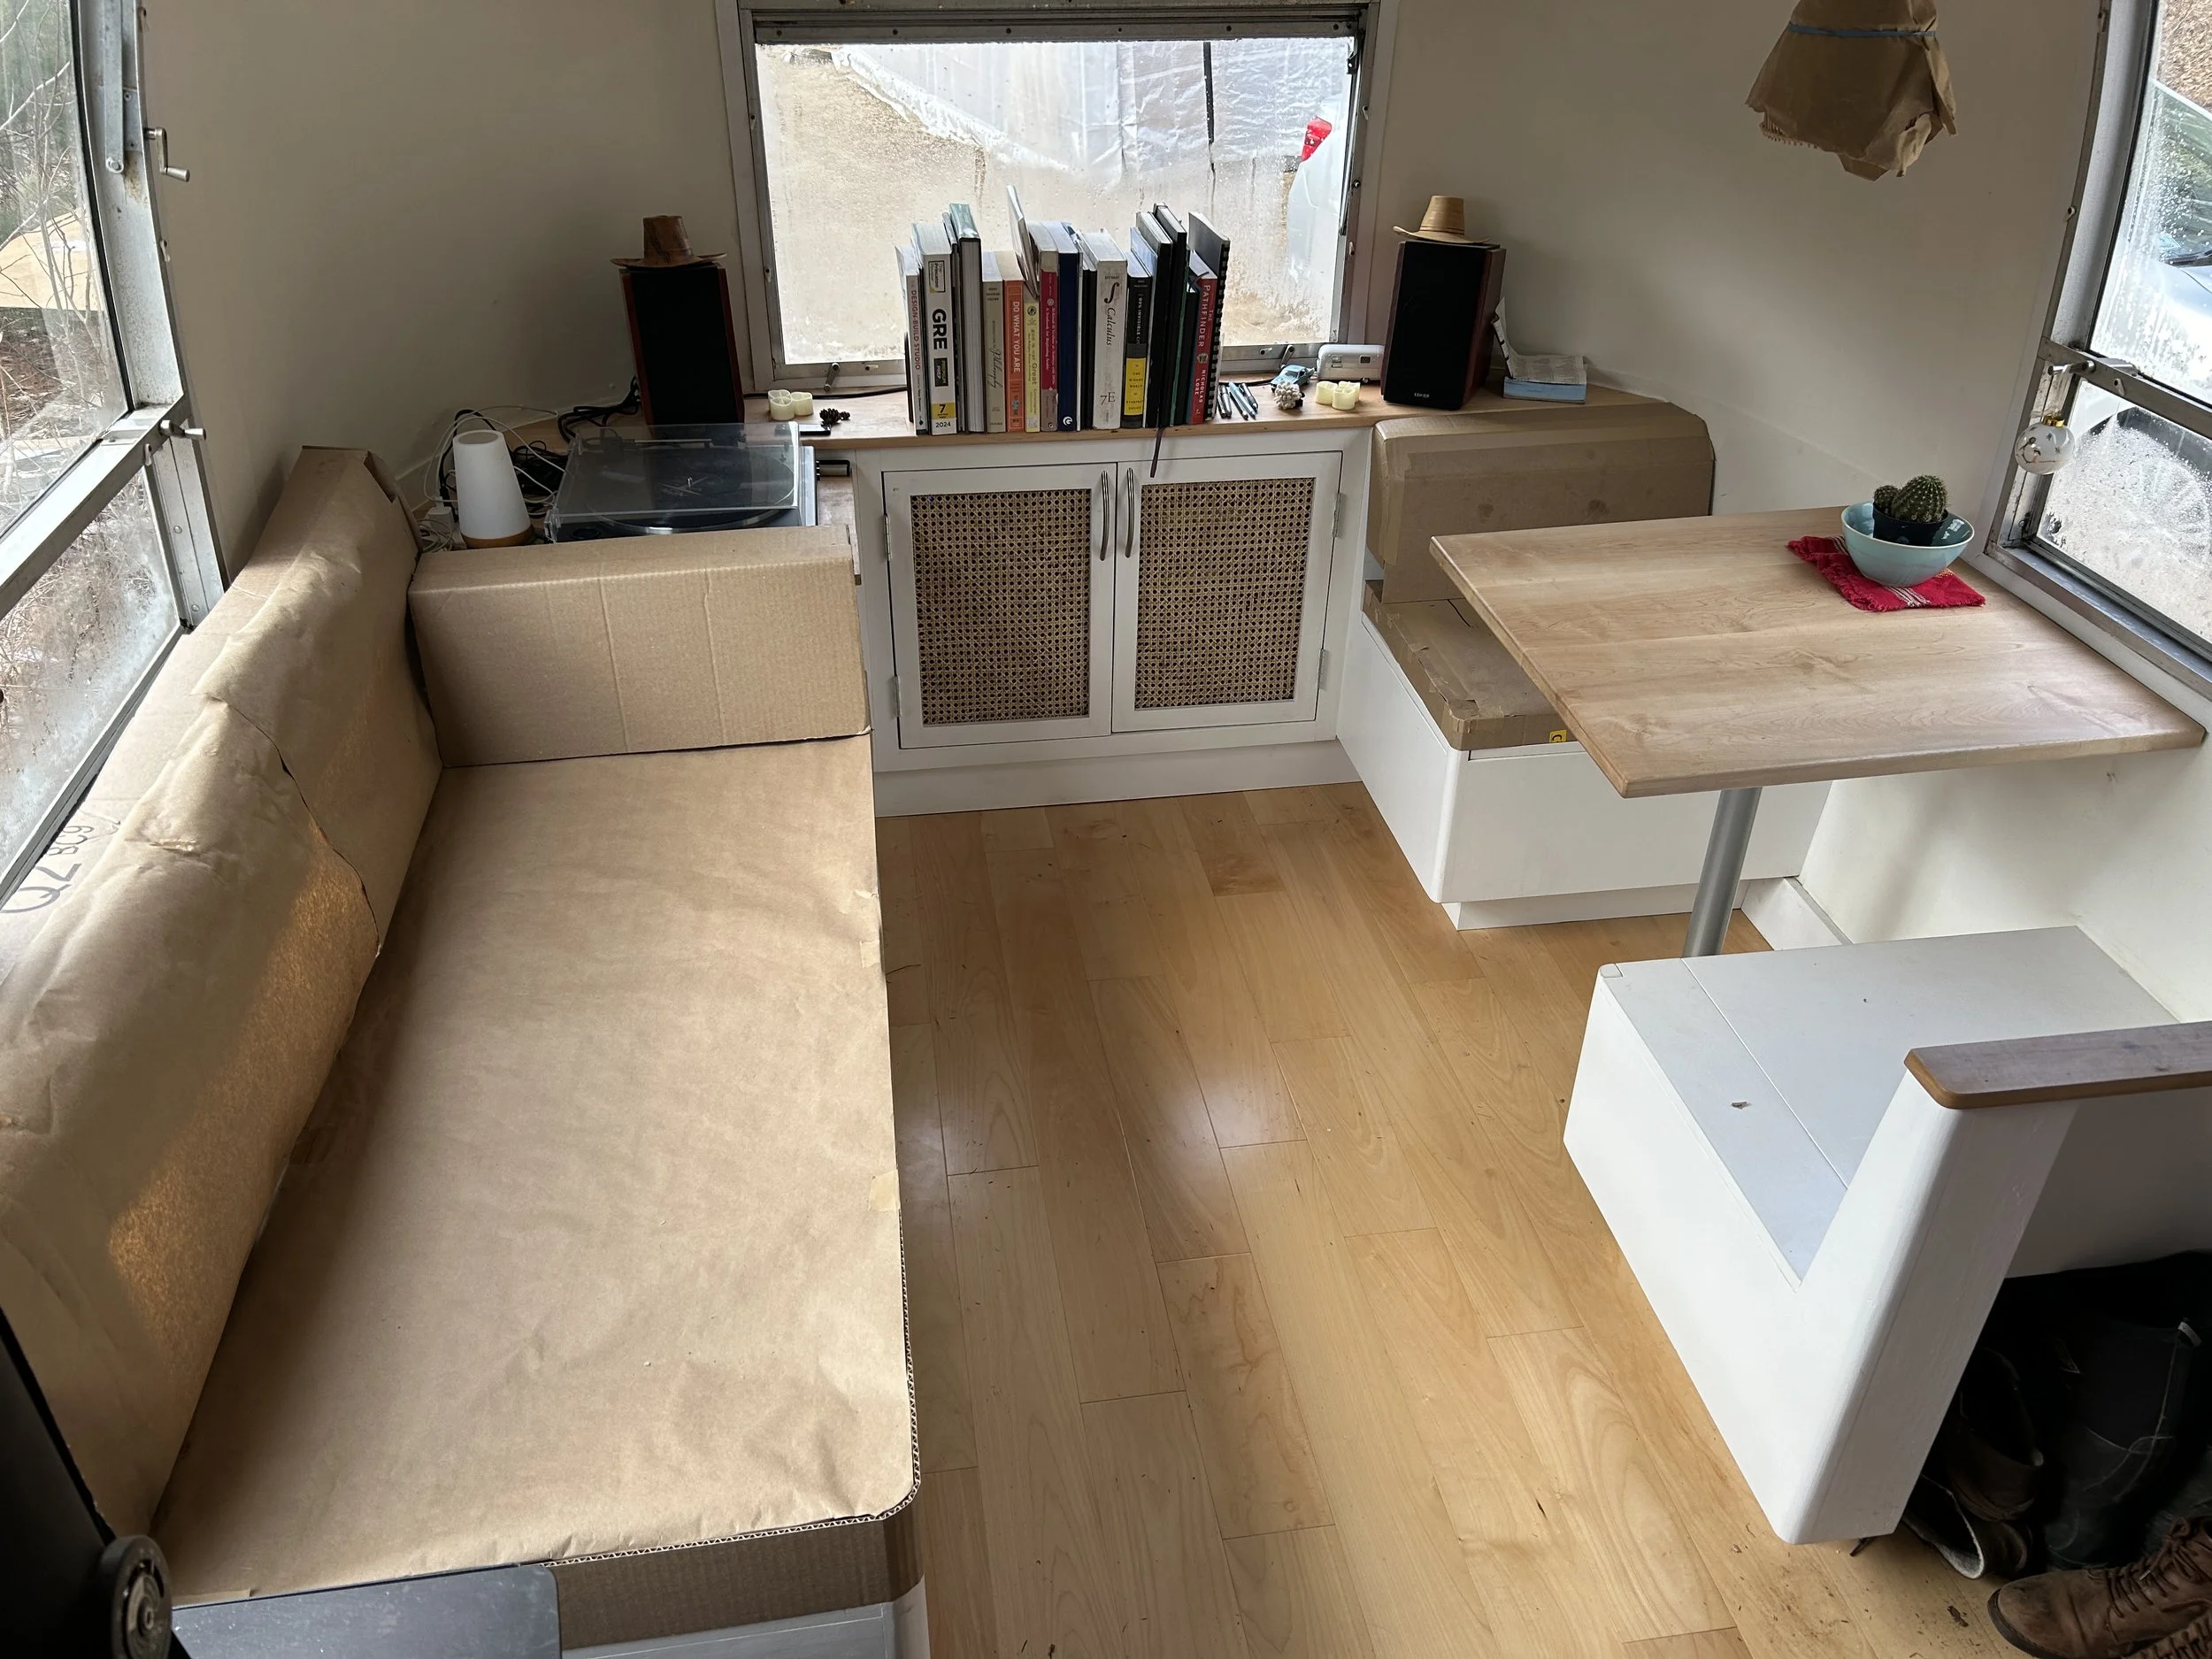
I started by taking copious measurements of the space. There were a few complex curves to take into consideration (the back seat in the dinette was the hardest) and every seat back had a slight recline. Since I would be working remotely, I decided to make a cardboard mockup to take with me.


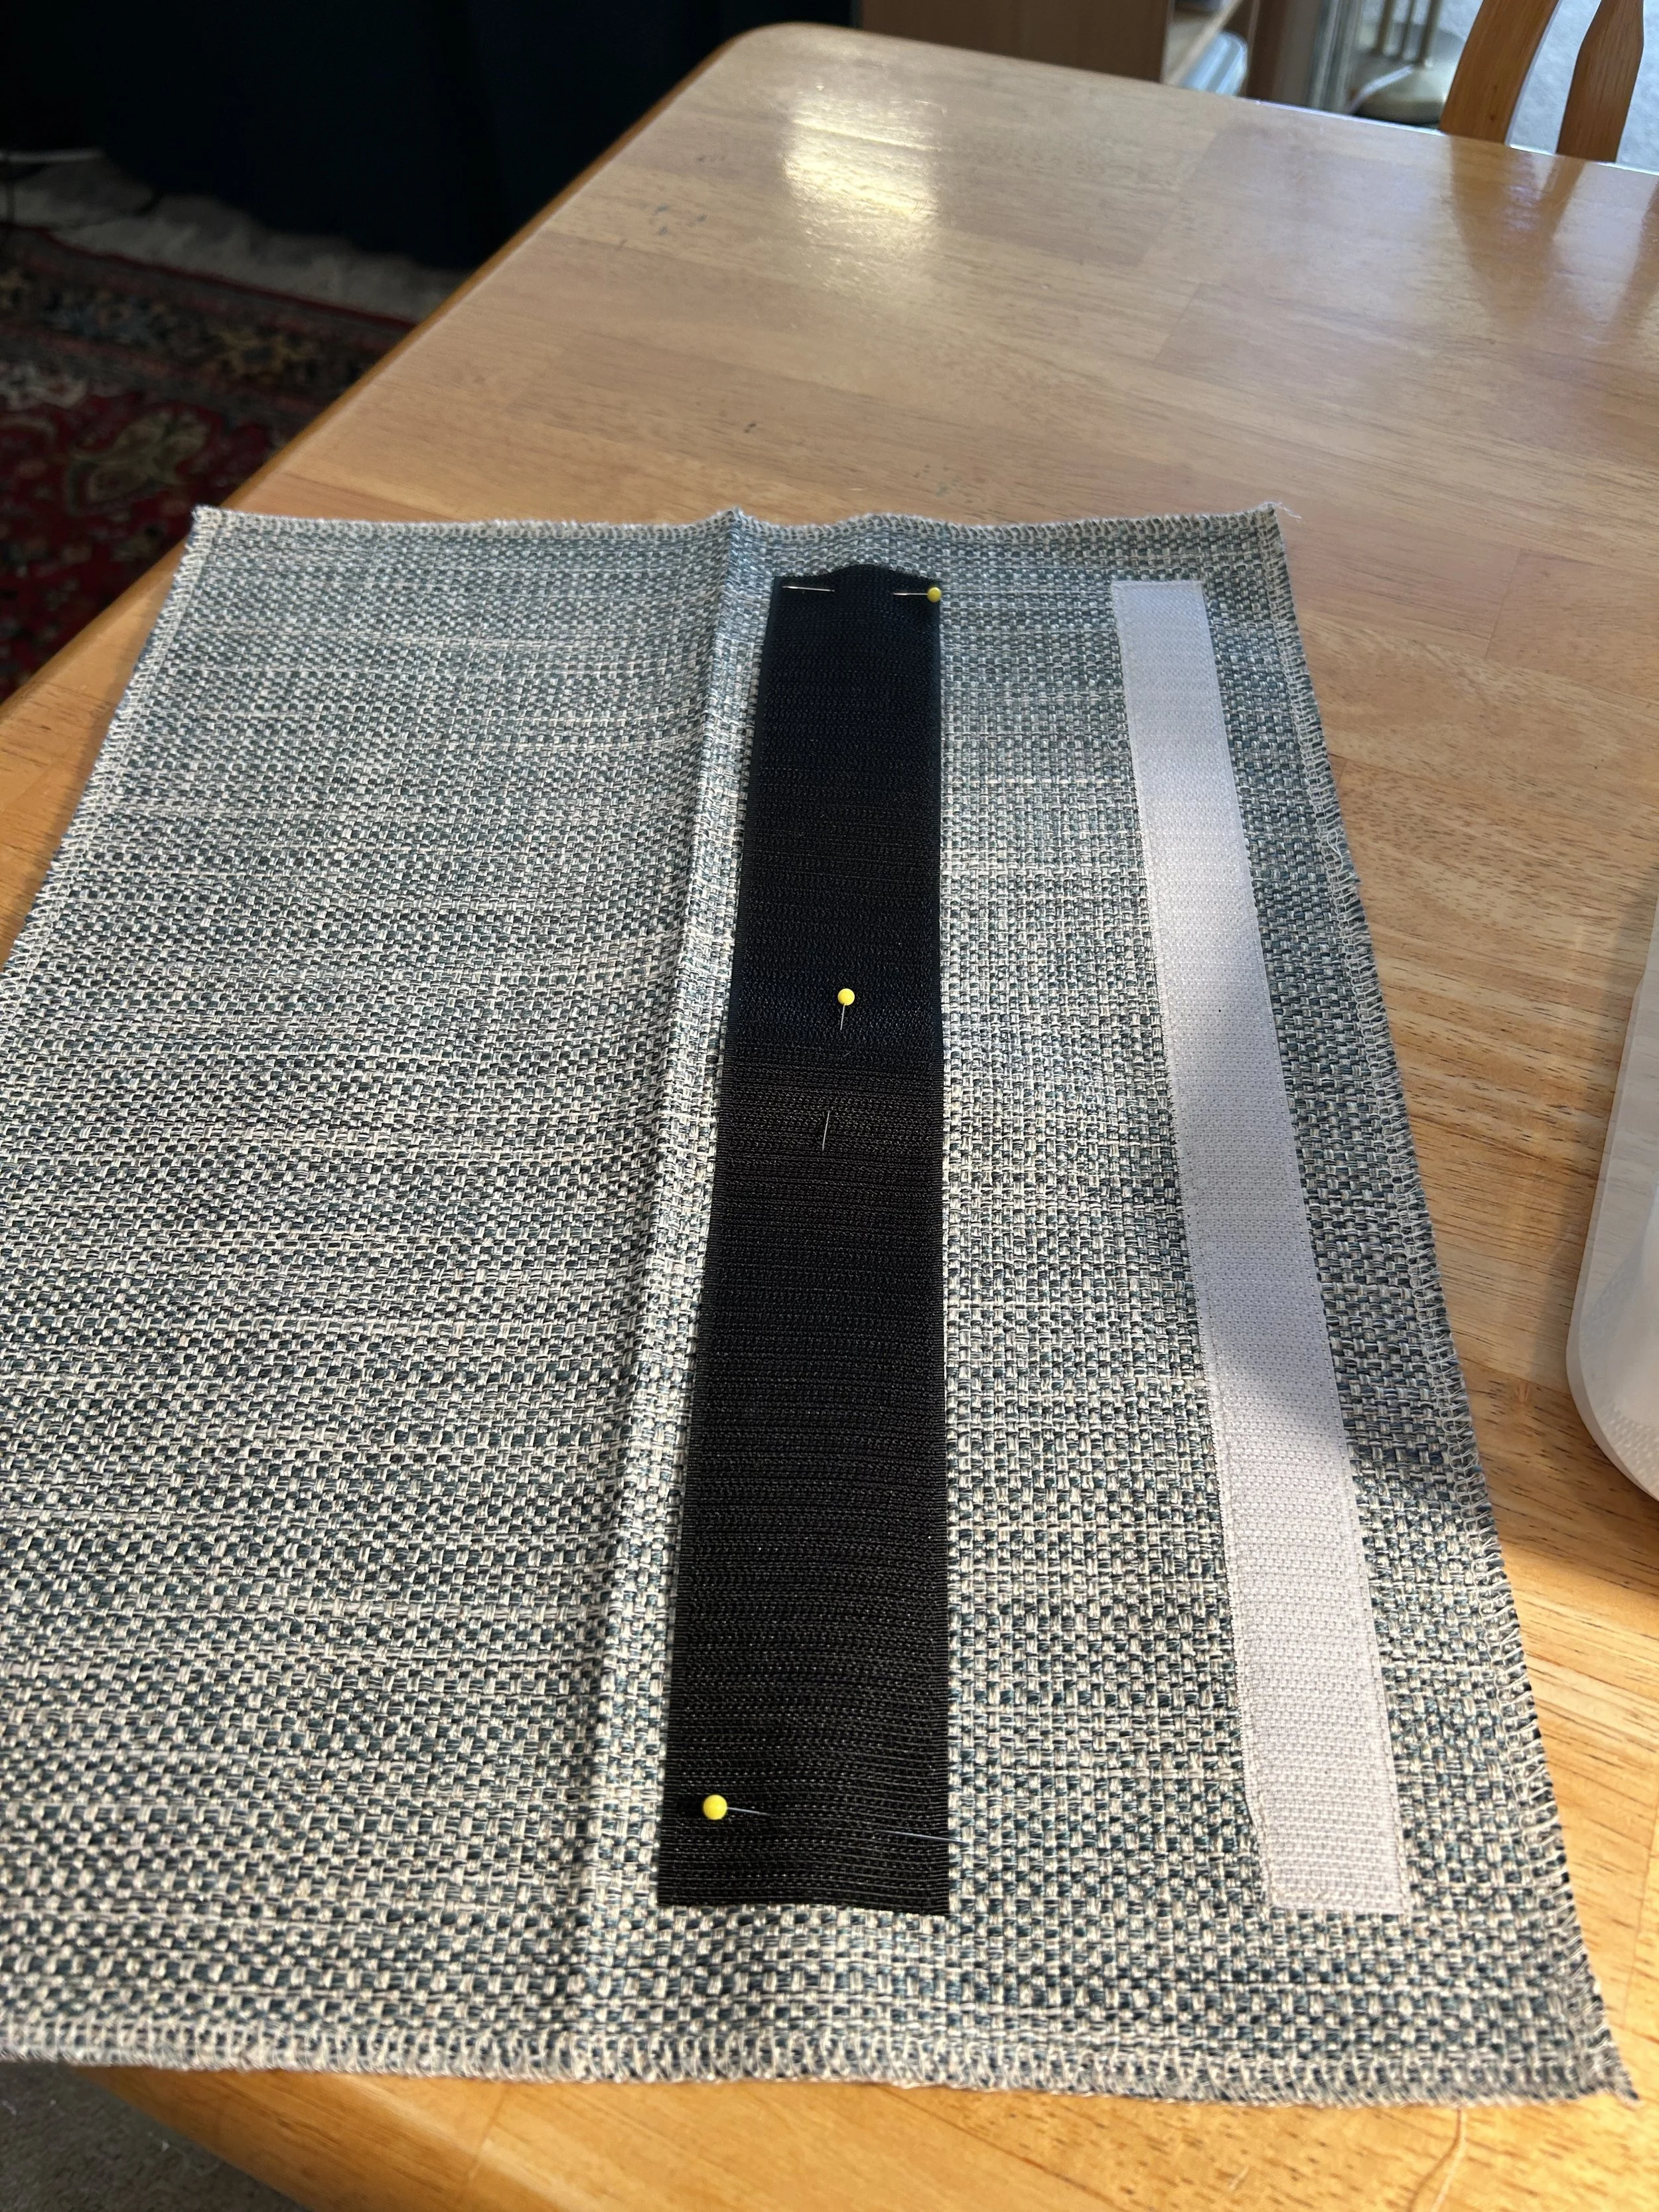
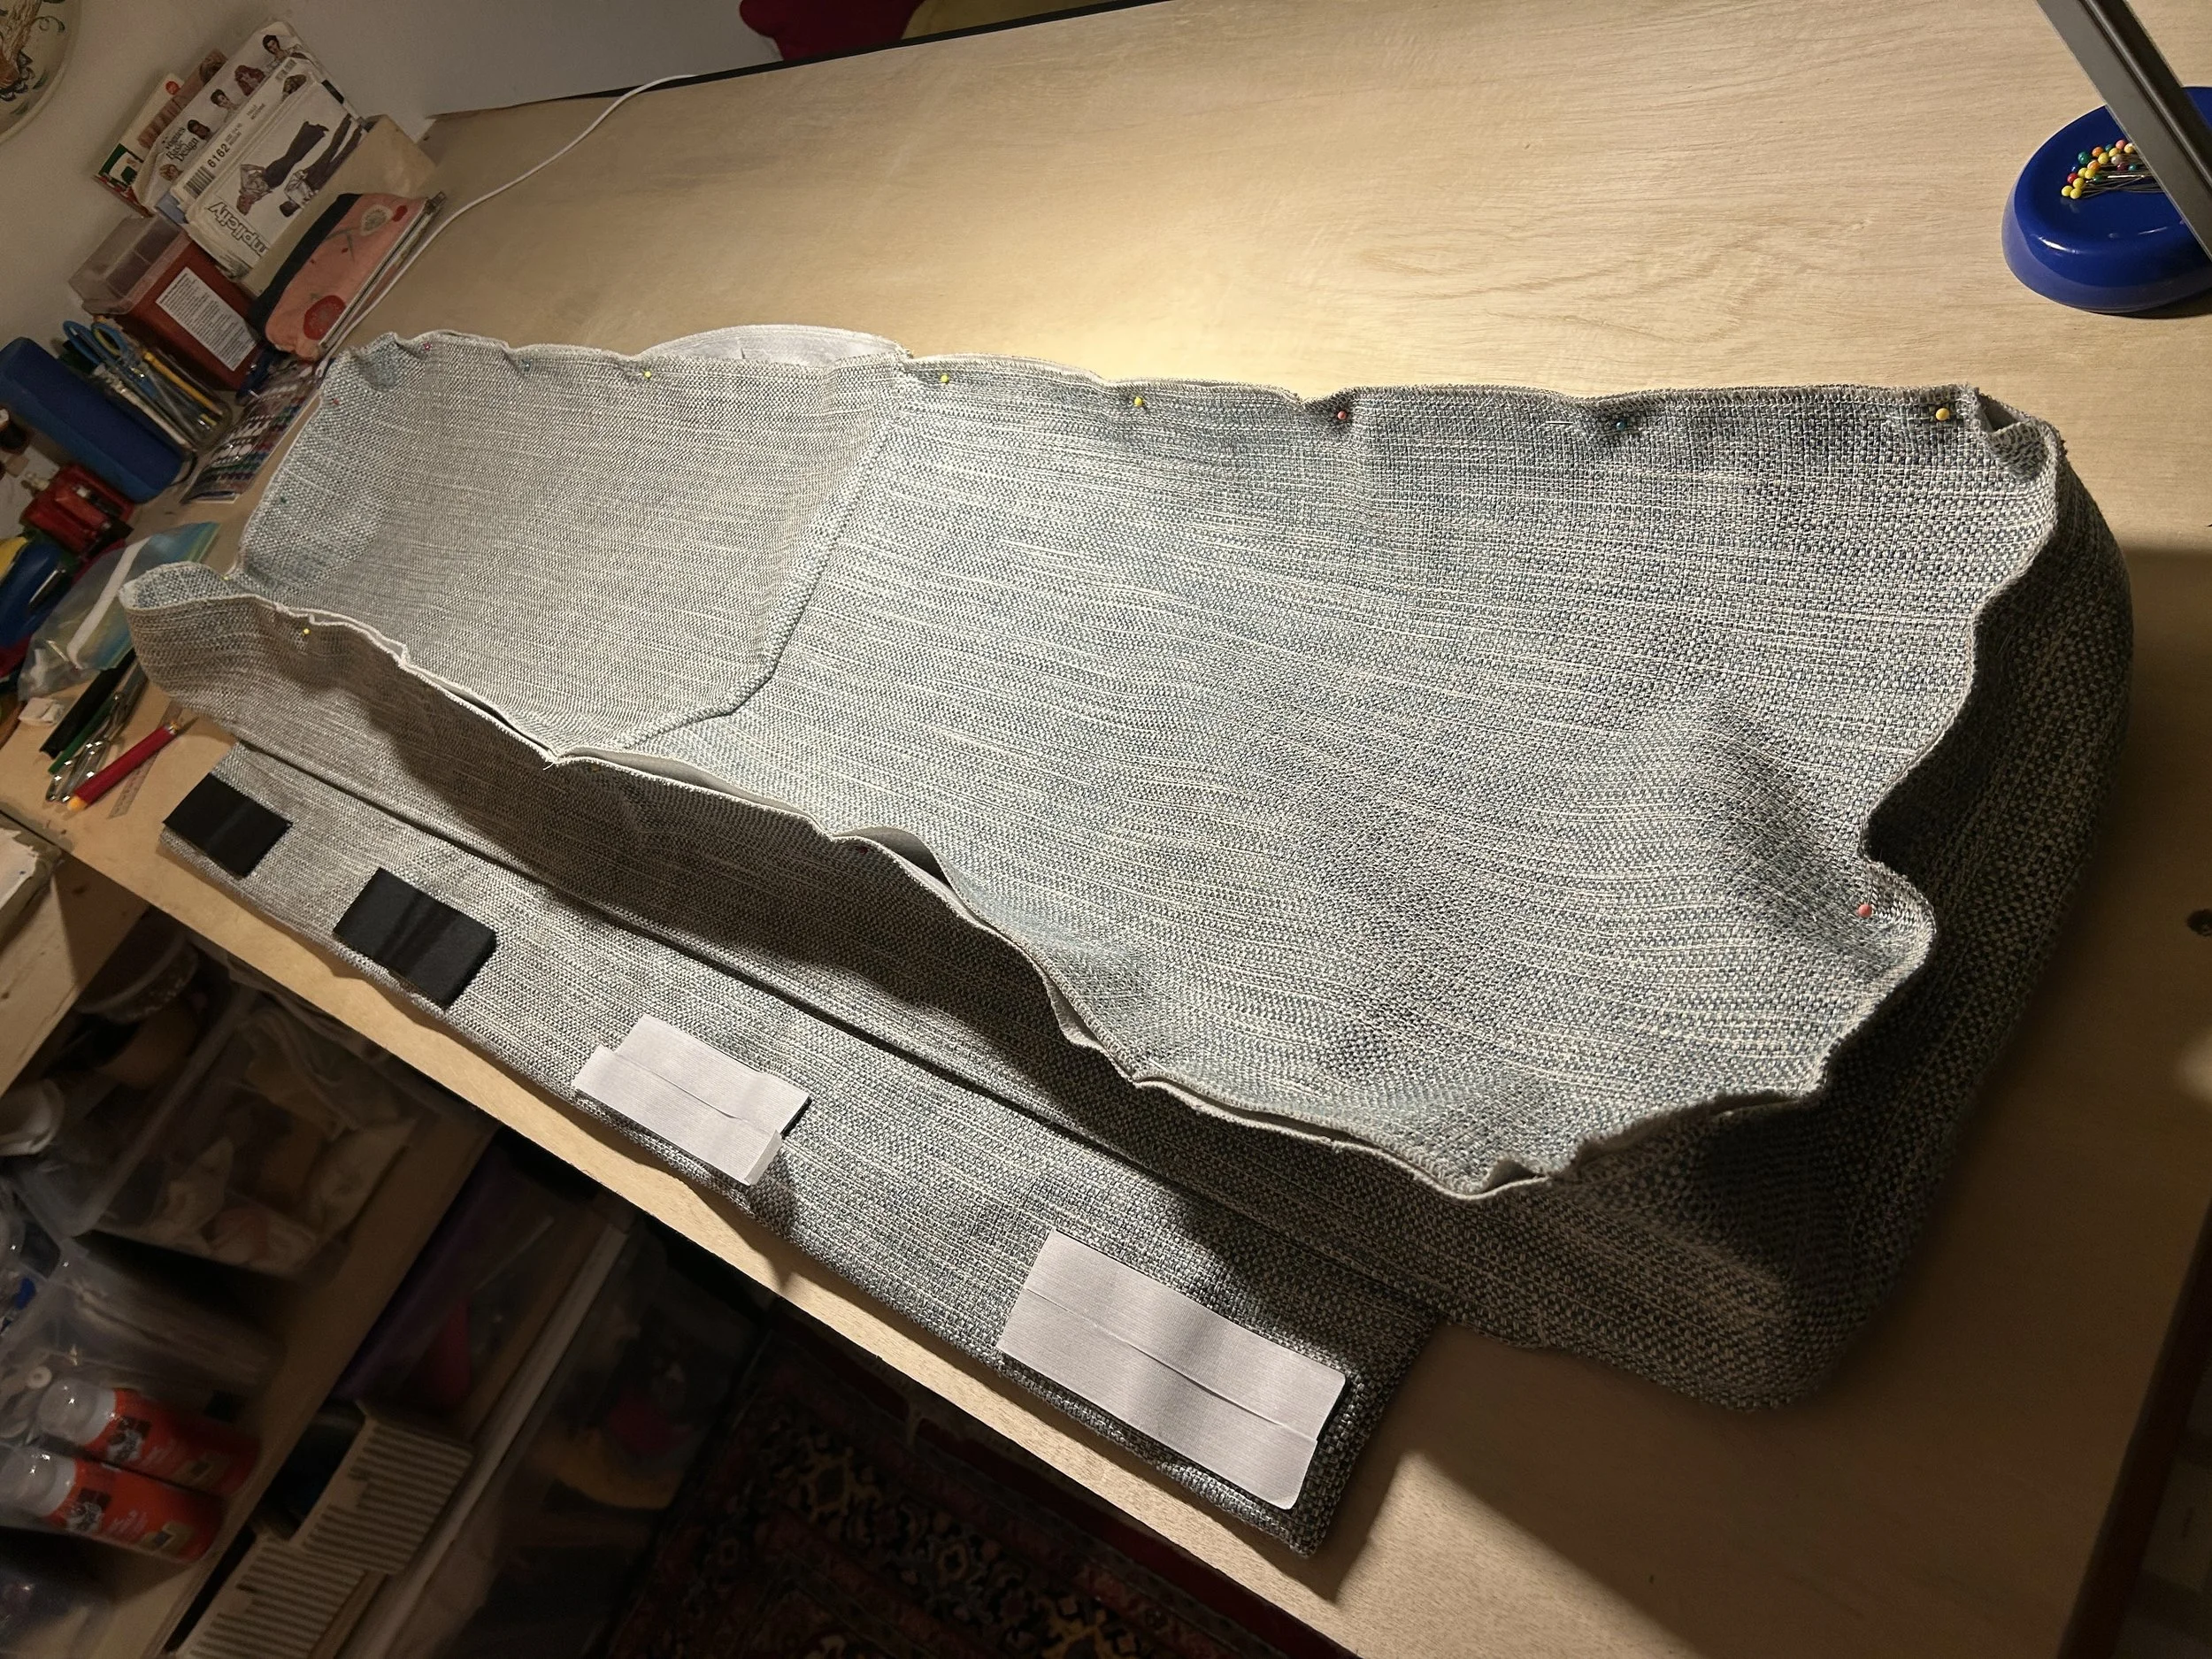
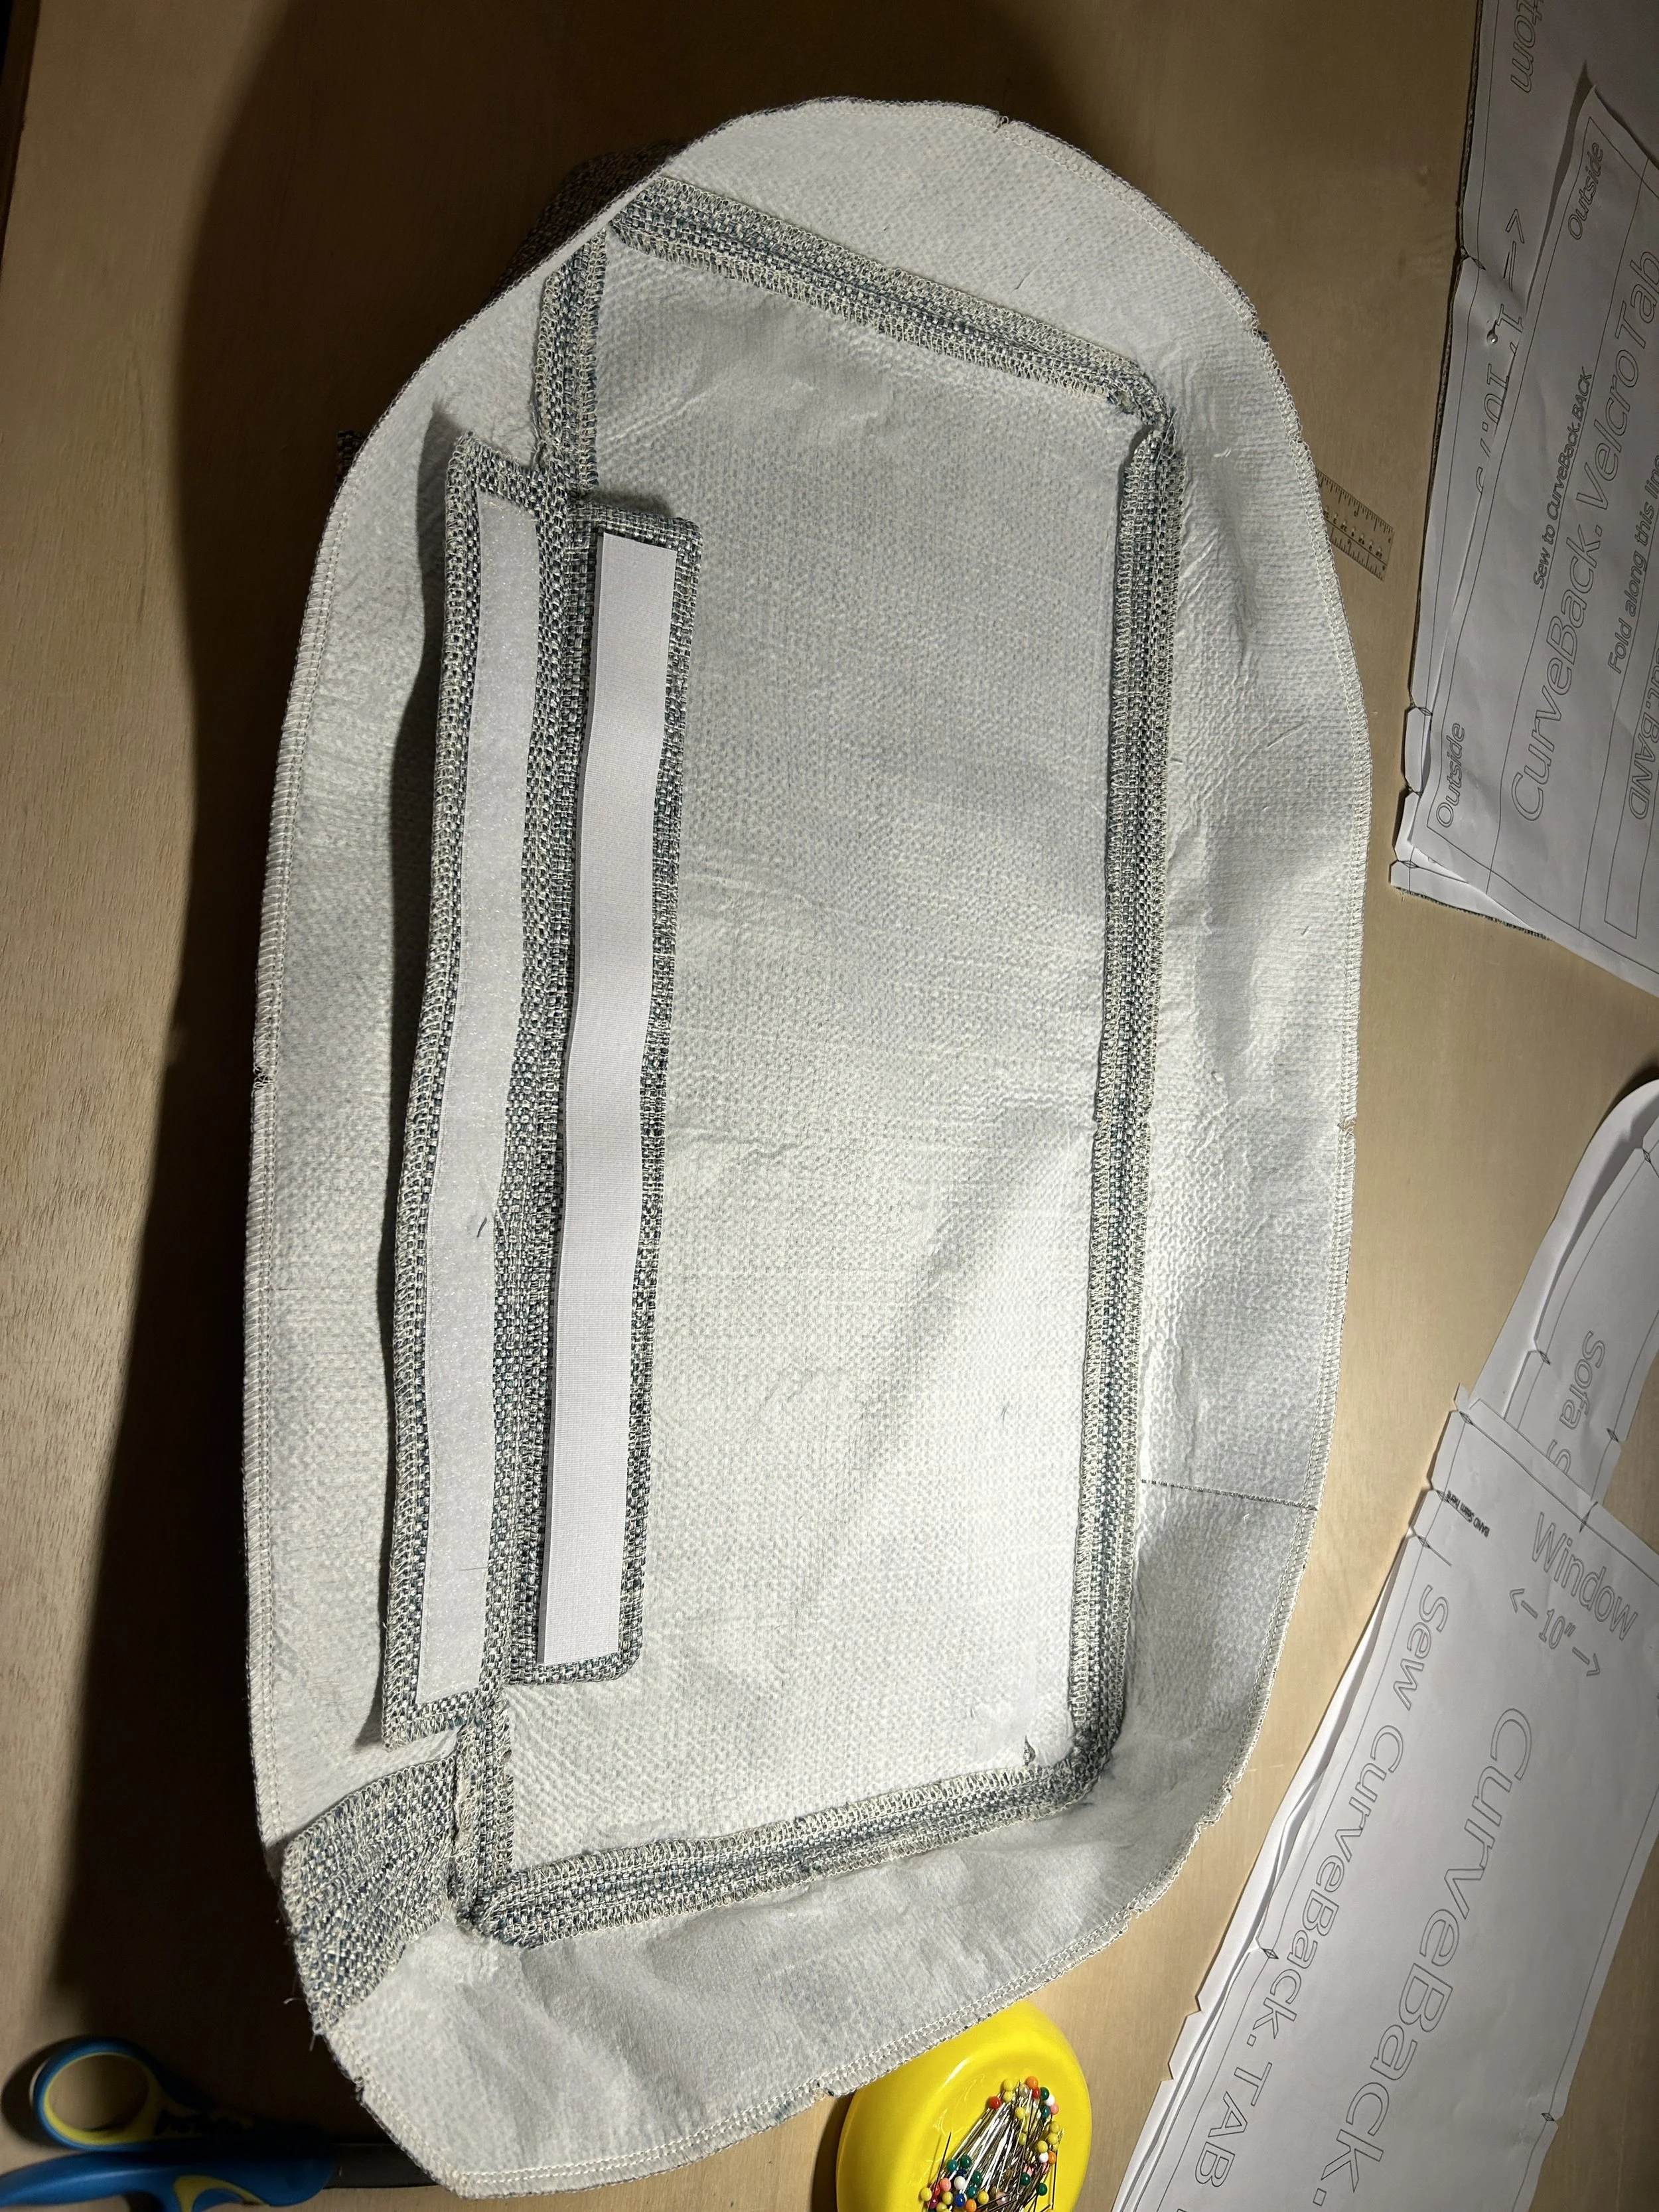
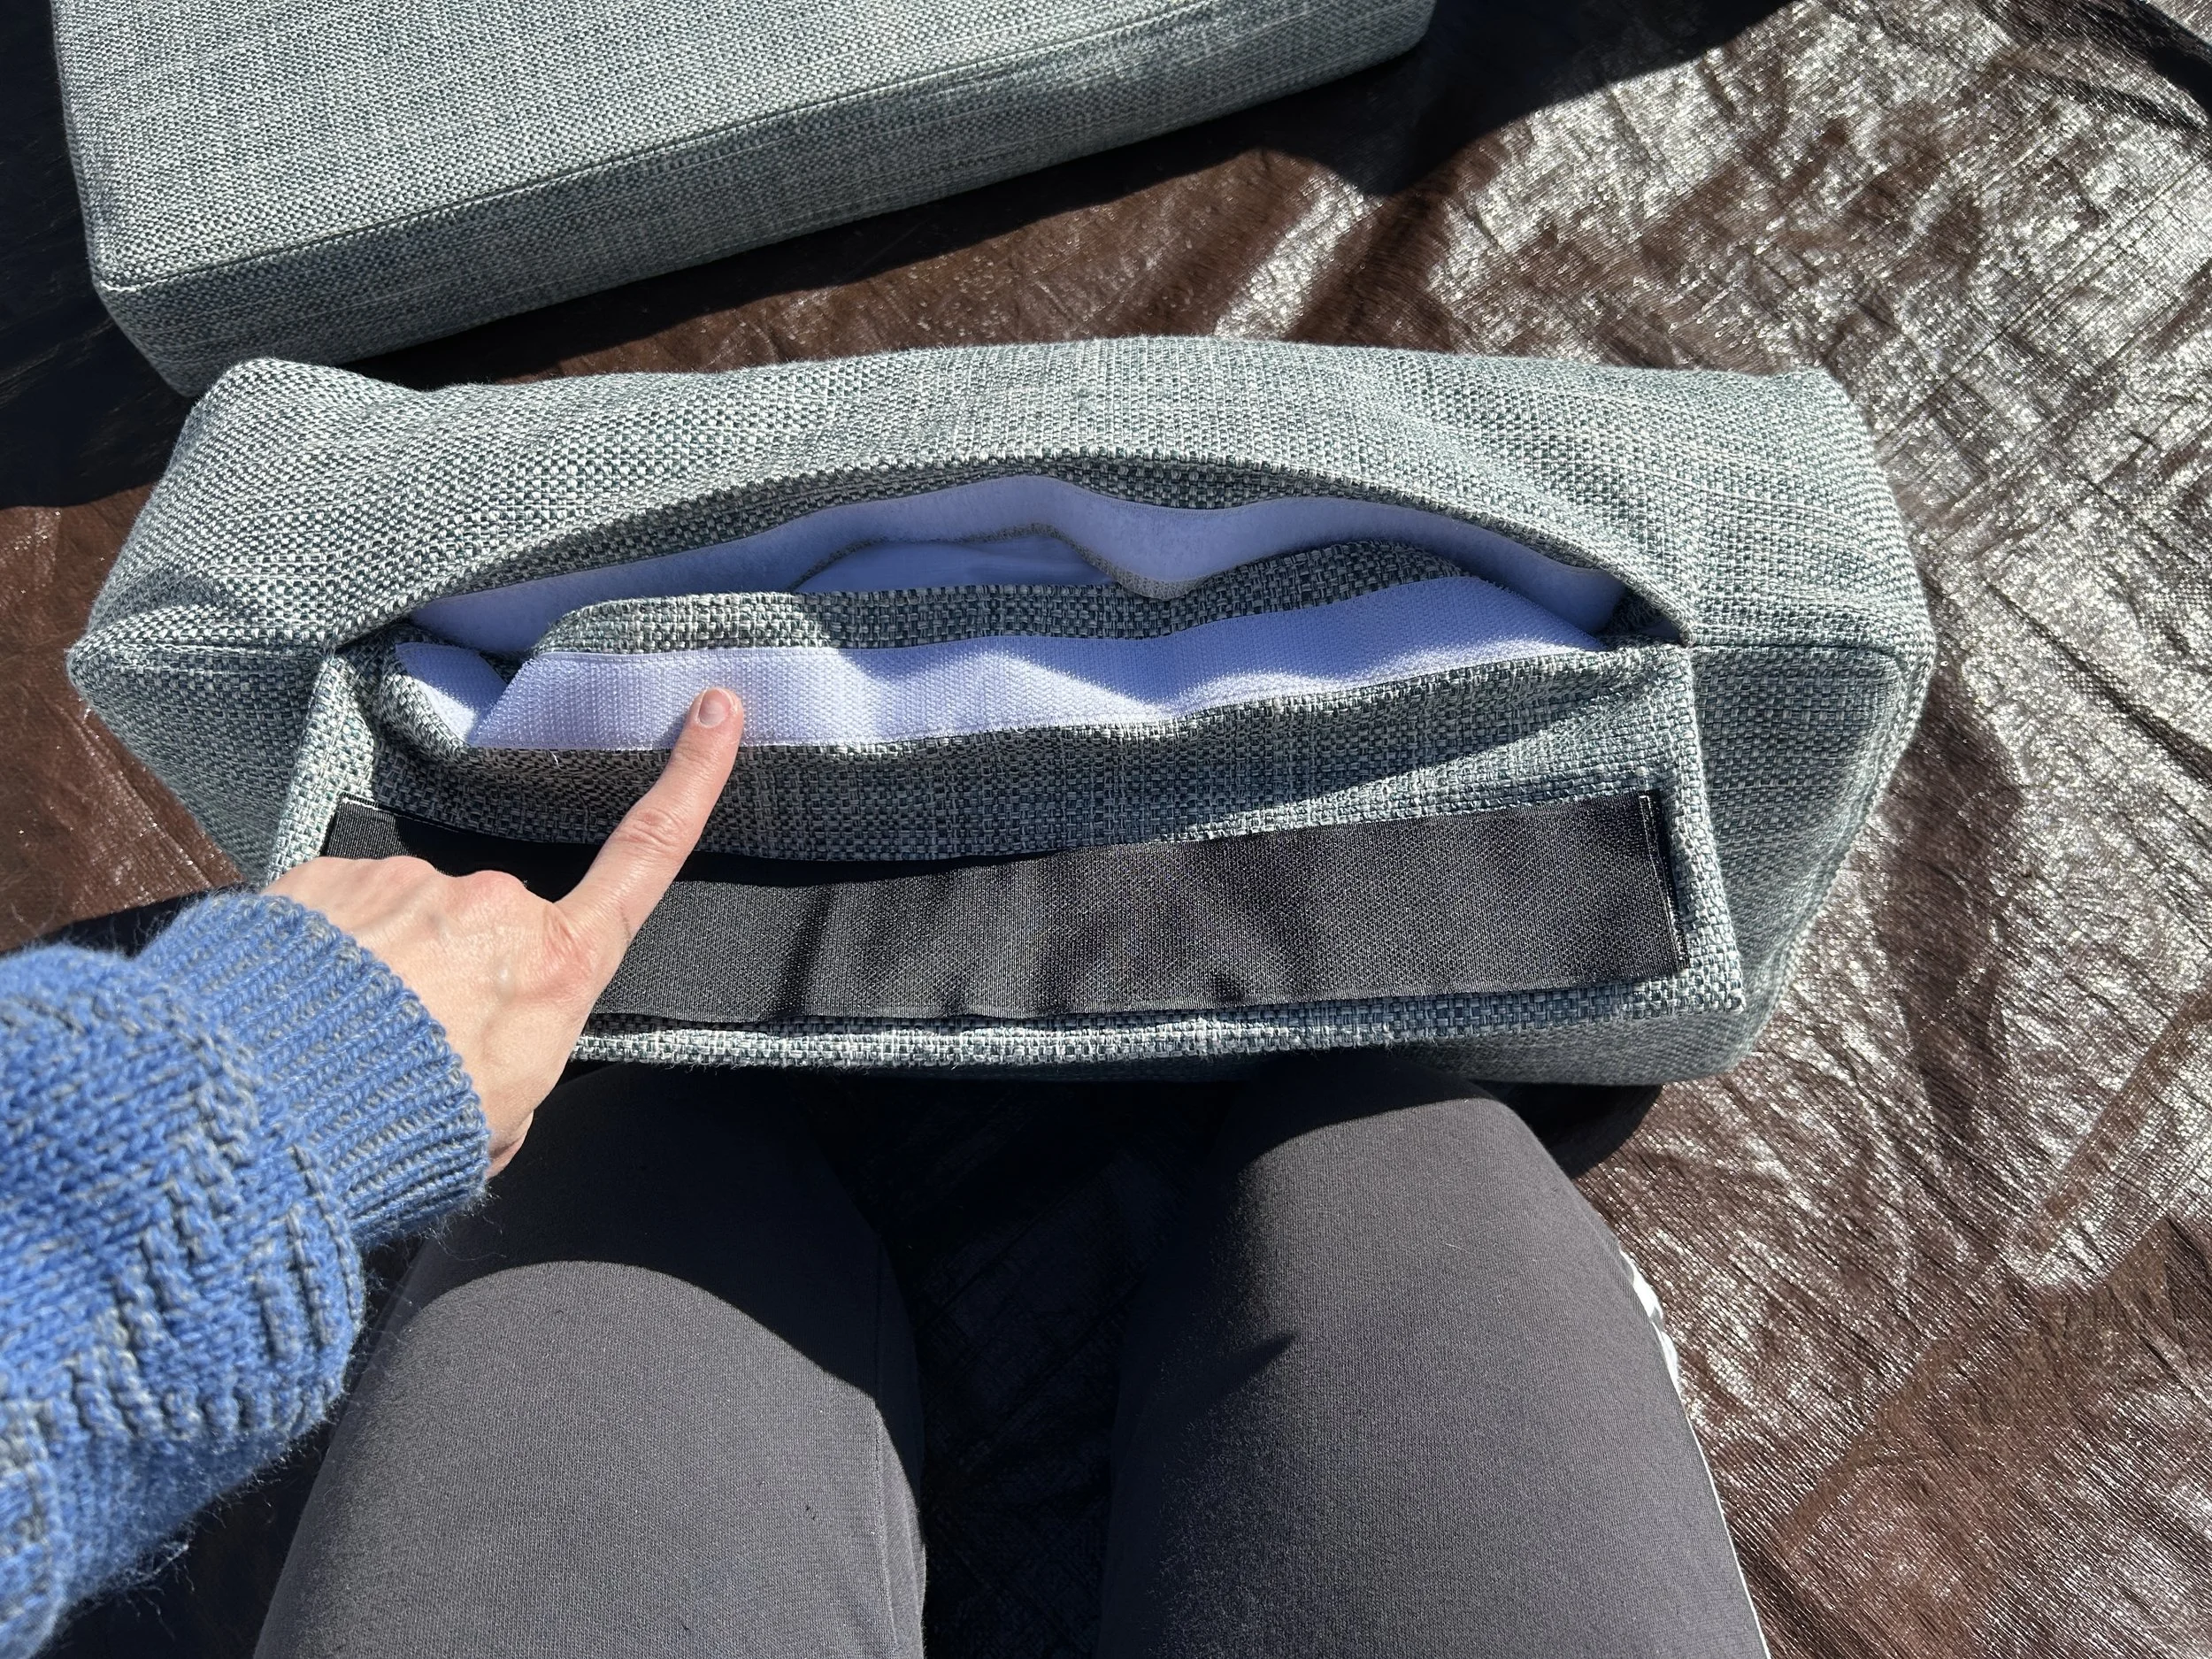
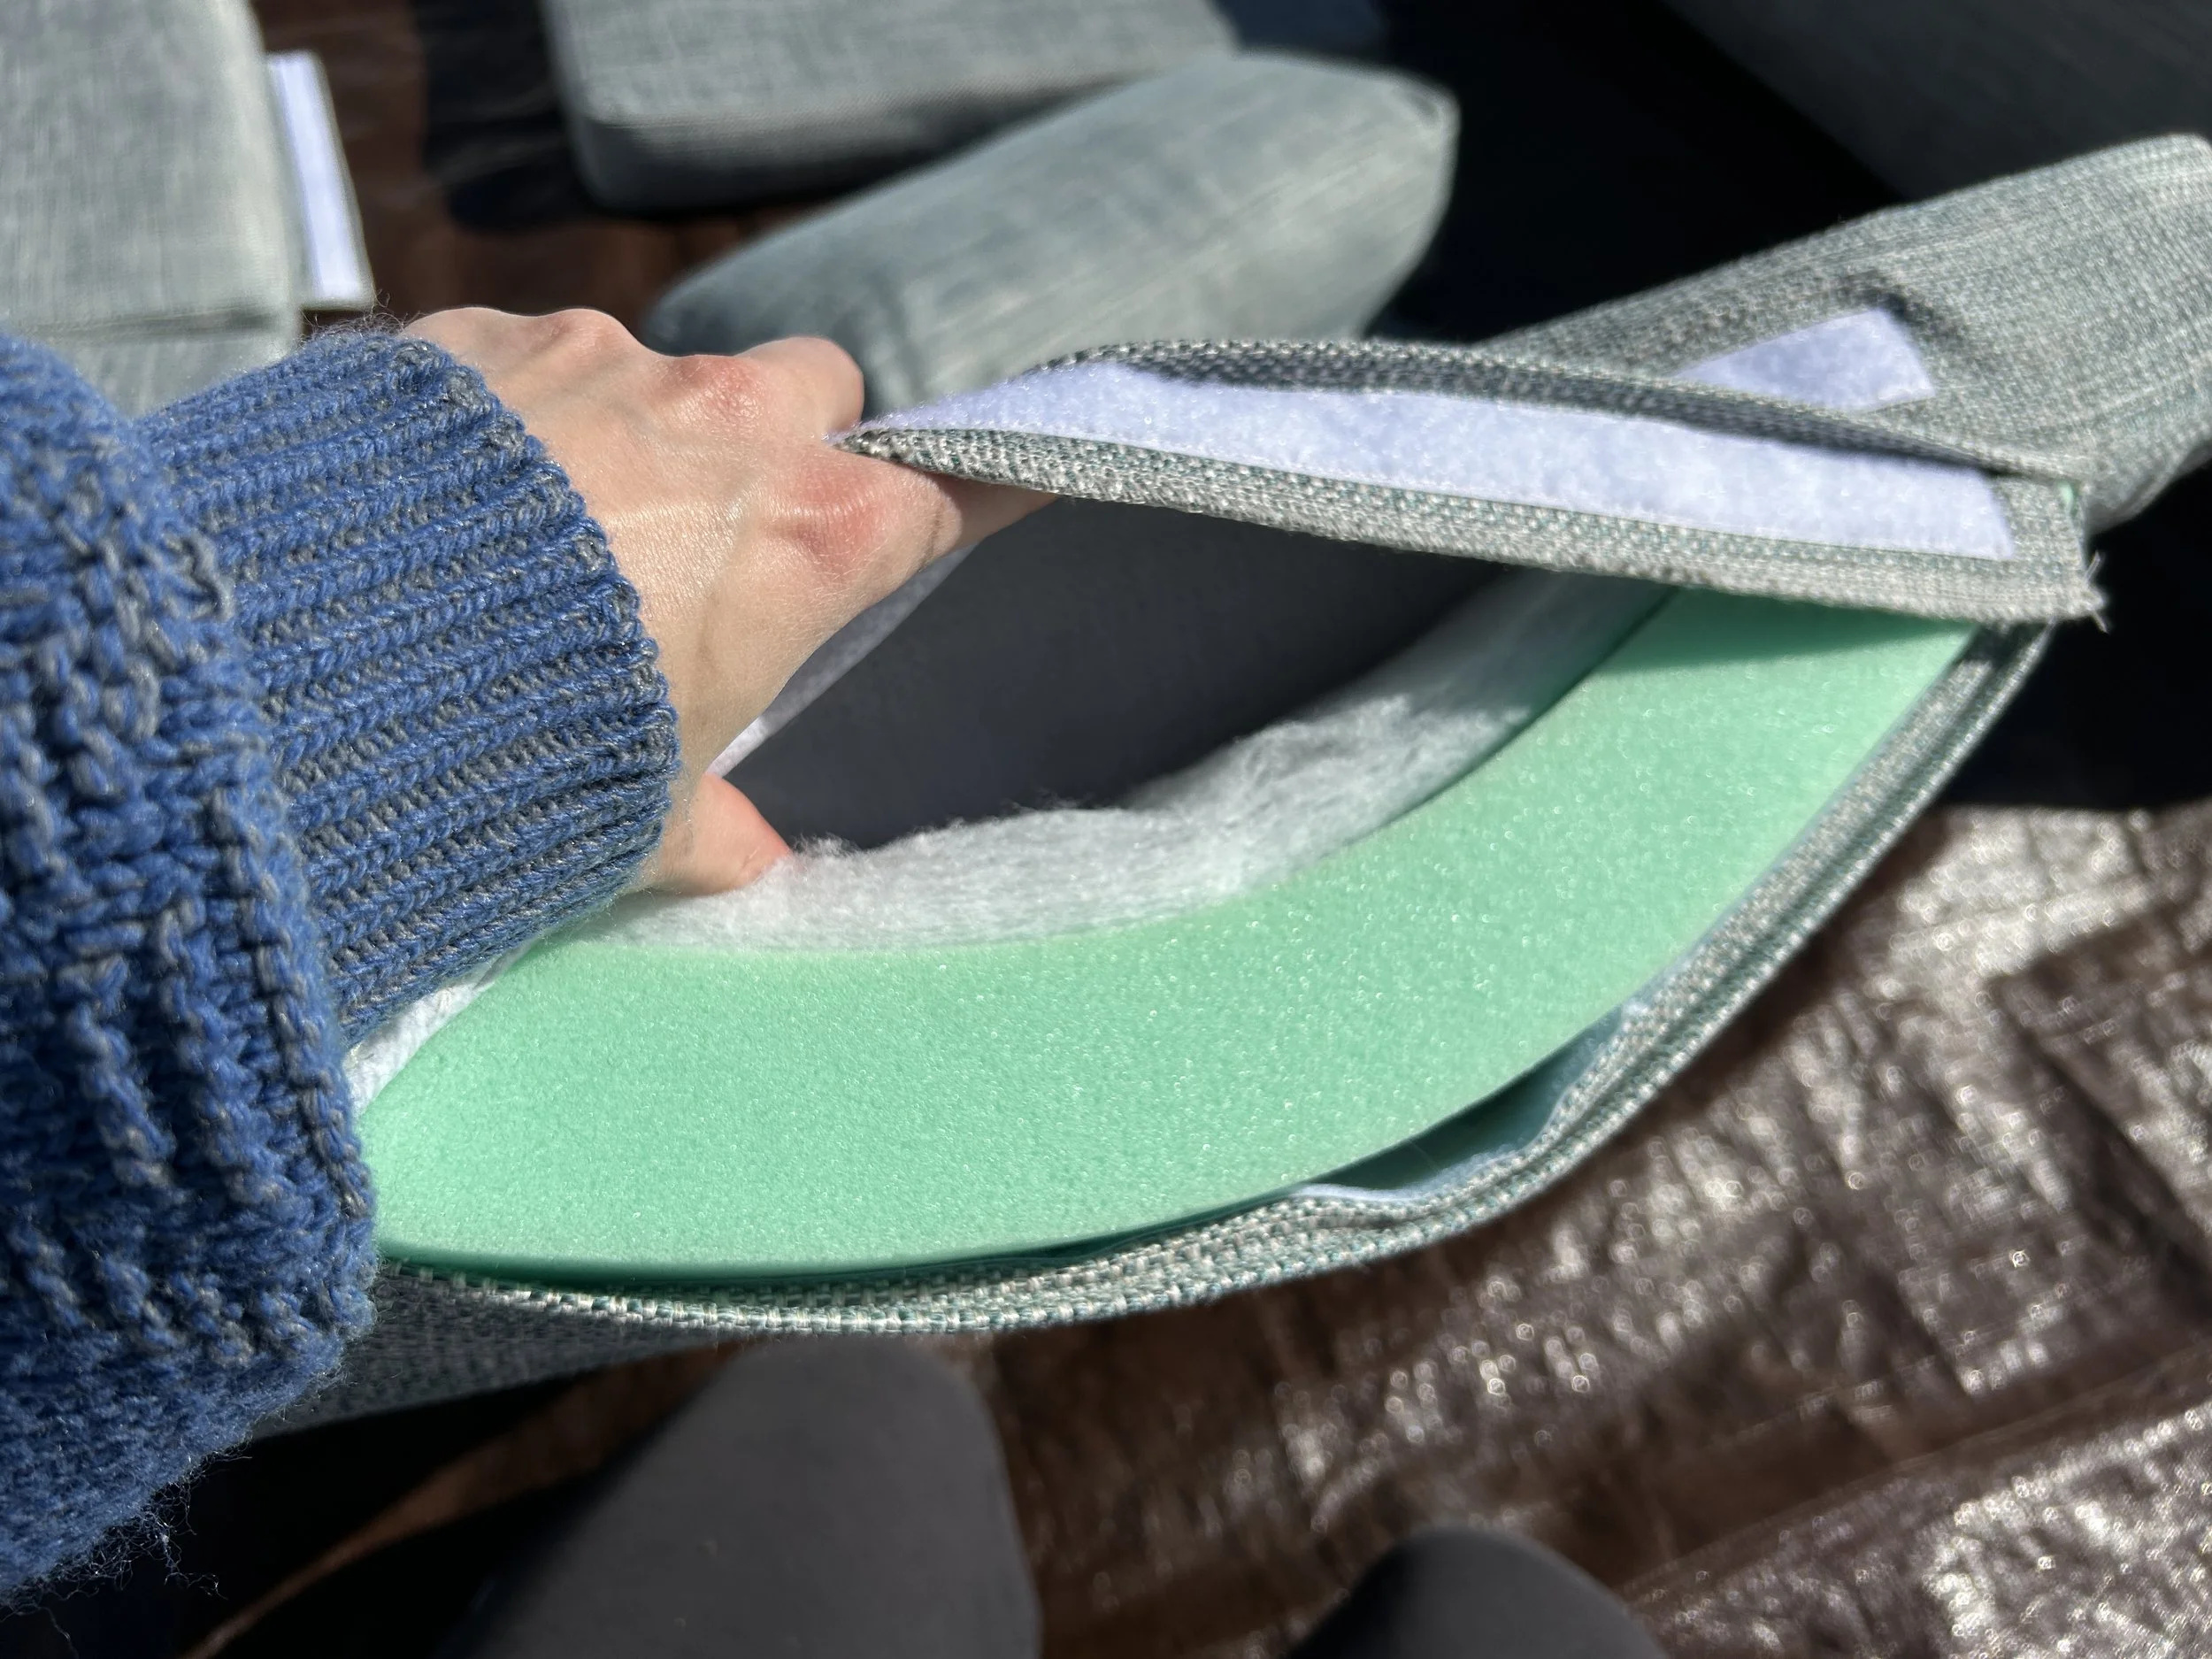
Once back home, I started thinking about how I wanted the cushions to interact. I decided all the cushions should velcro securely to the wooden seats. This would be beneficial for transport and would also offer some resistance to general slipping around during usage. This would have the added safety benefit of keeping the sofa securely away from the little wood burning stove. Along those lines, I decided it would be nice if the cushion sets velcroed to each other. Finally, I decided I would create velcro openings in each cushion, to allow access to the interior stuffing. This would facilitate cleaning down the road.
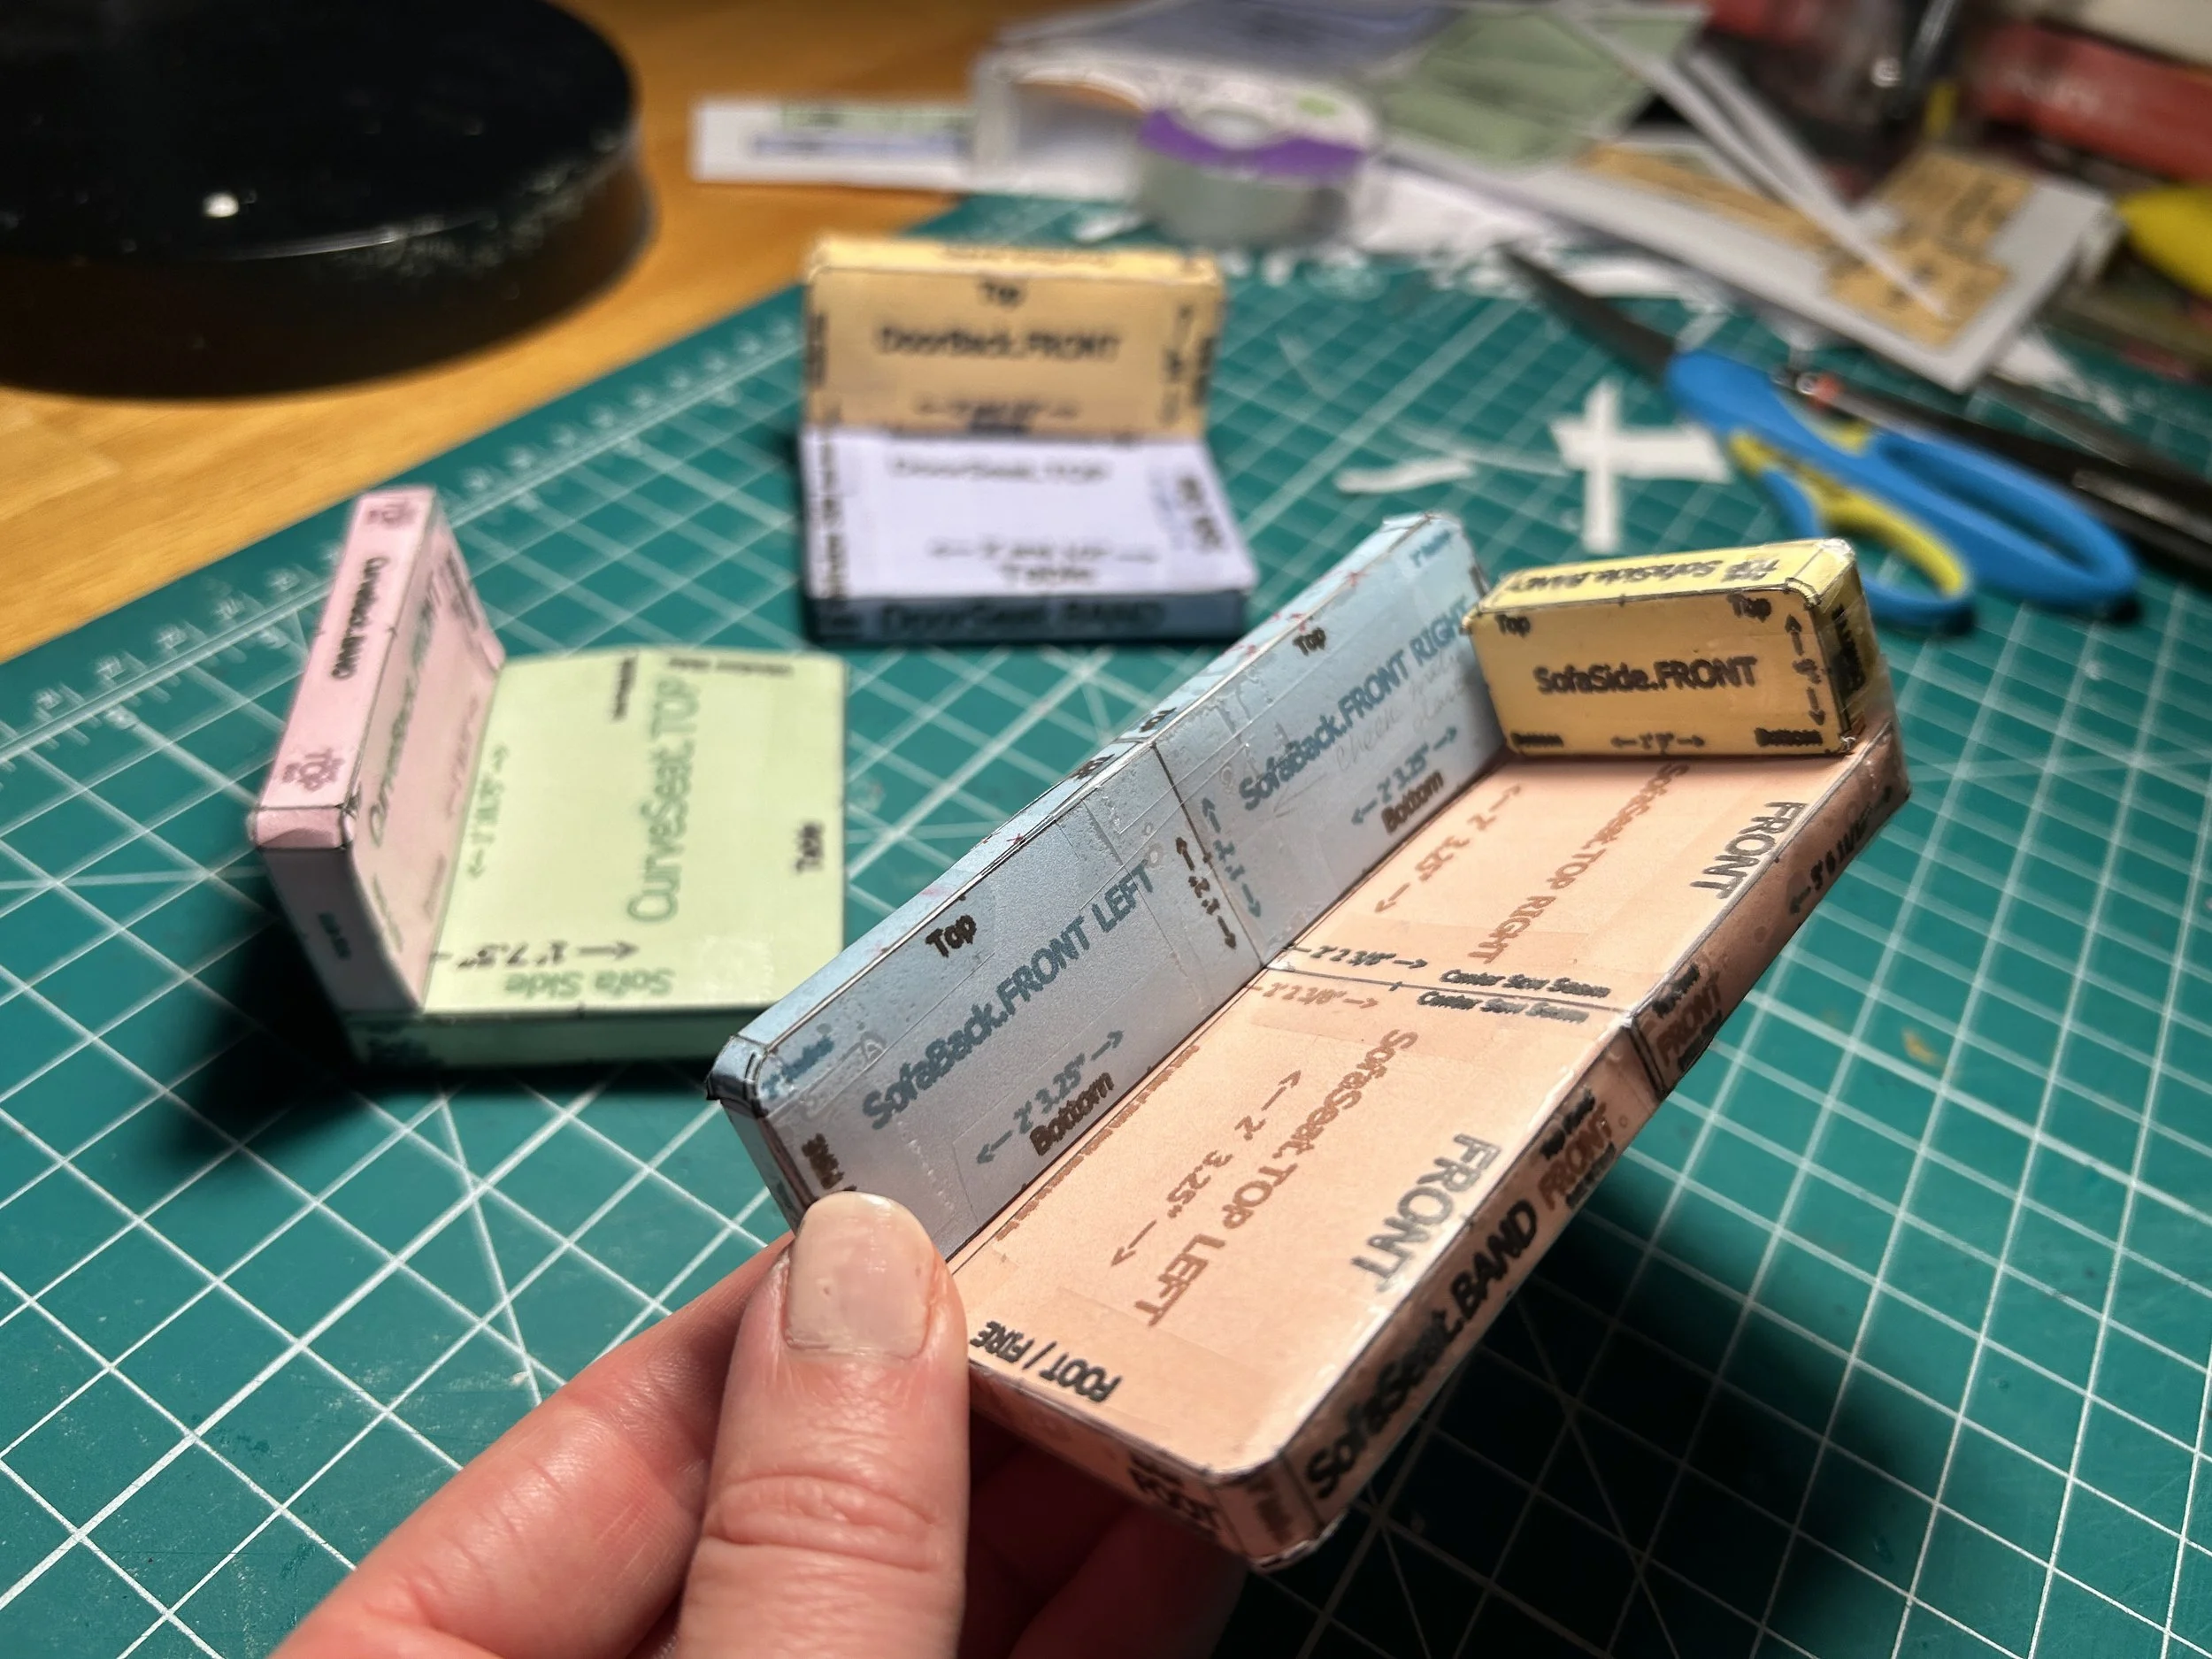
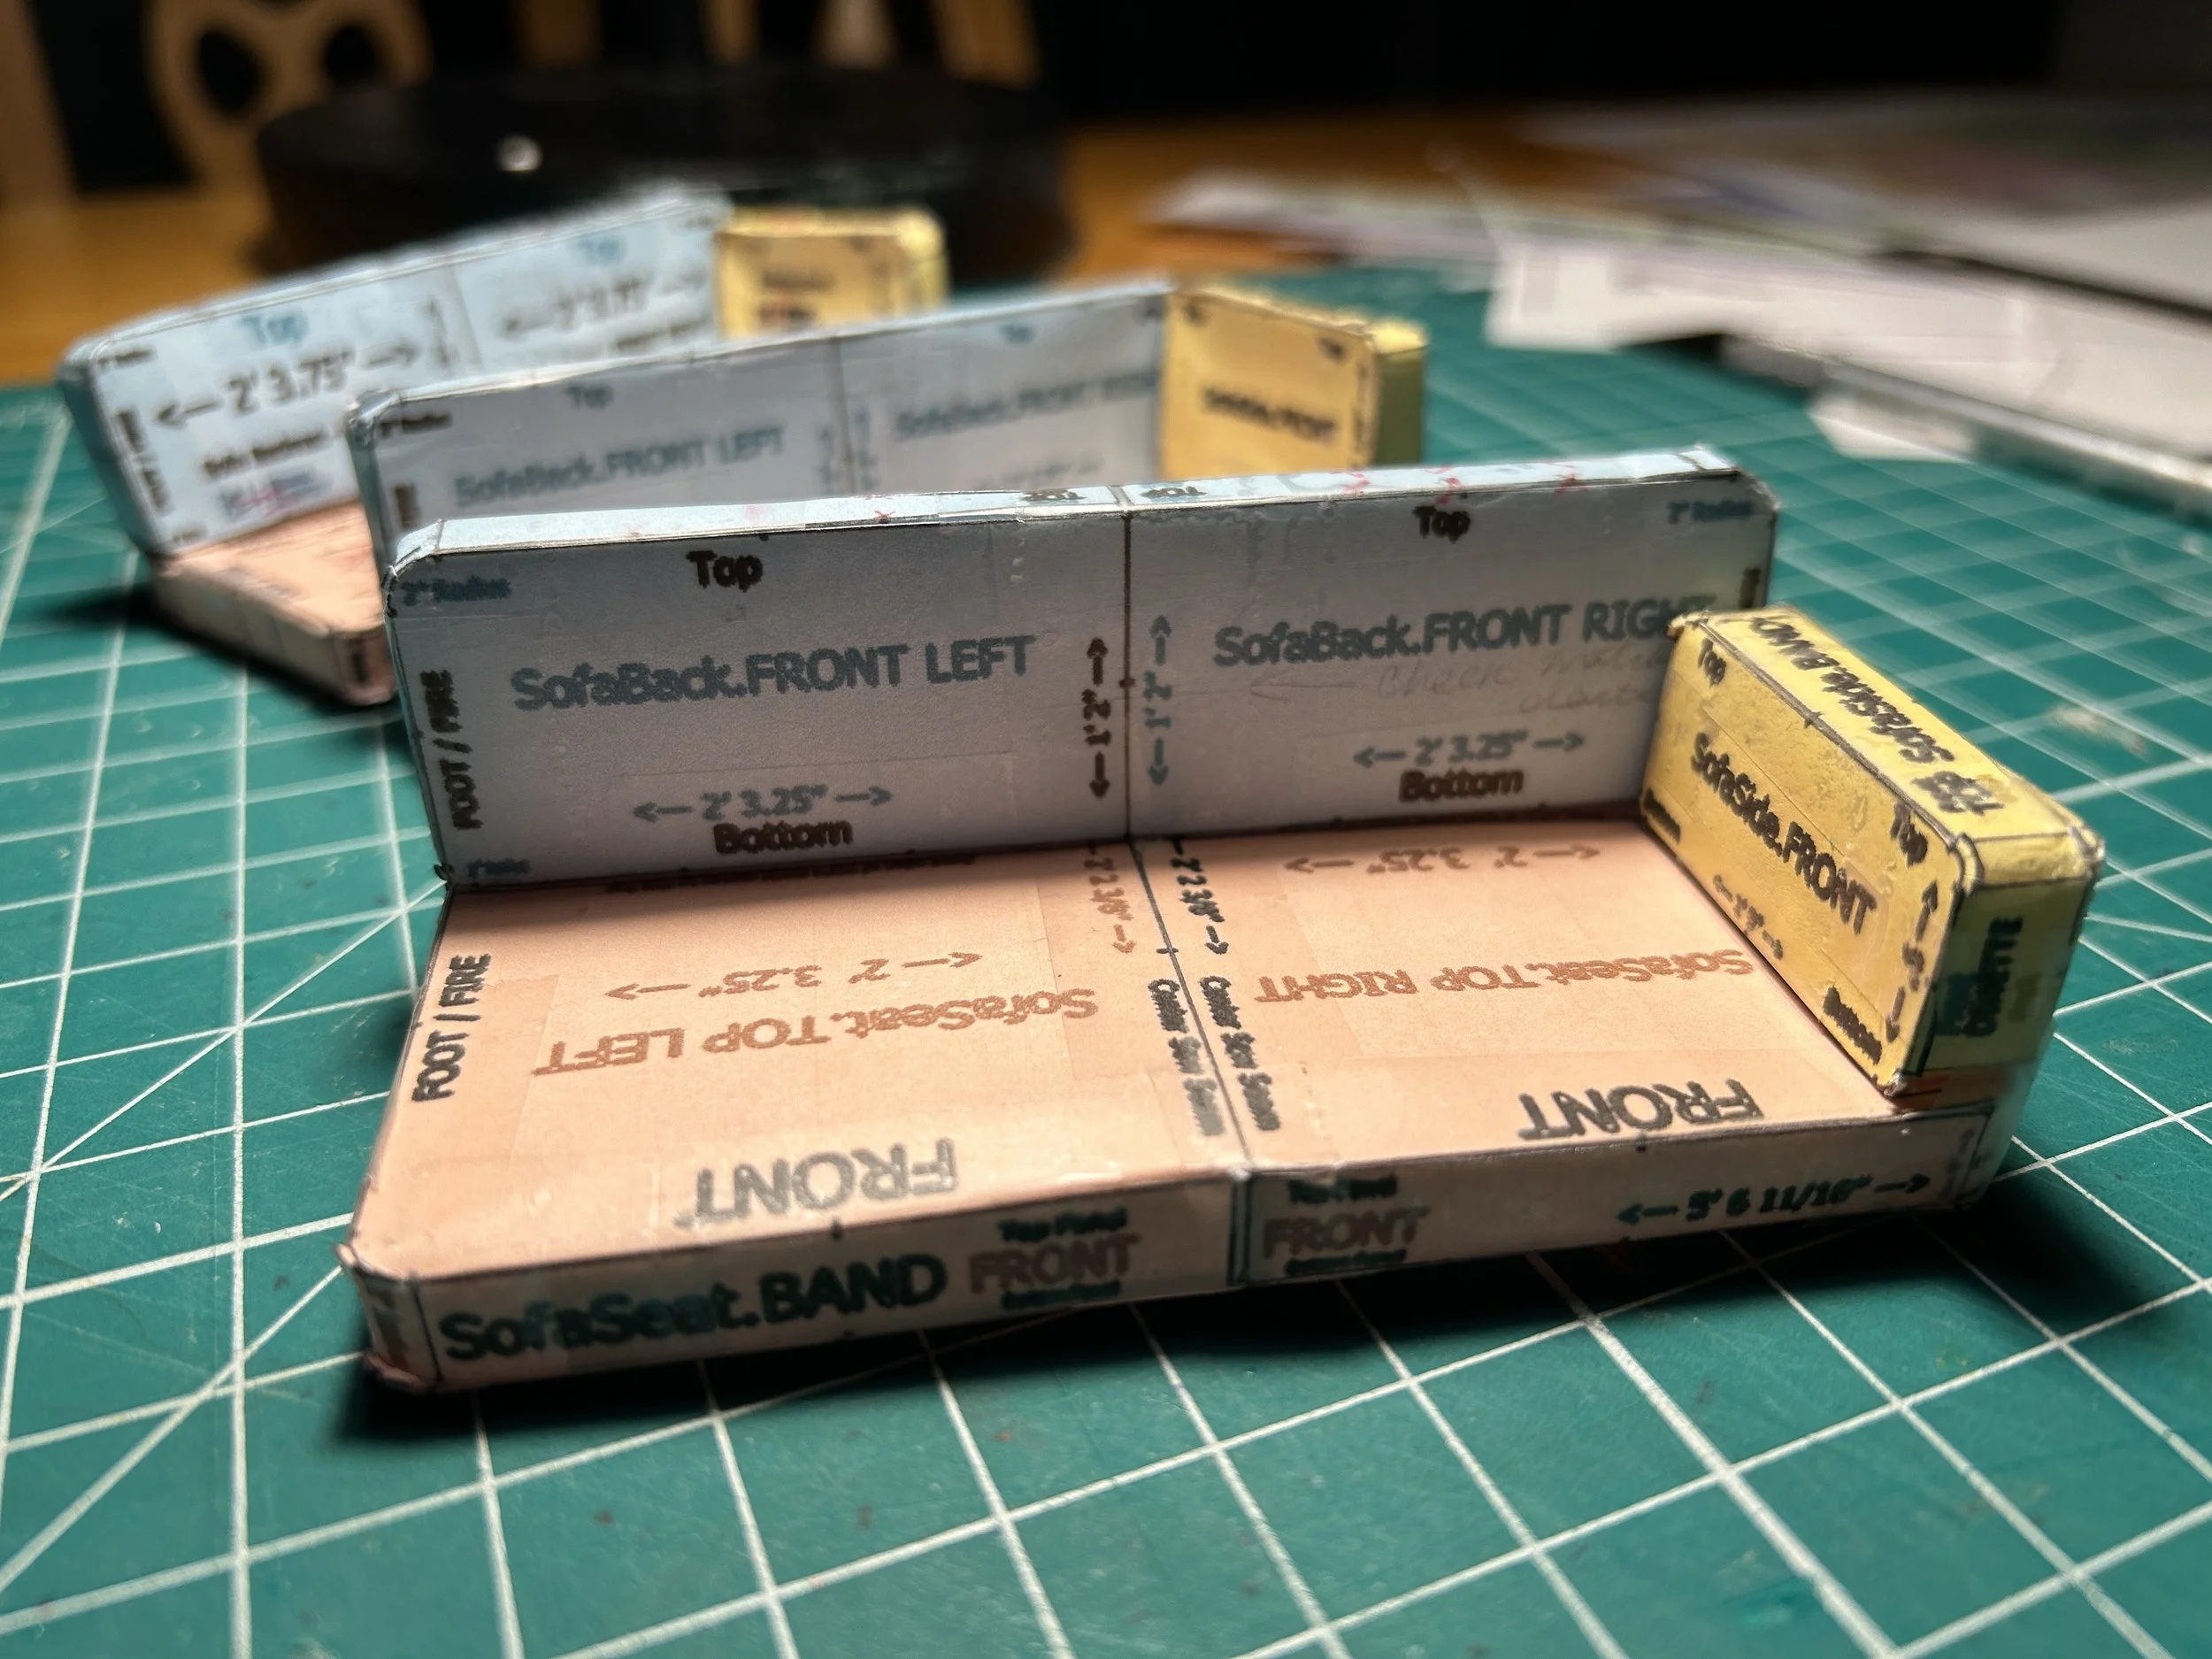
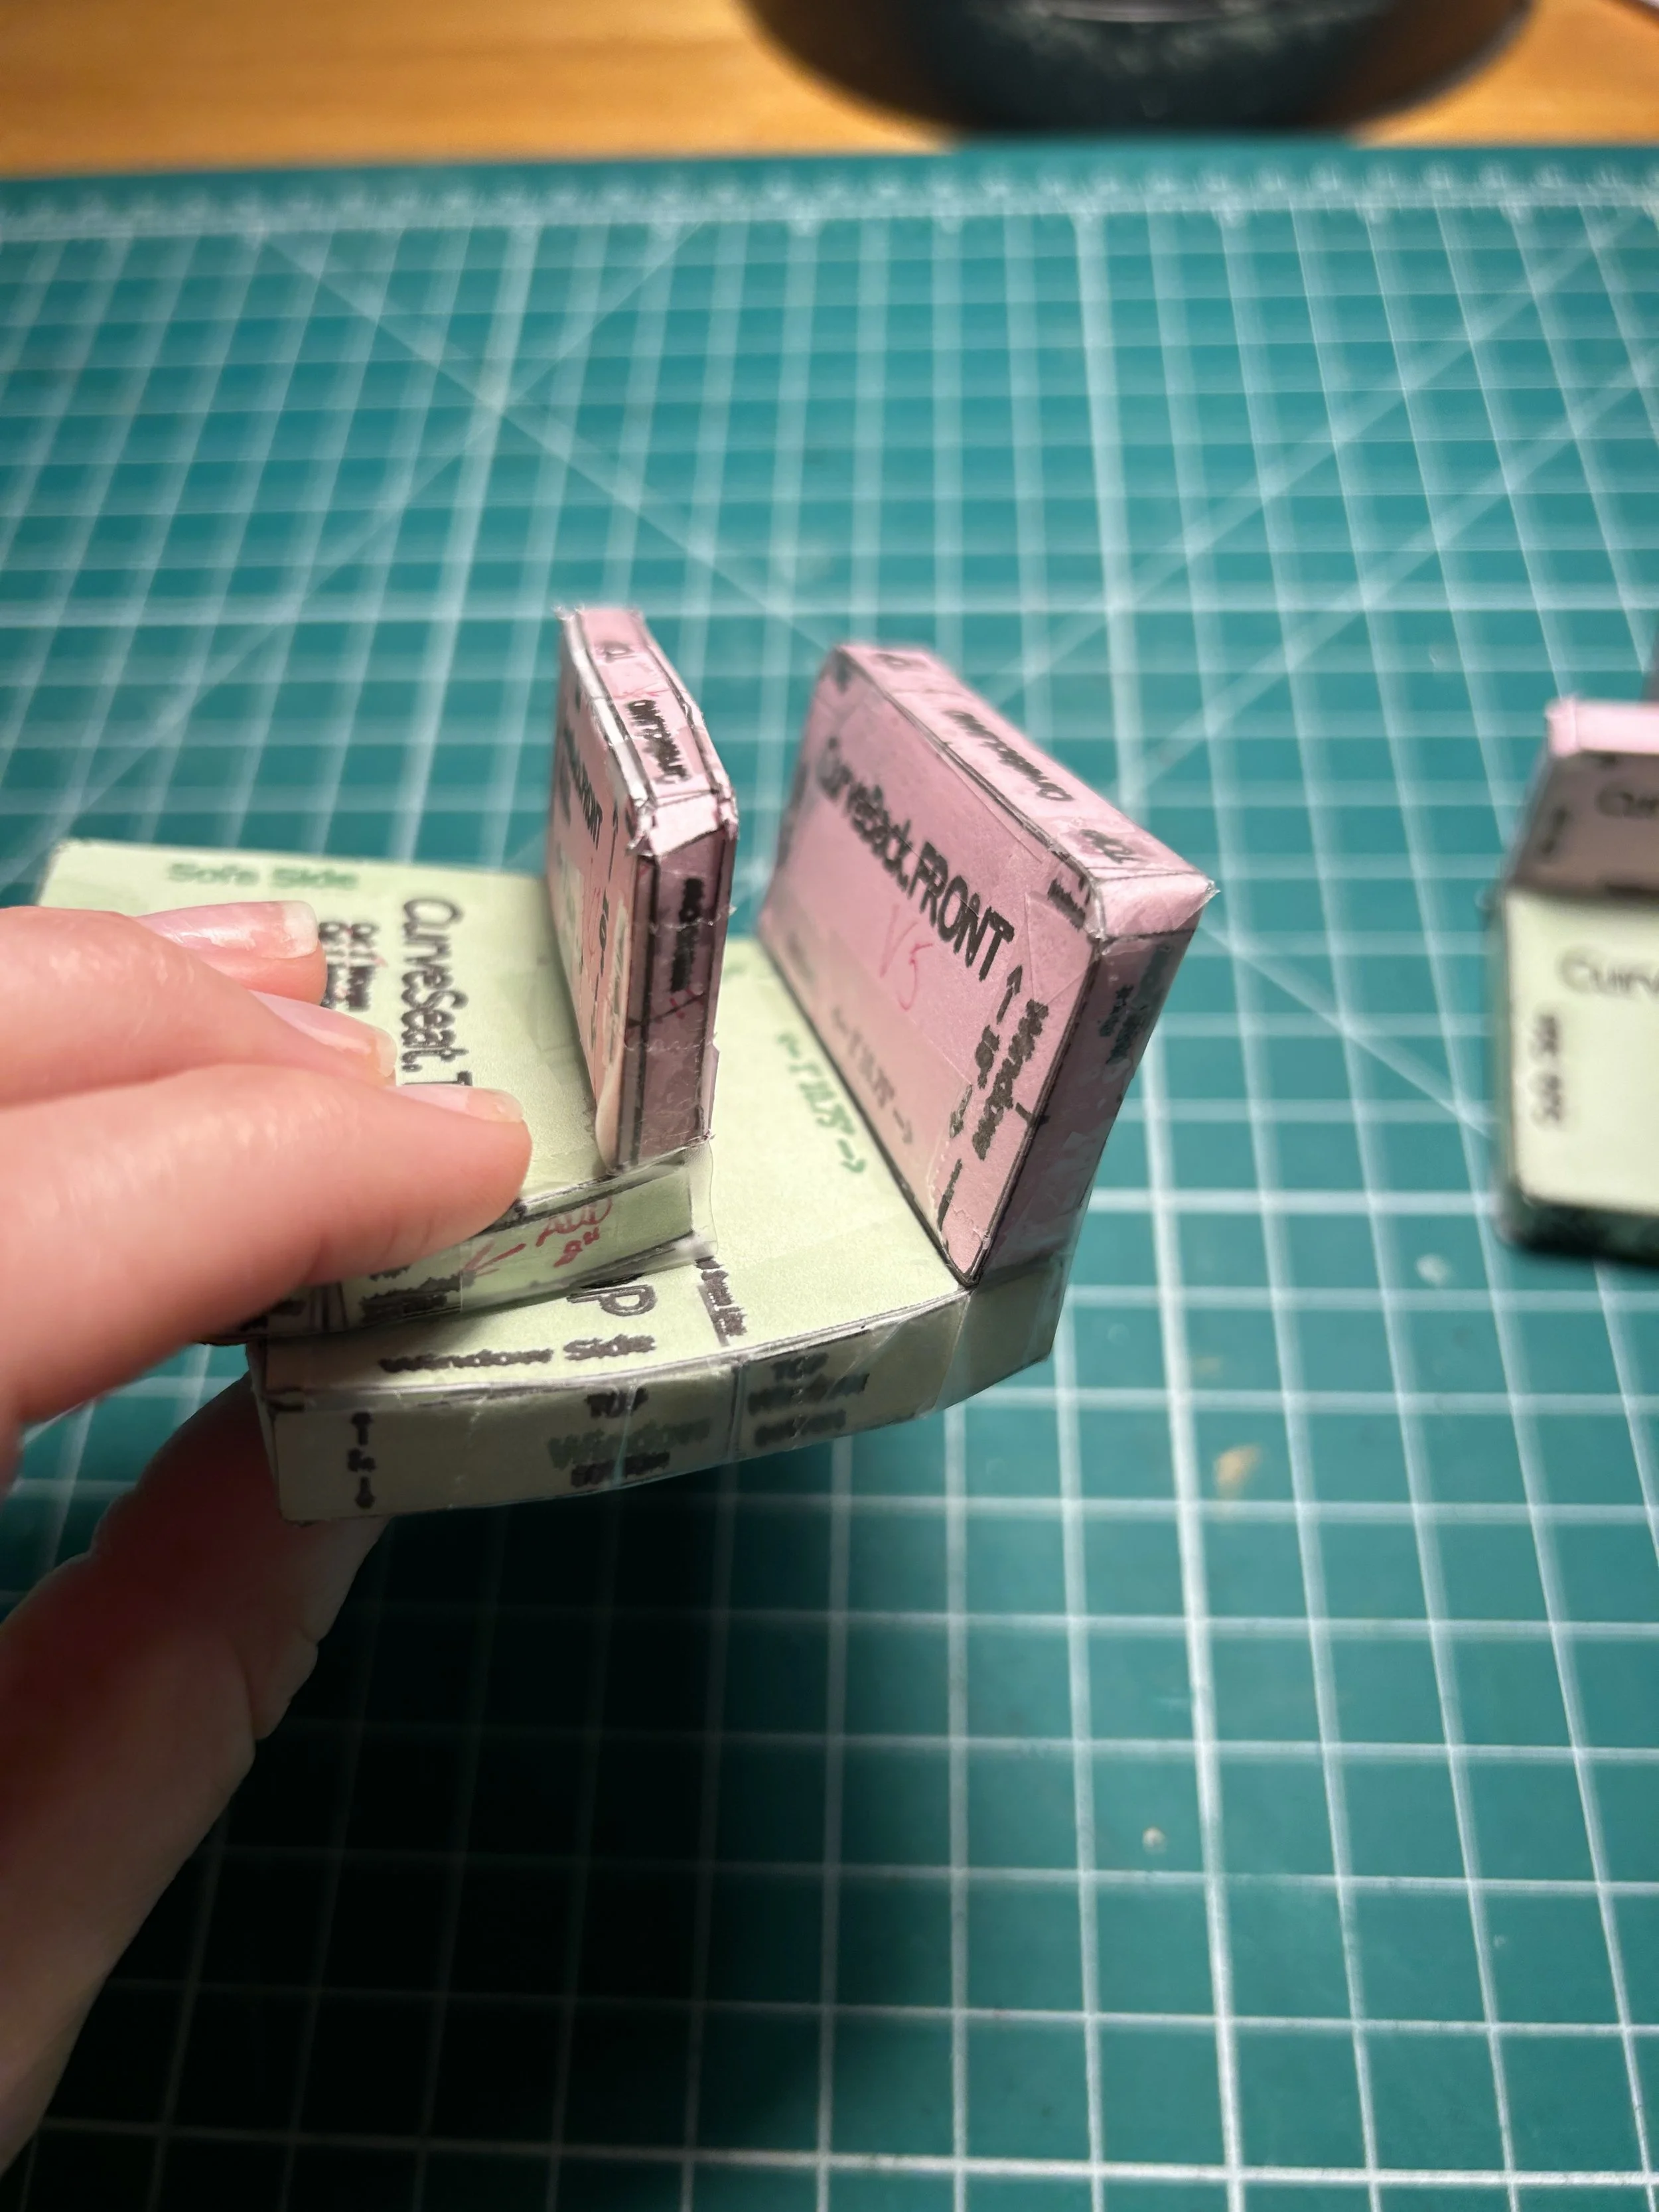
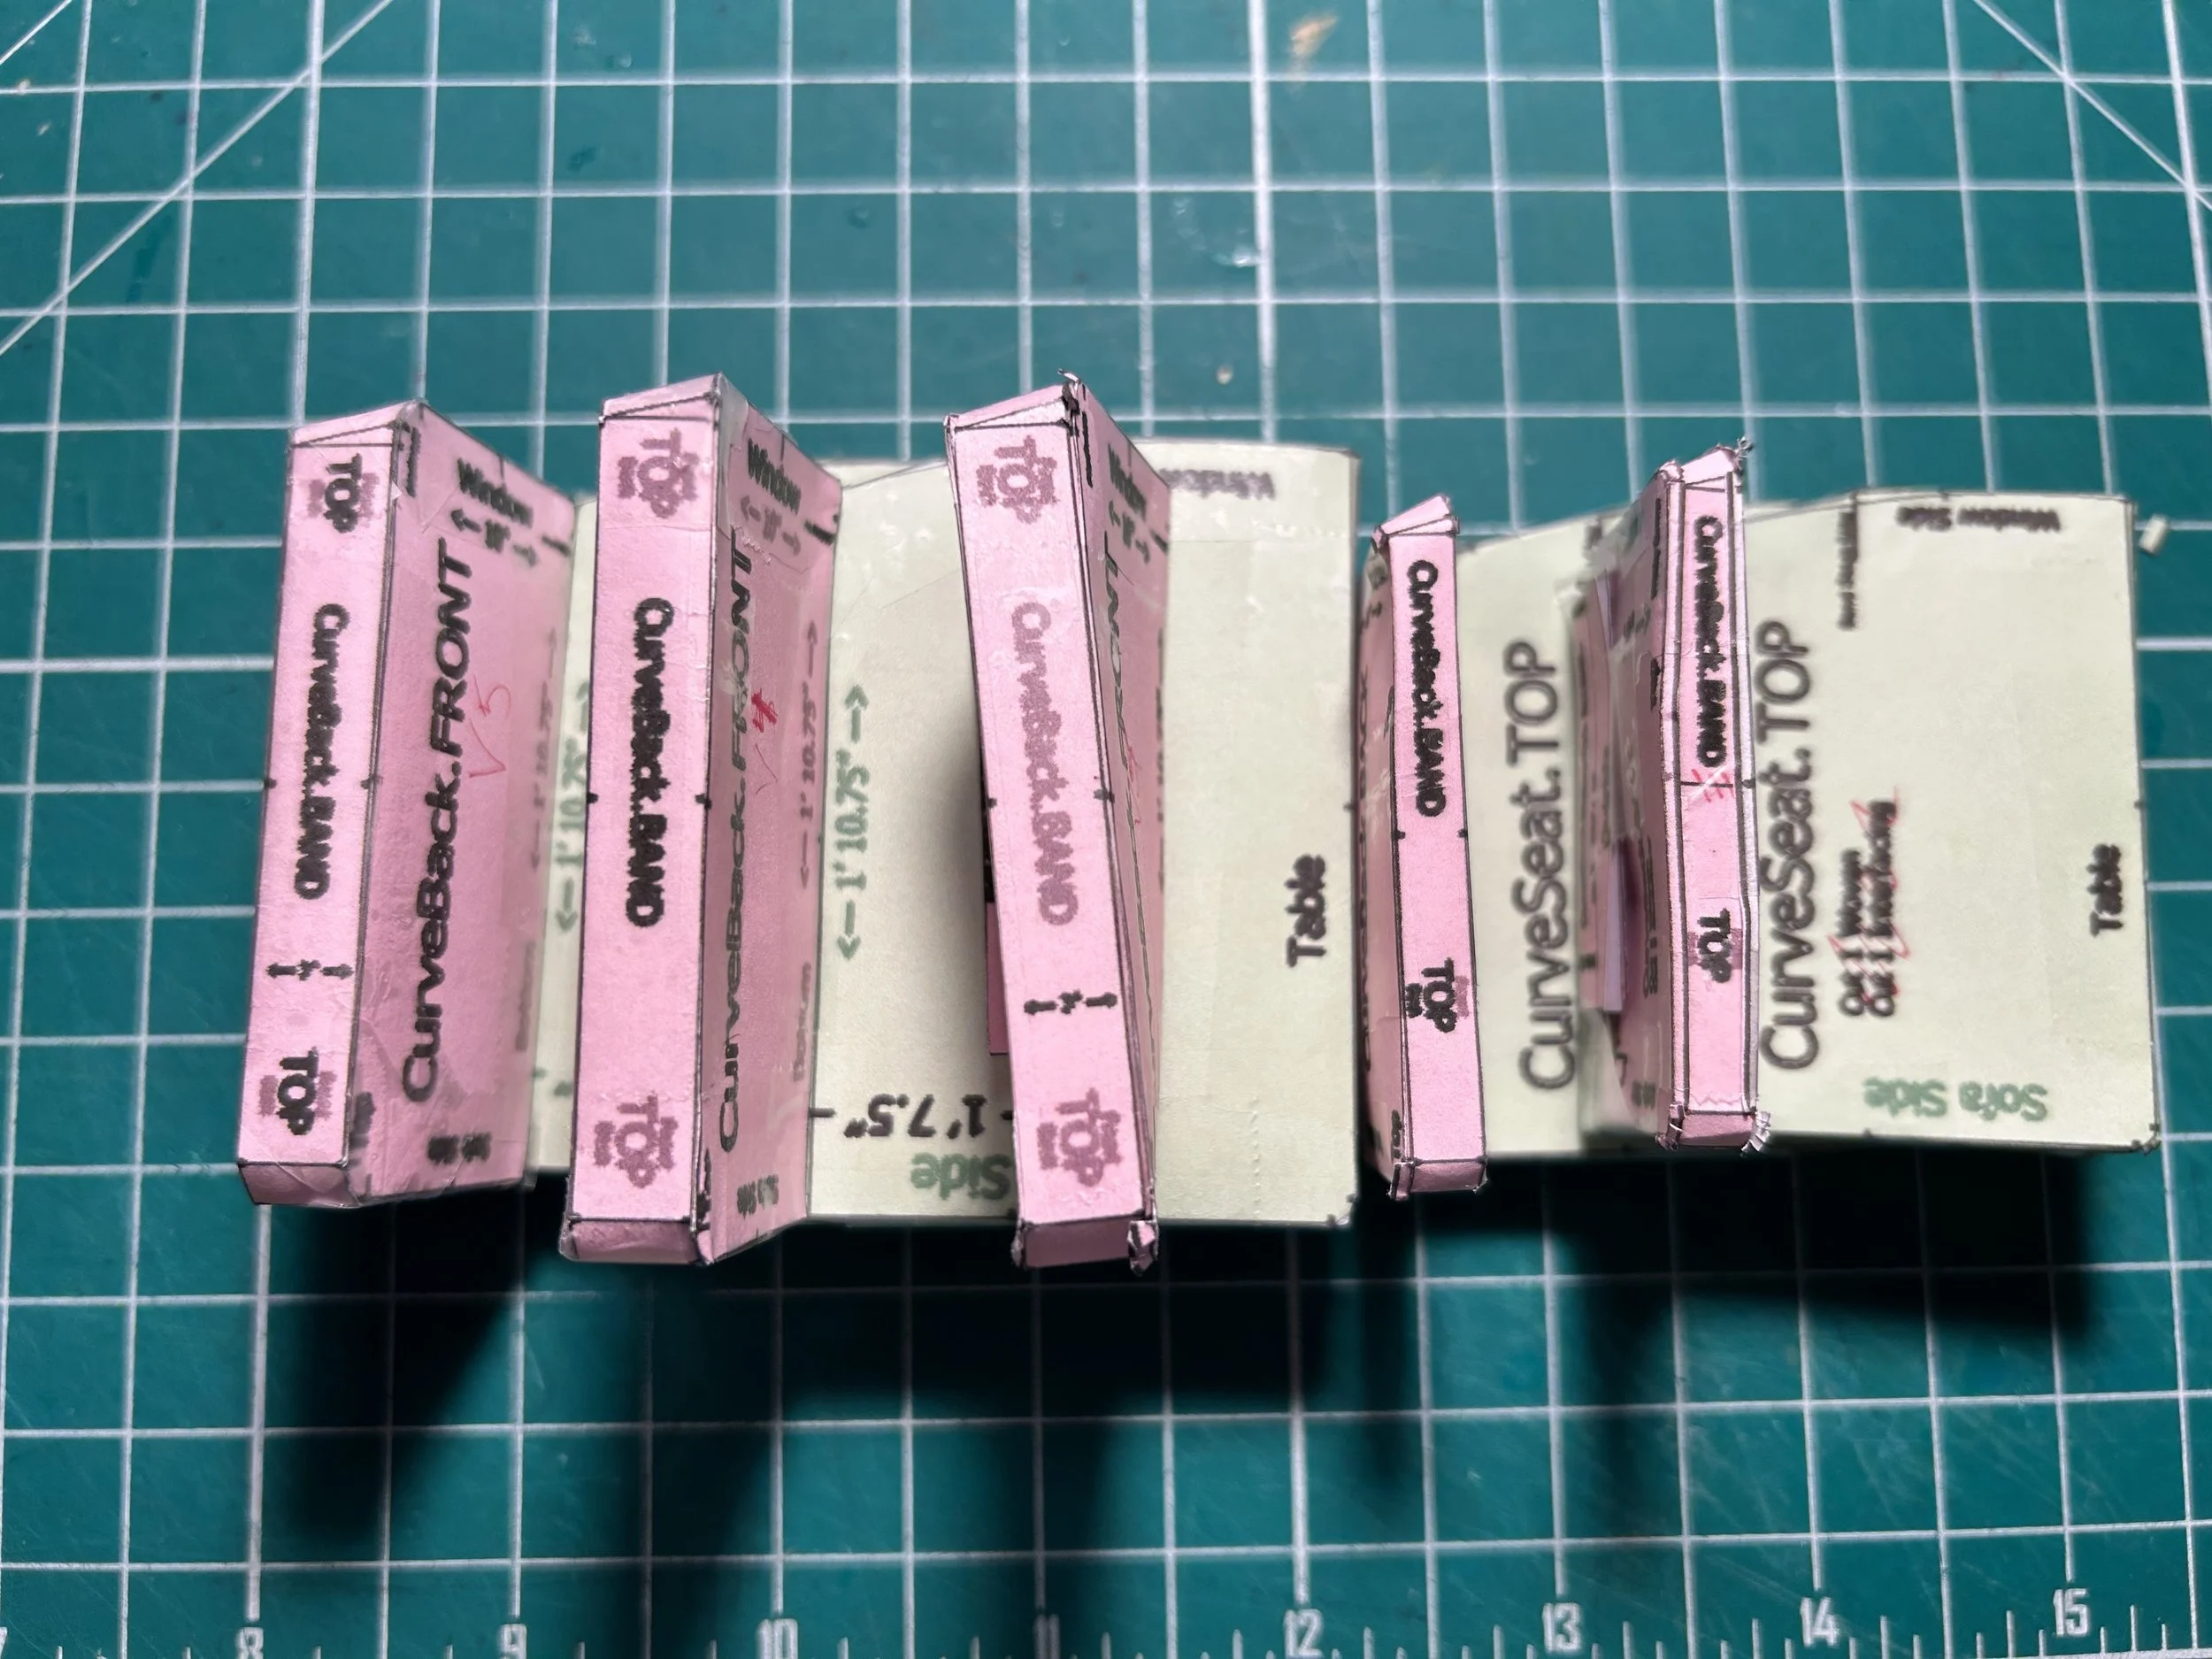
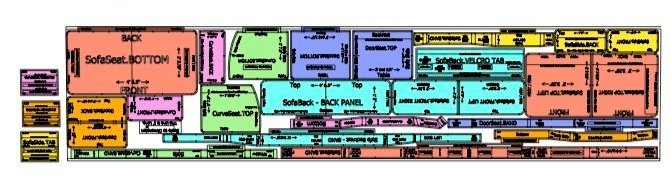
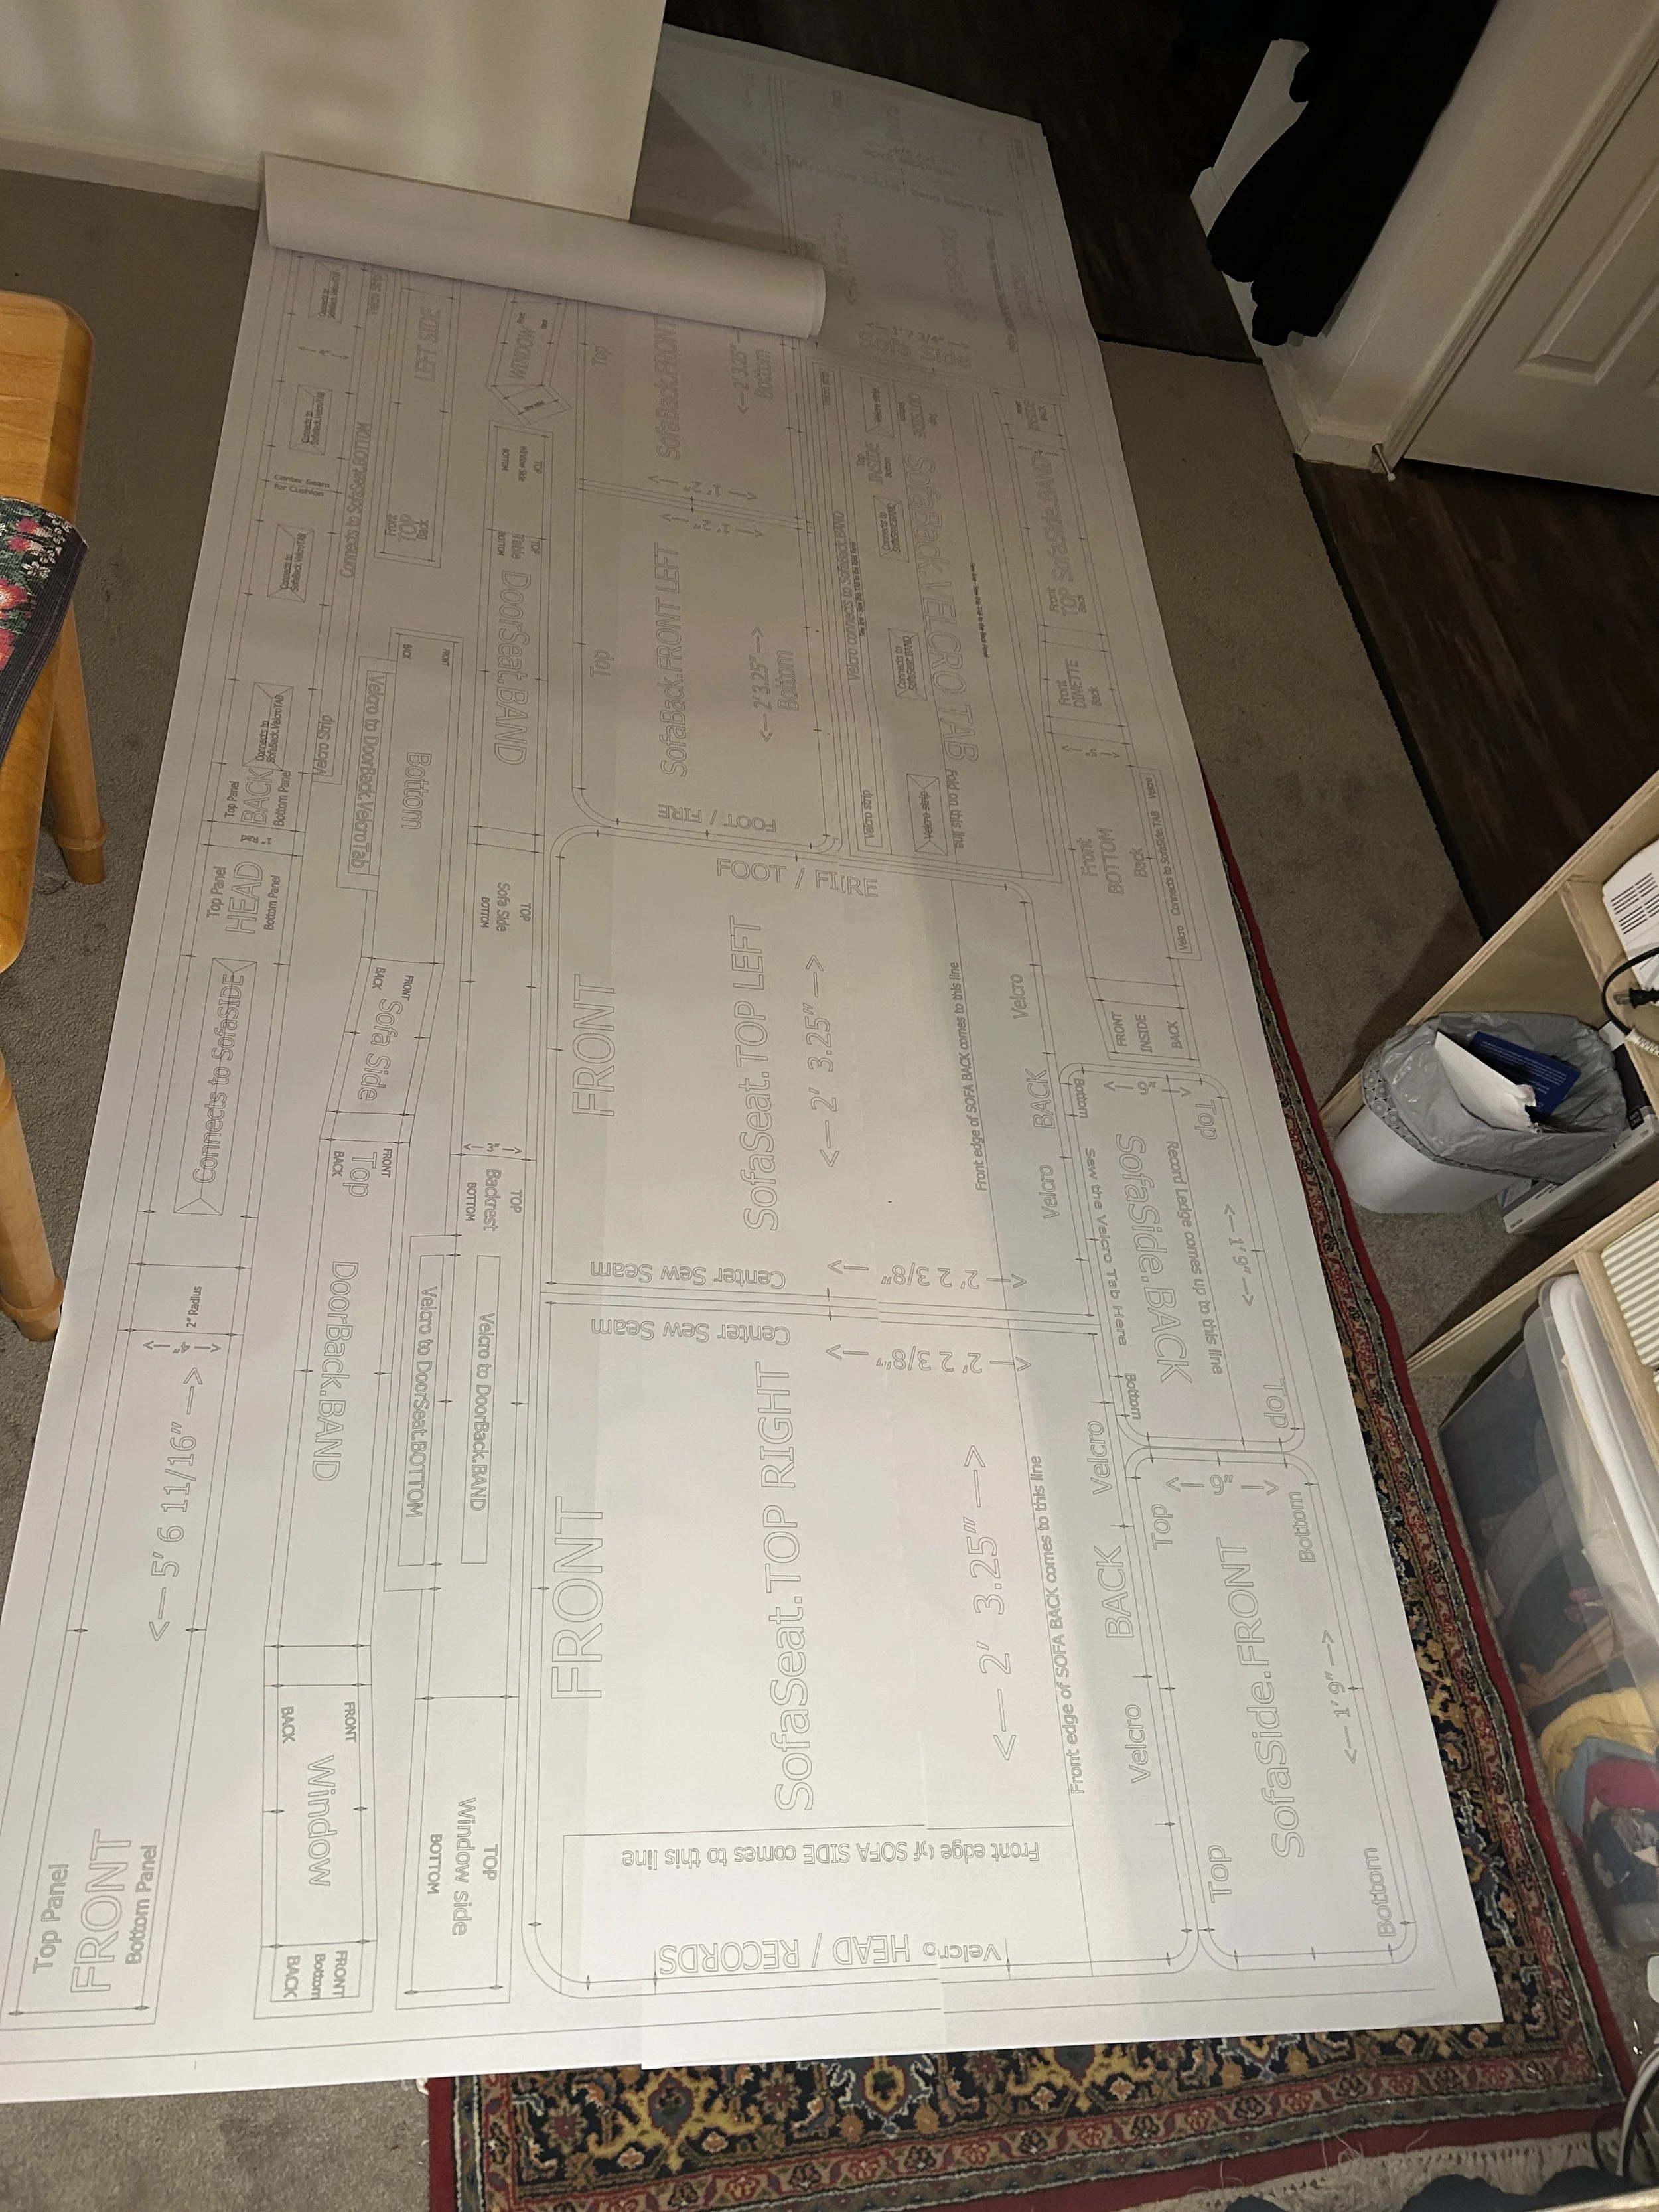
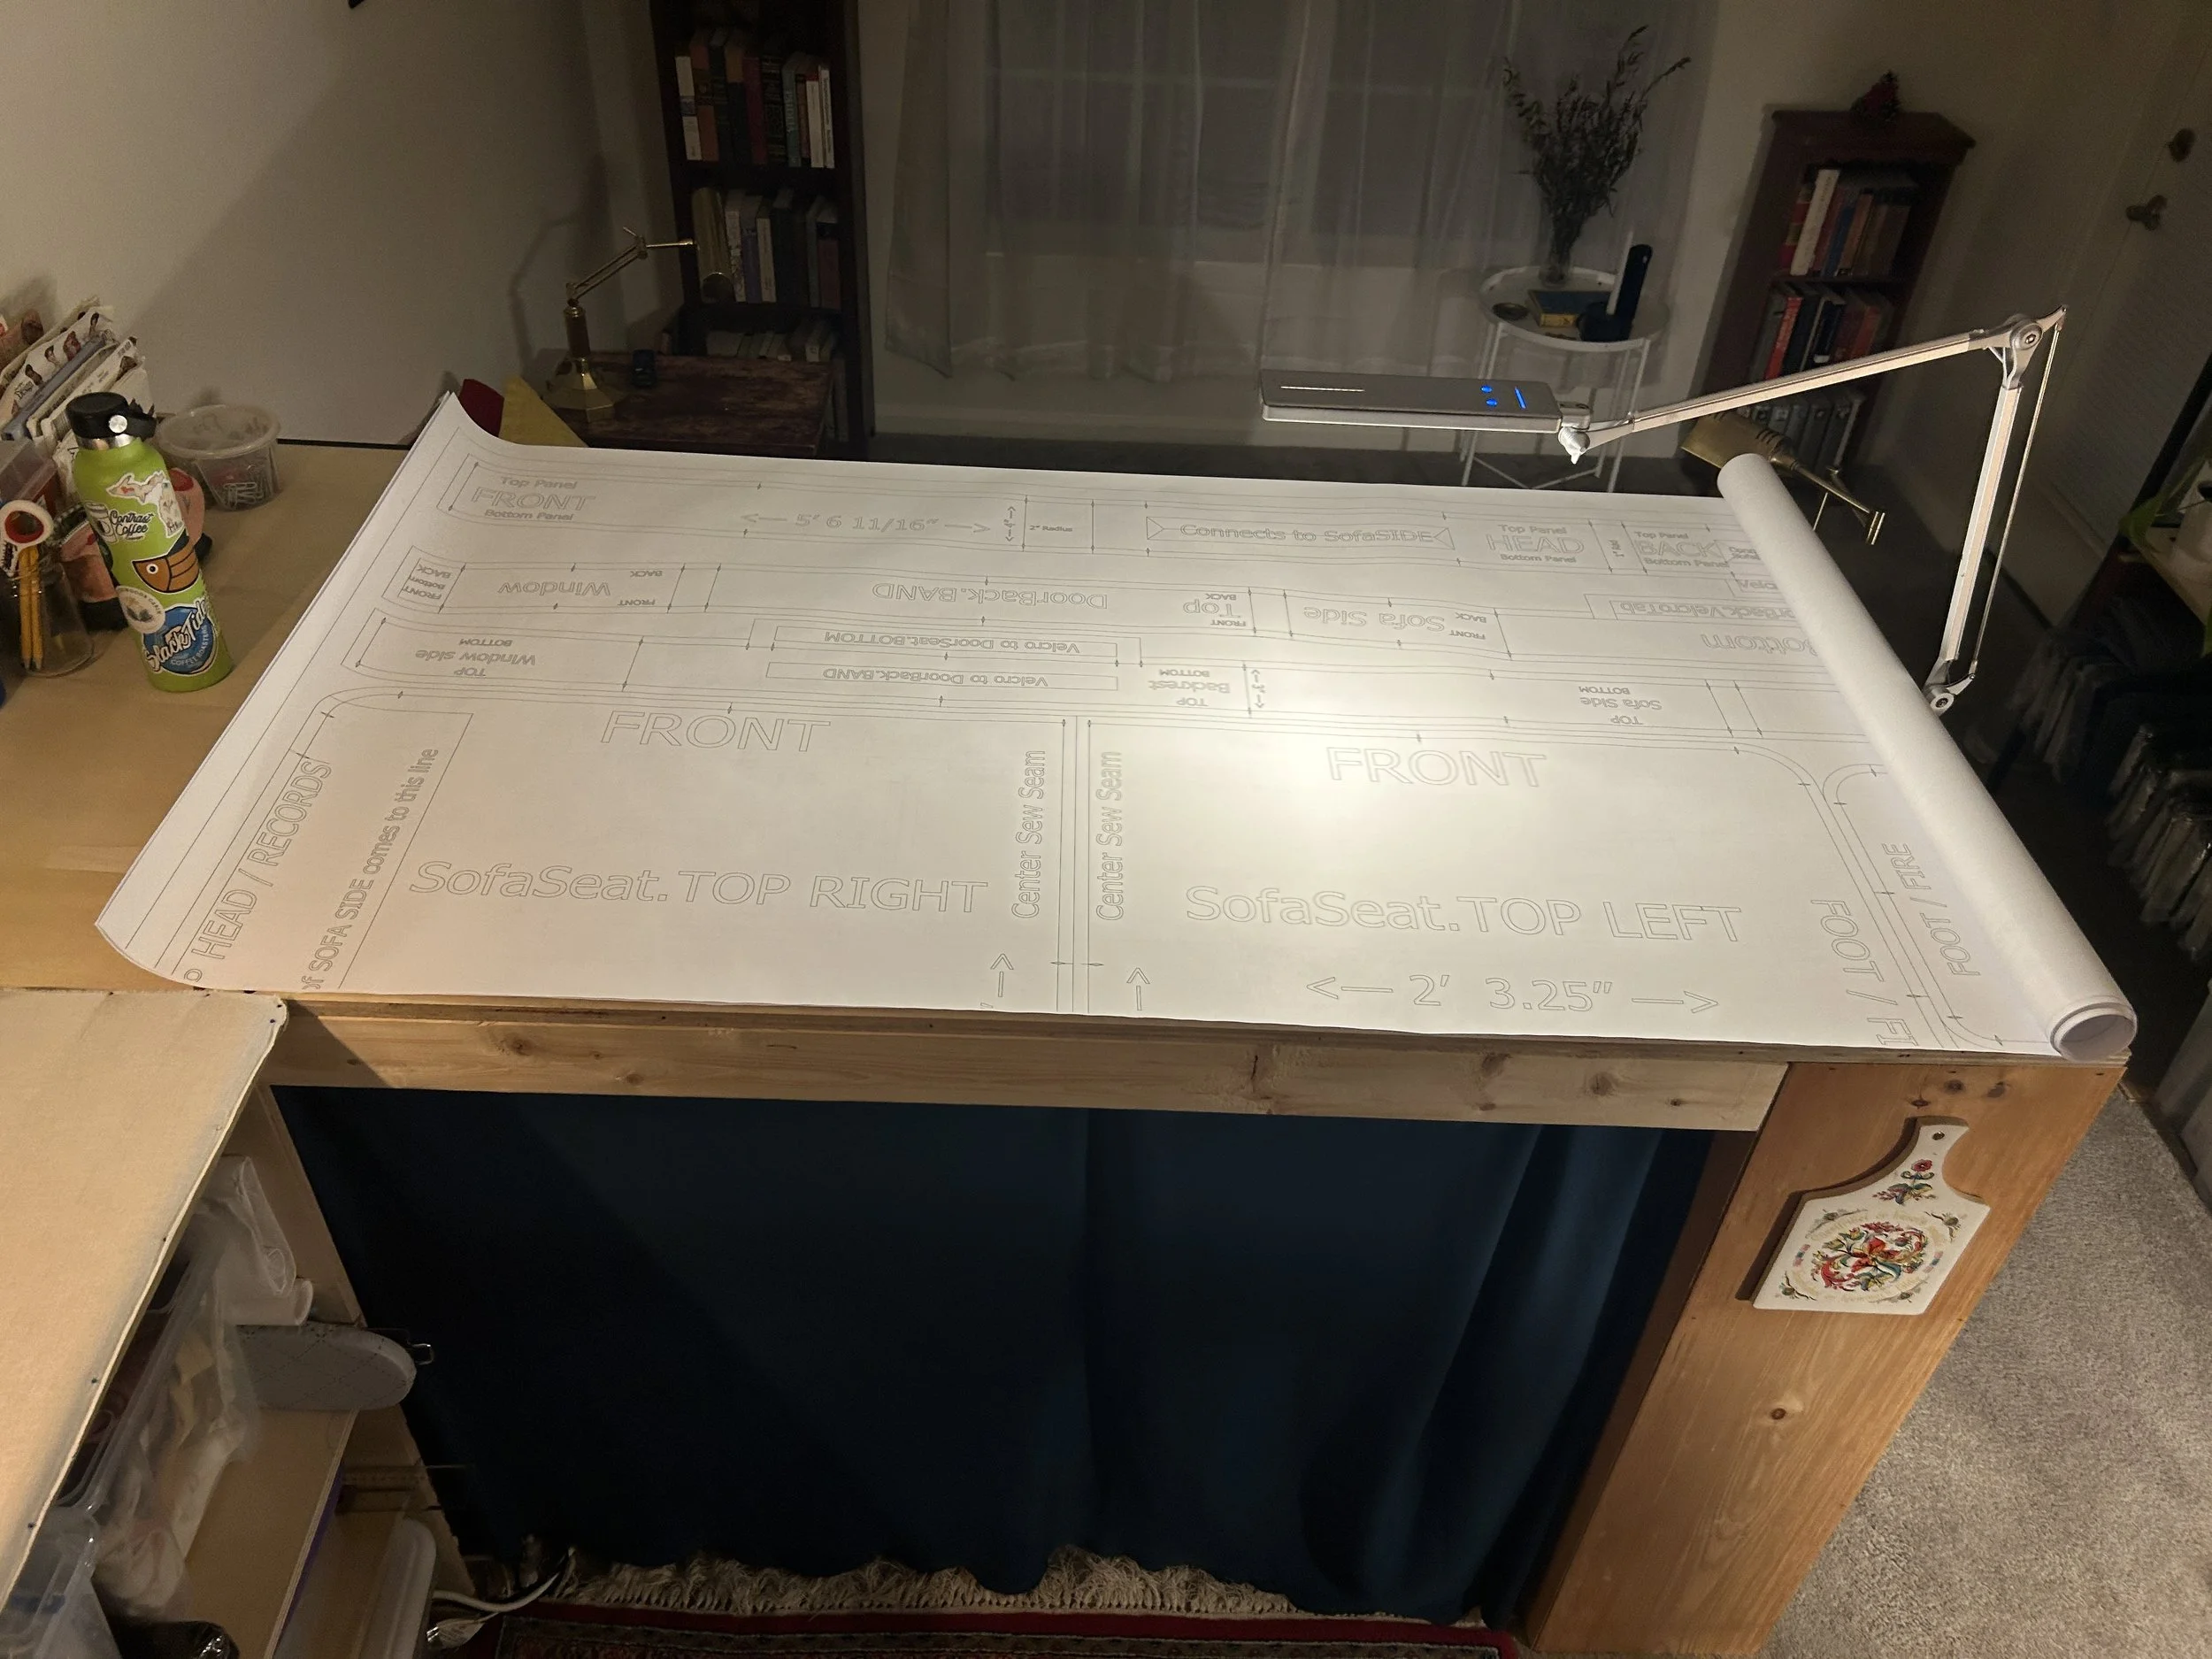
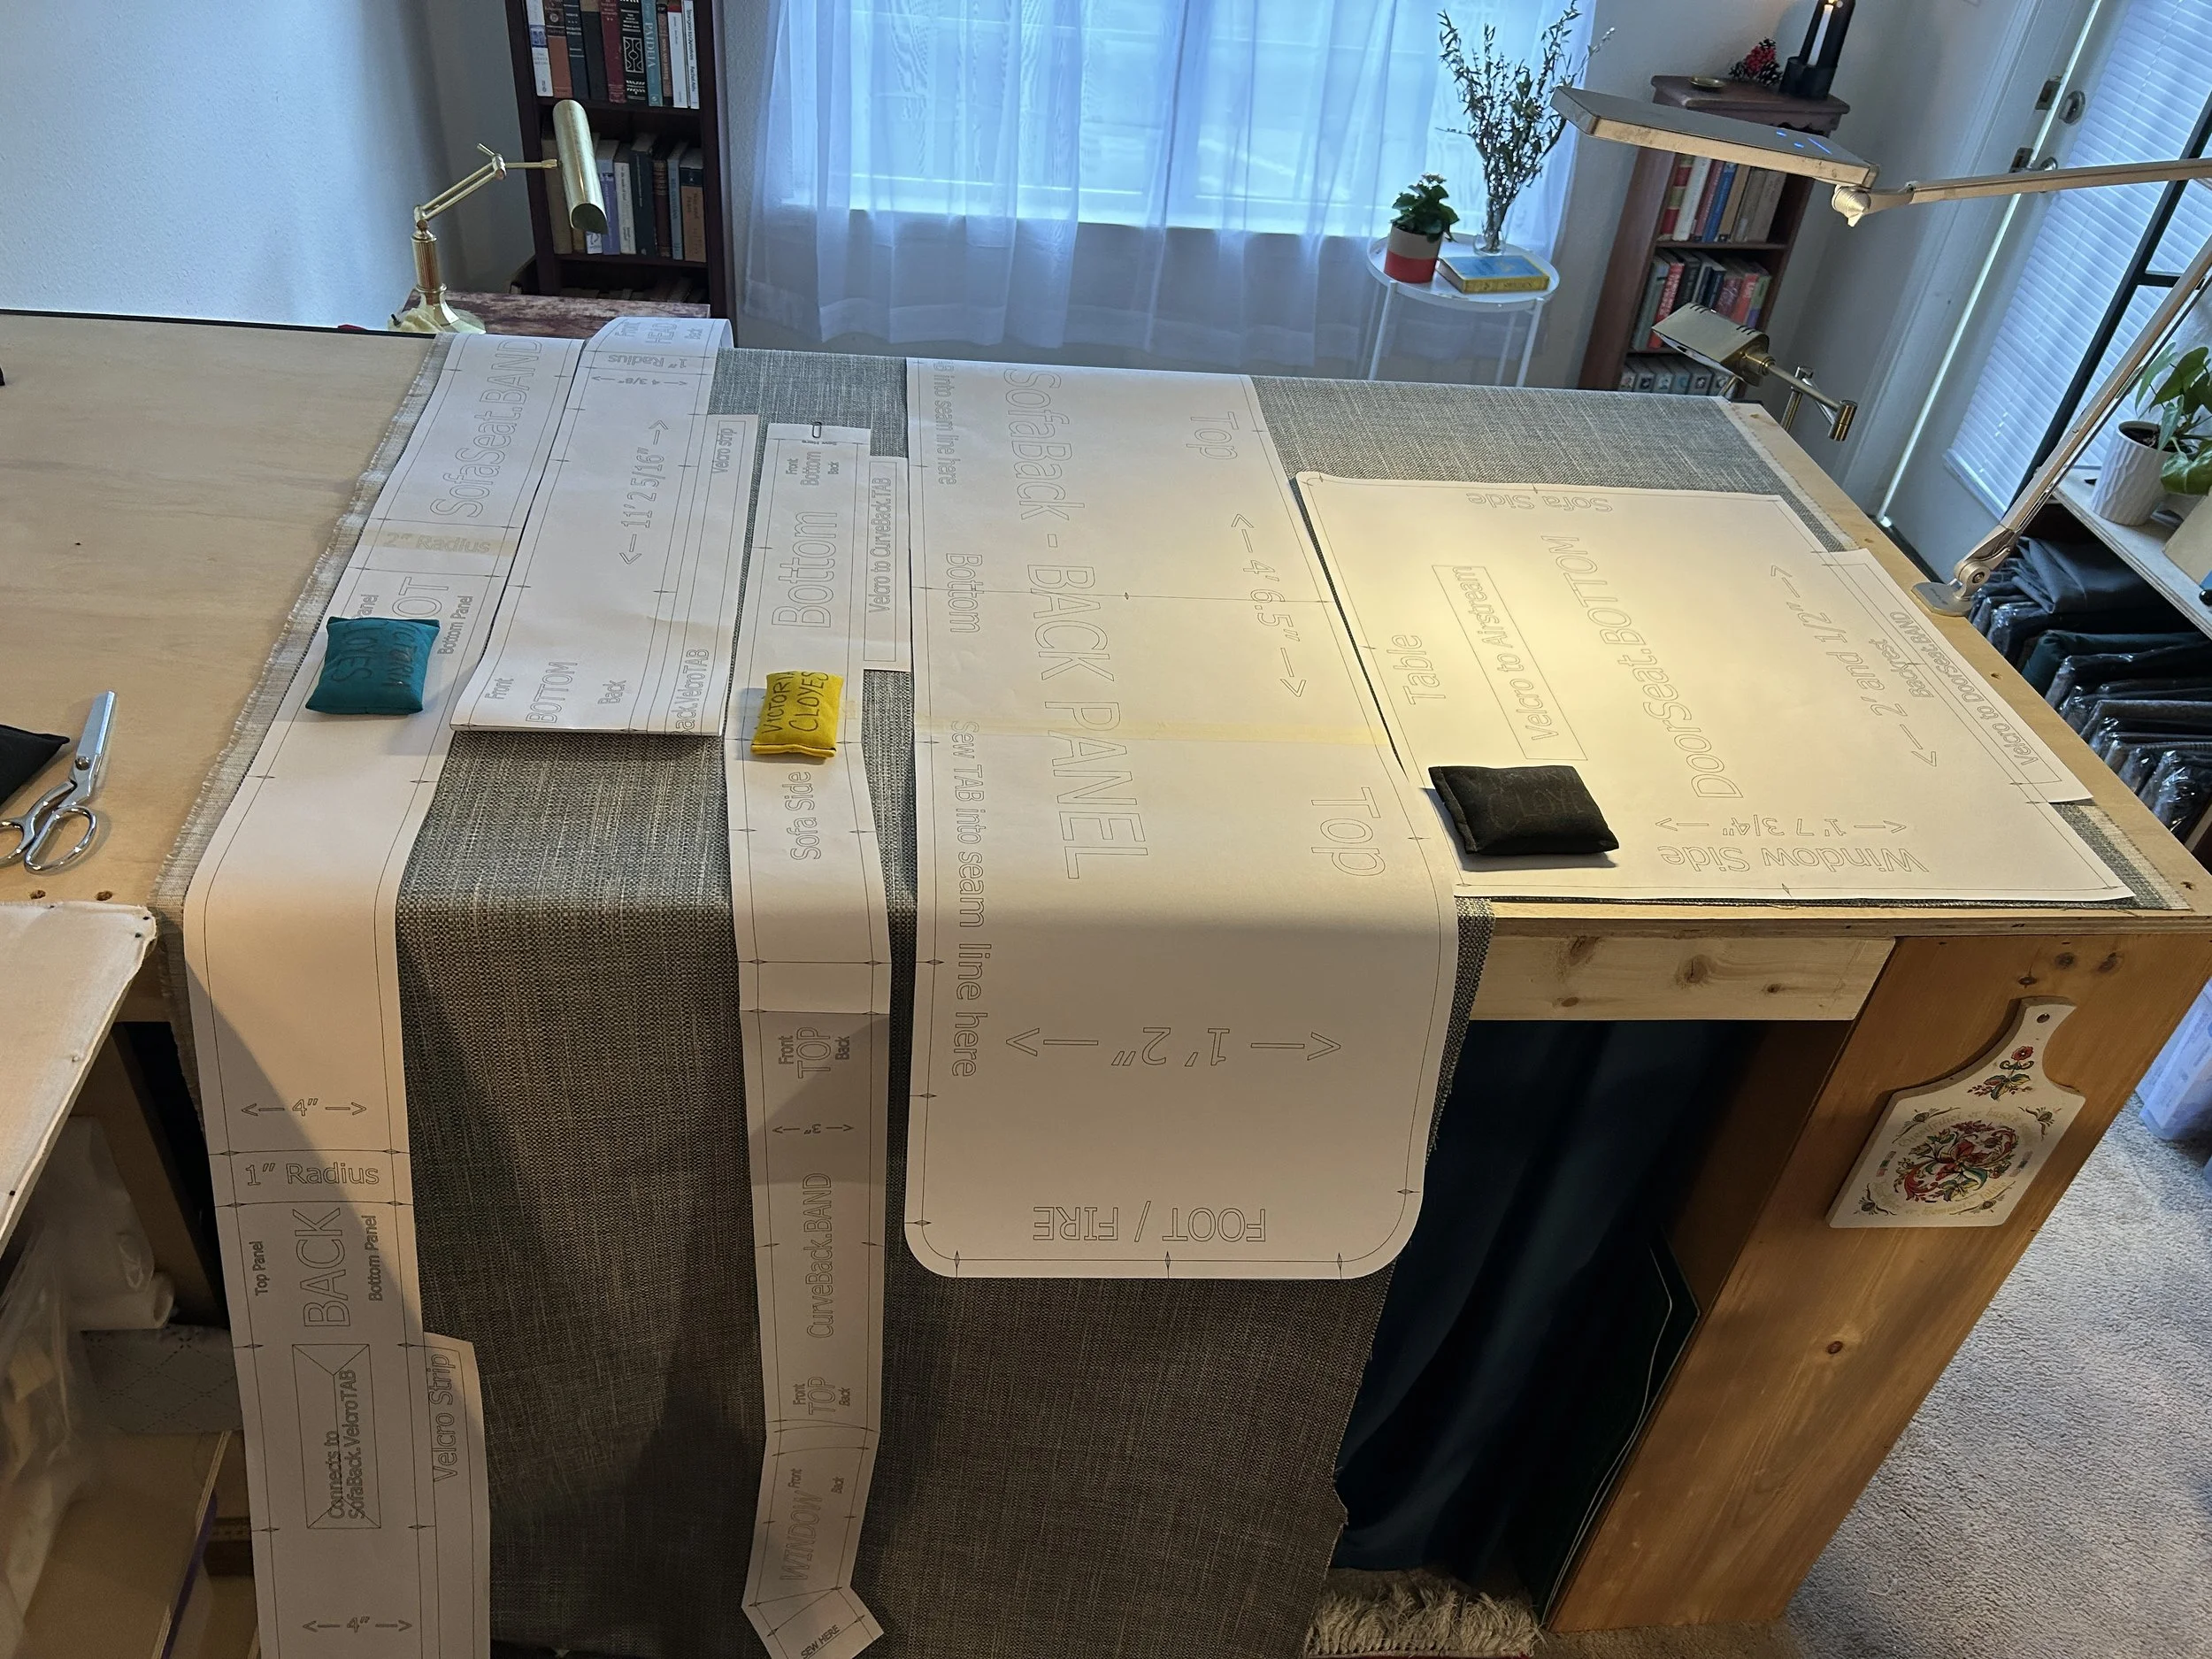
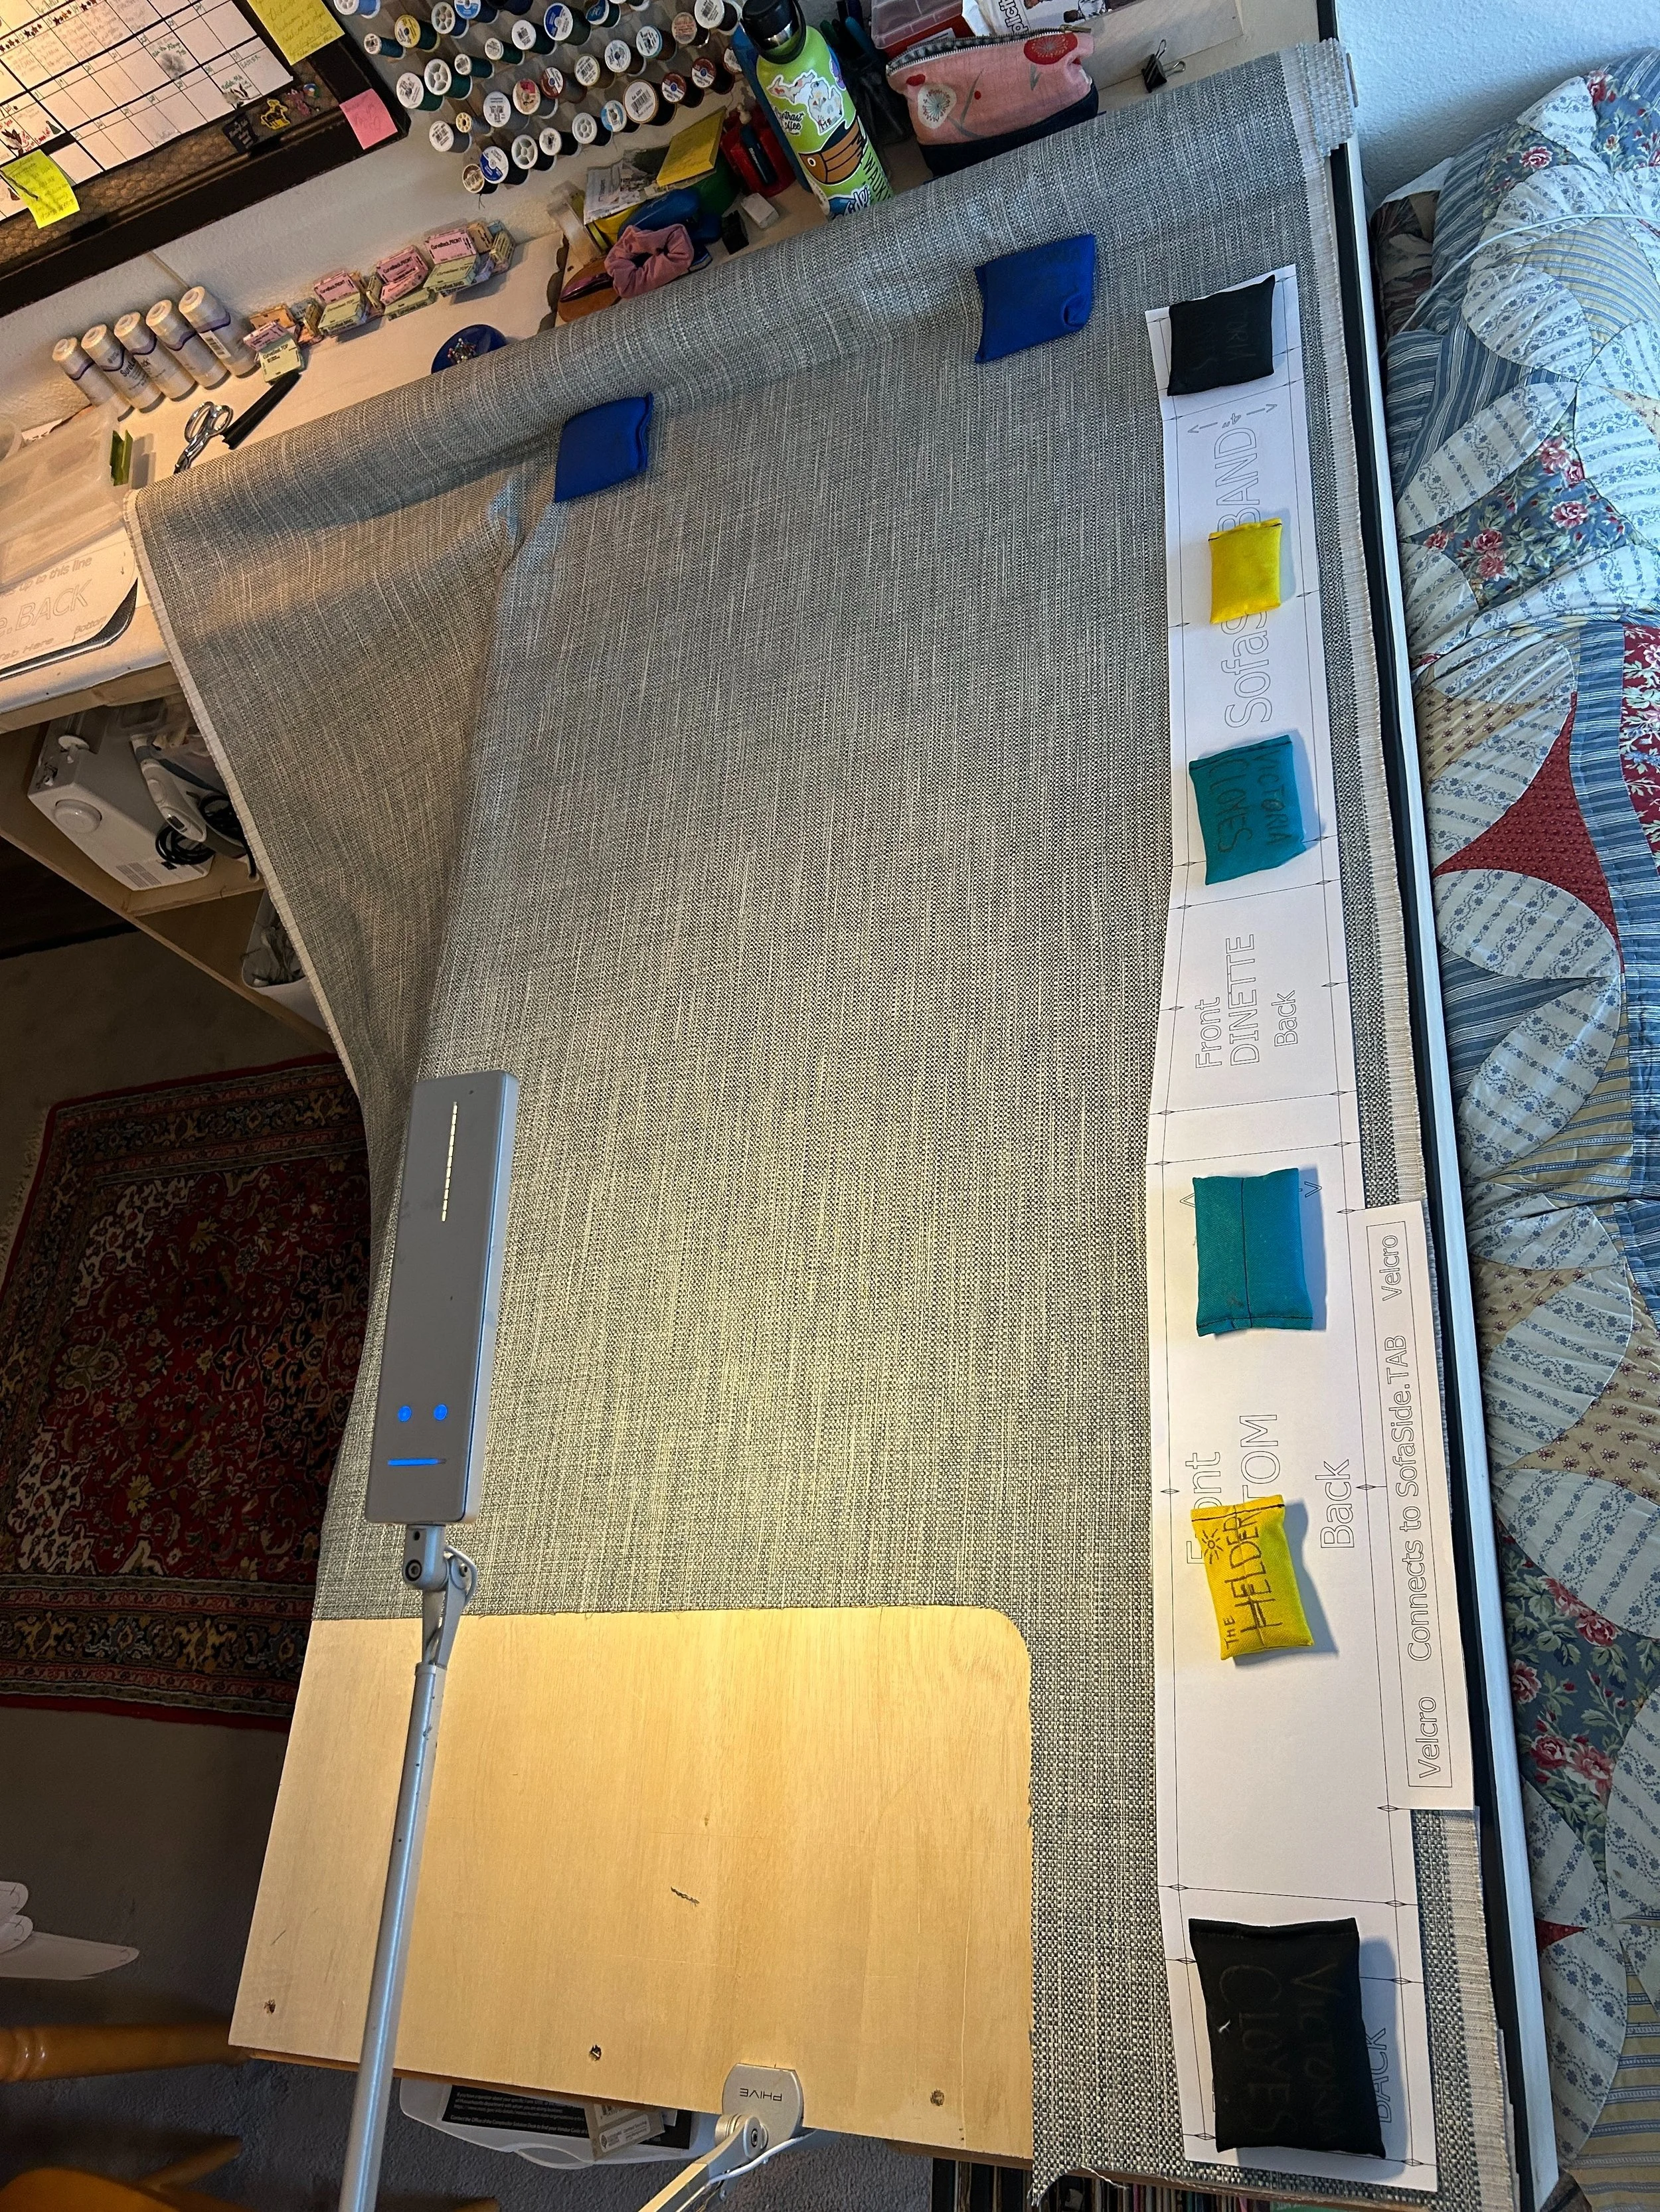
I started sketching in my notebook and quickly realized that it was going to be quite involved to figure out how all these cushions worked together. I shifted to Sketchup. I realized I would need to create digital models of the wooden structure, as well as every cushion and tab. This digital design phase would prove to be the most difficult part of the process. The first picture is from the start of the process, and the following photos show the patterns in their final configuration.
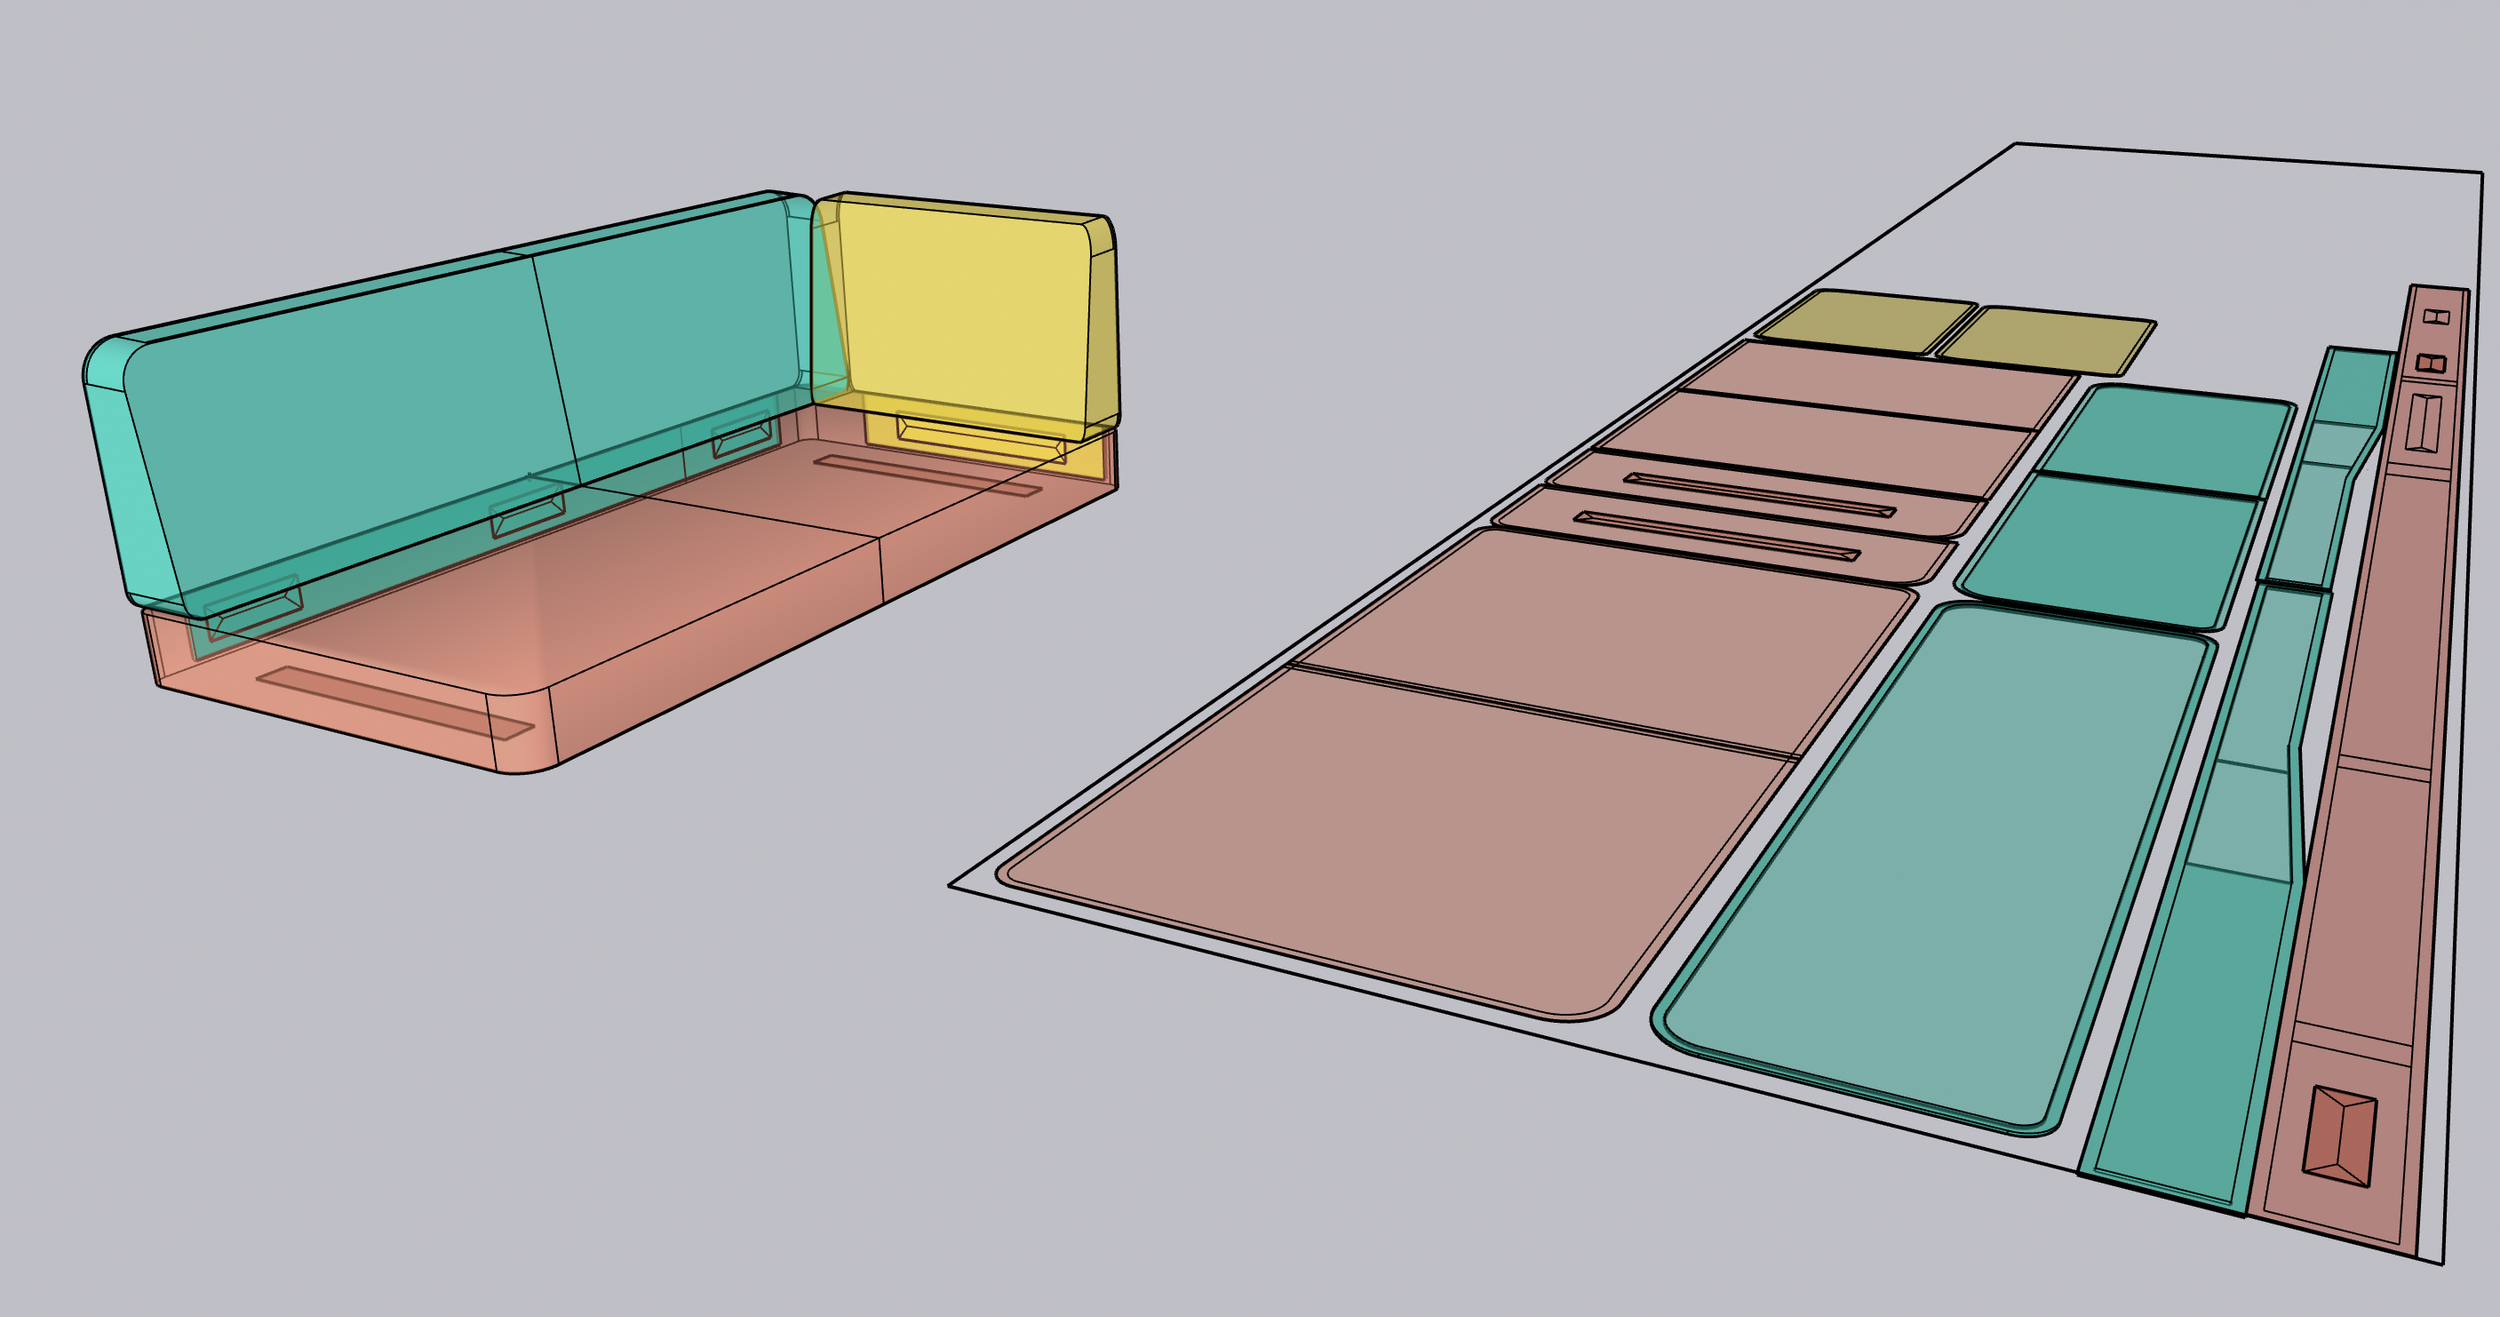


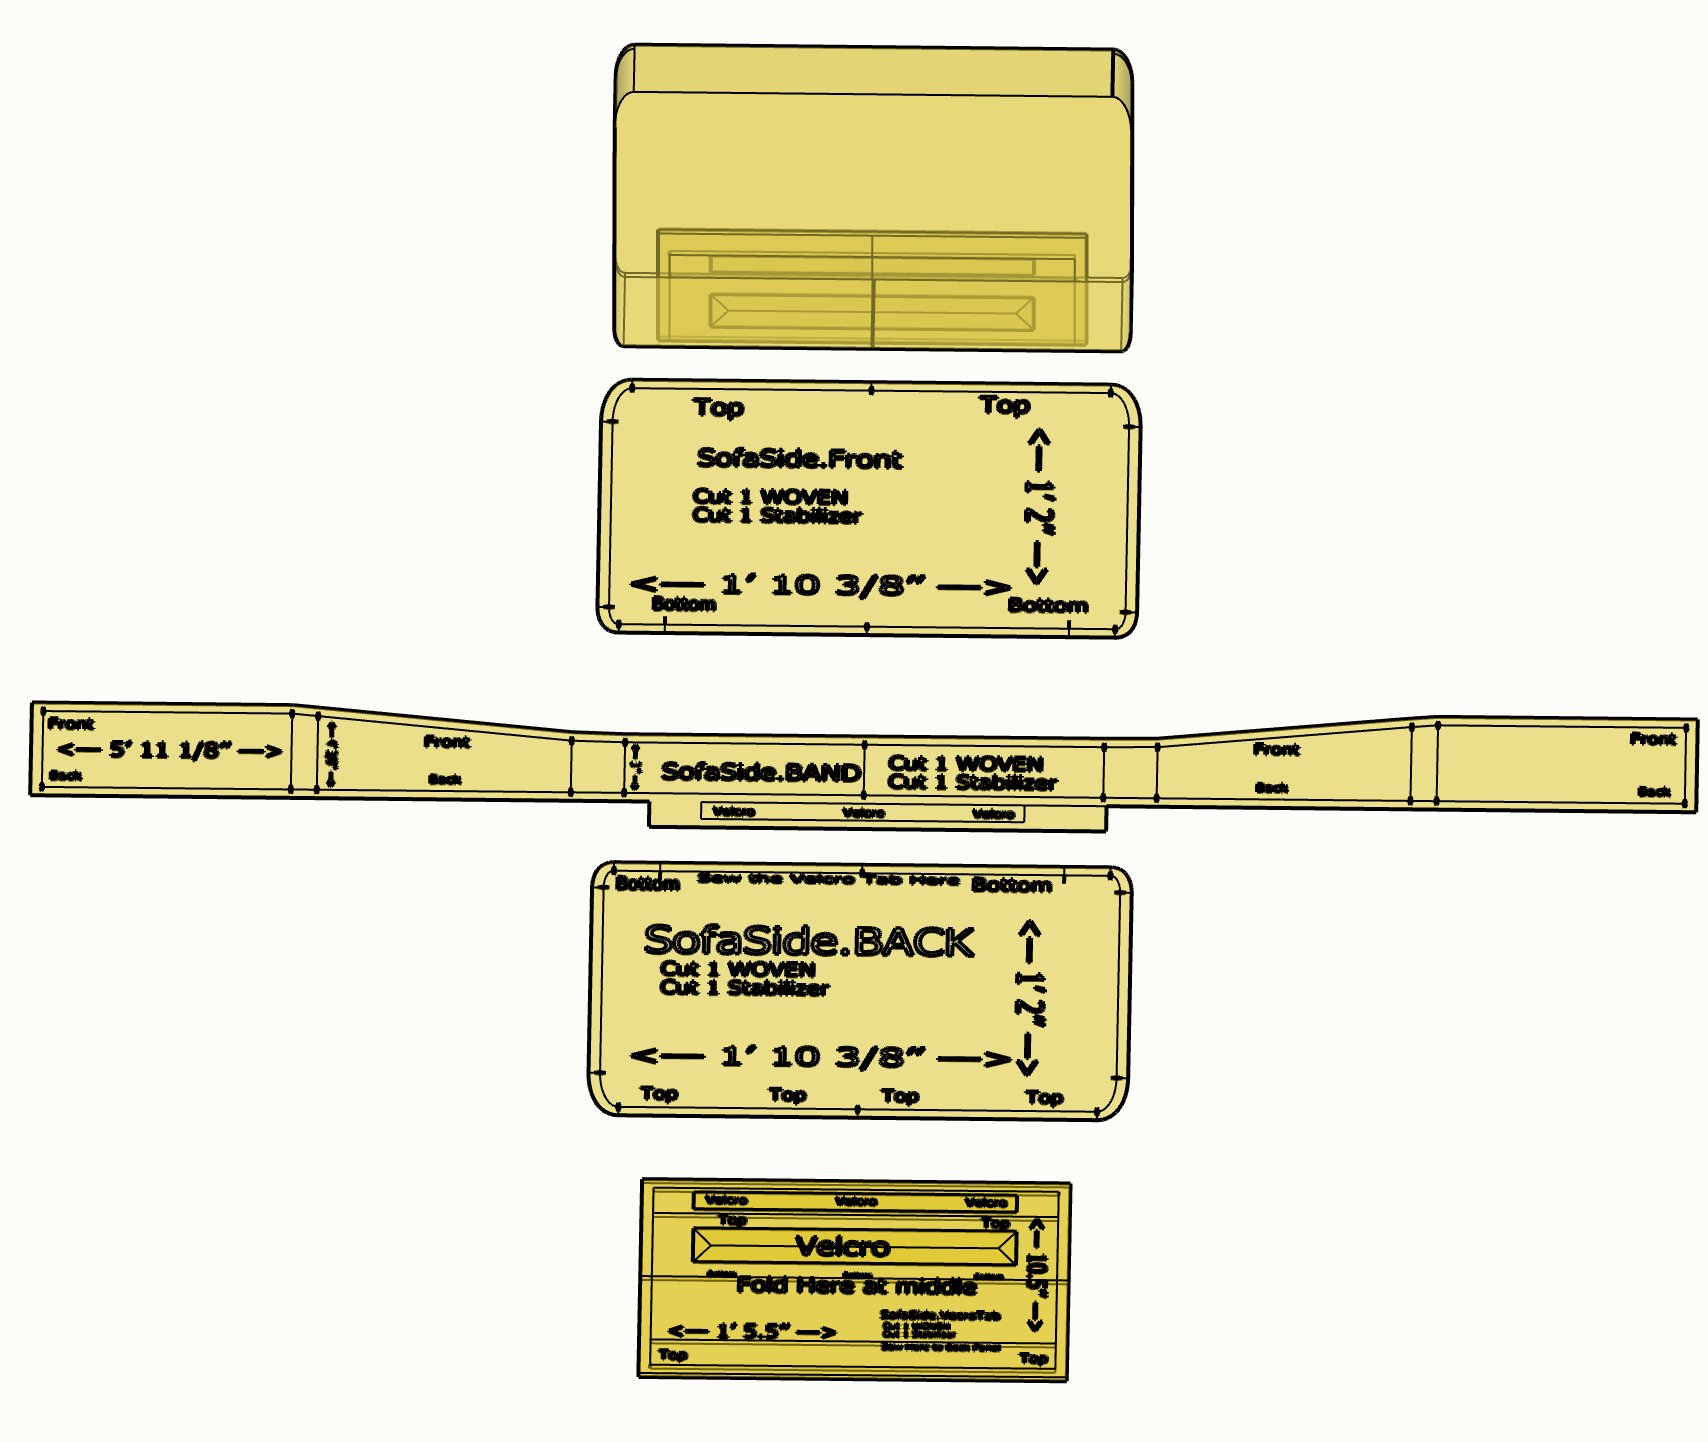

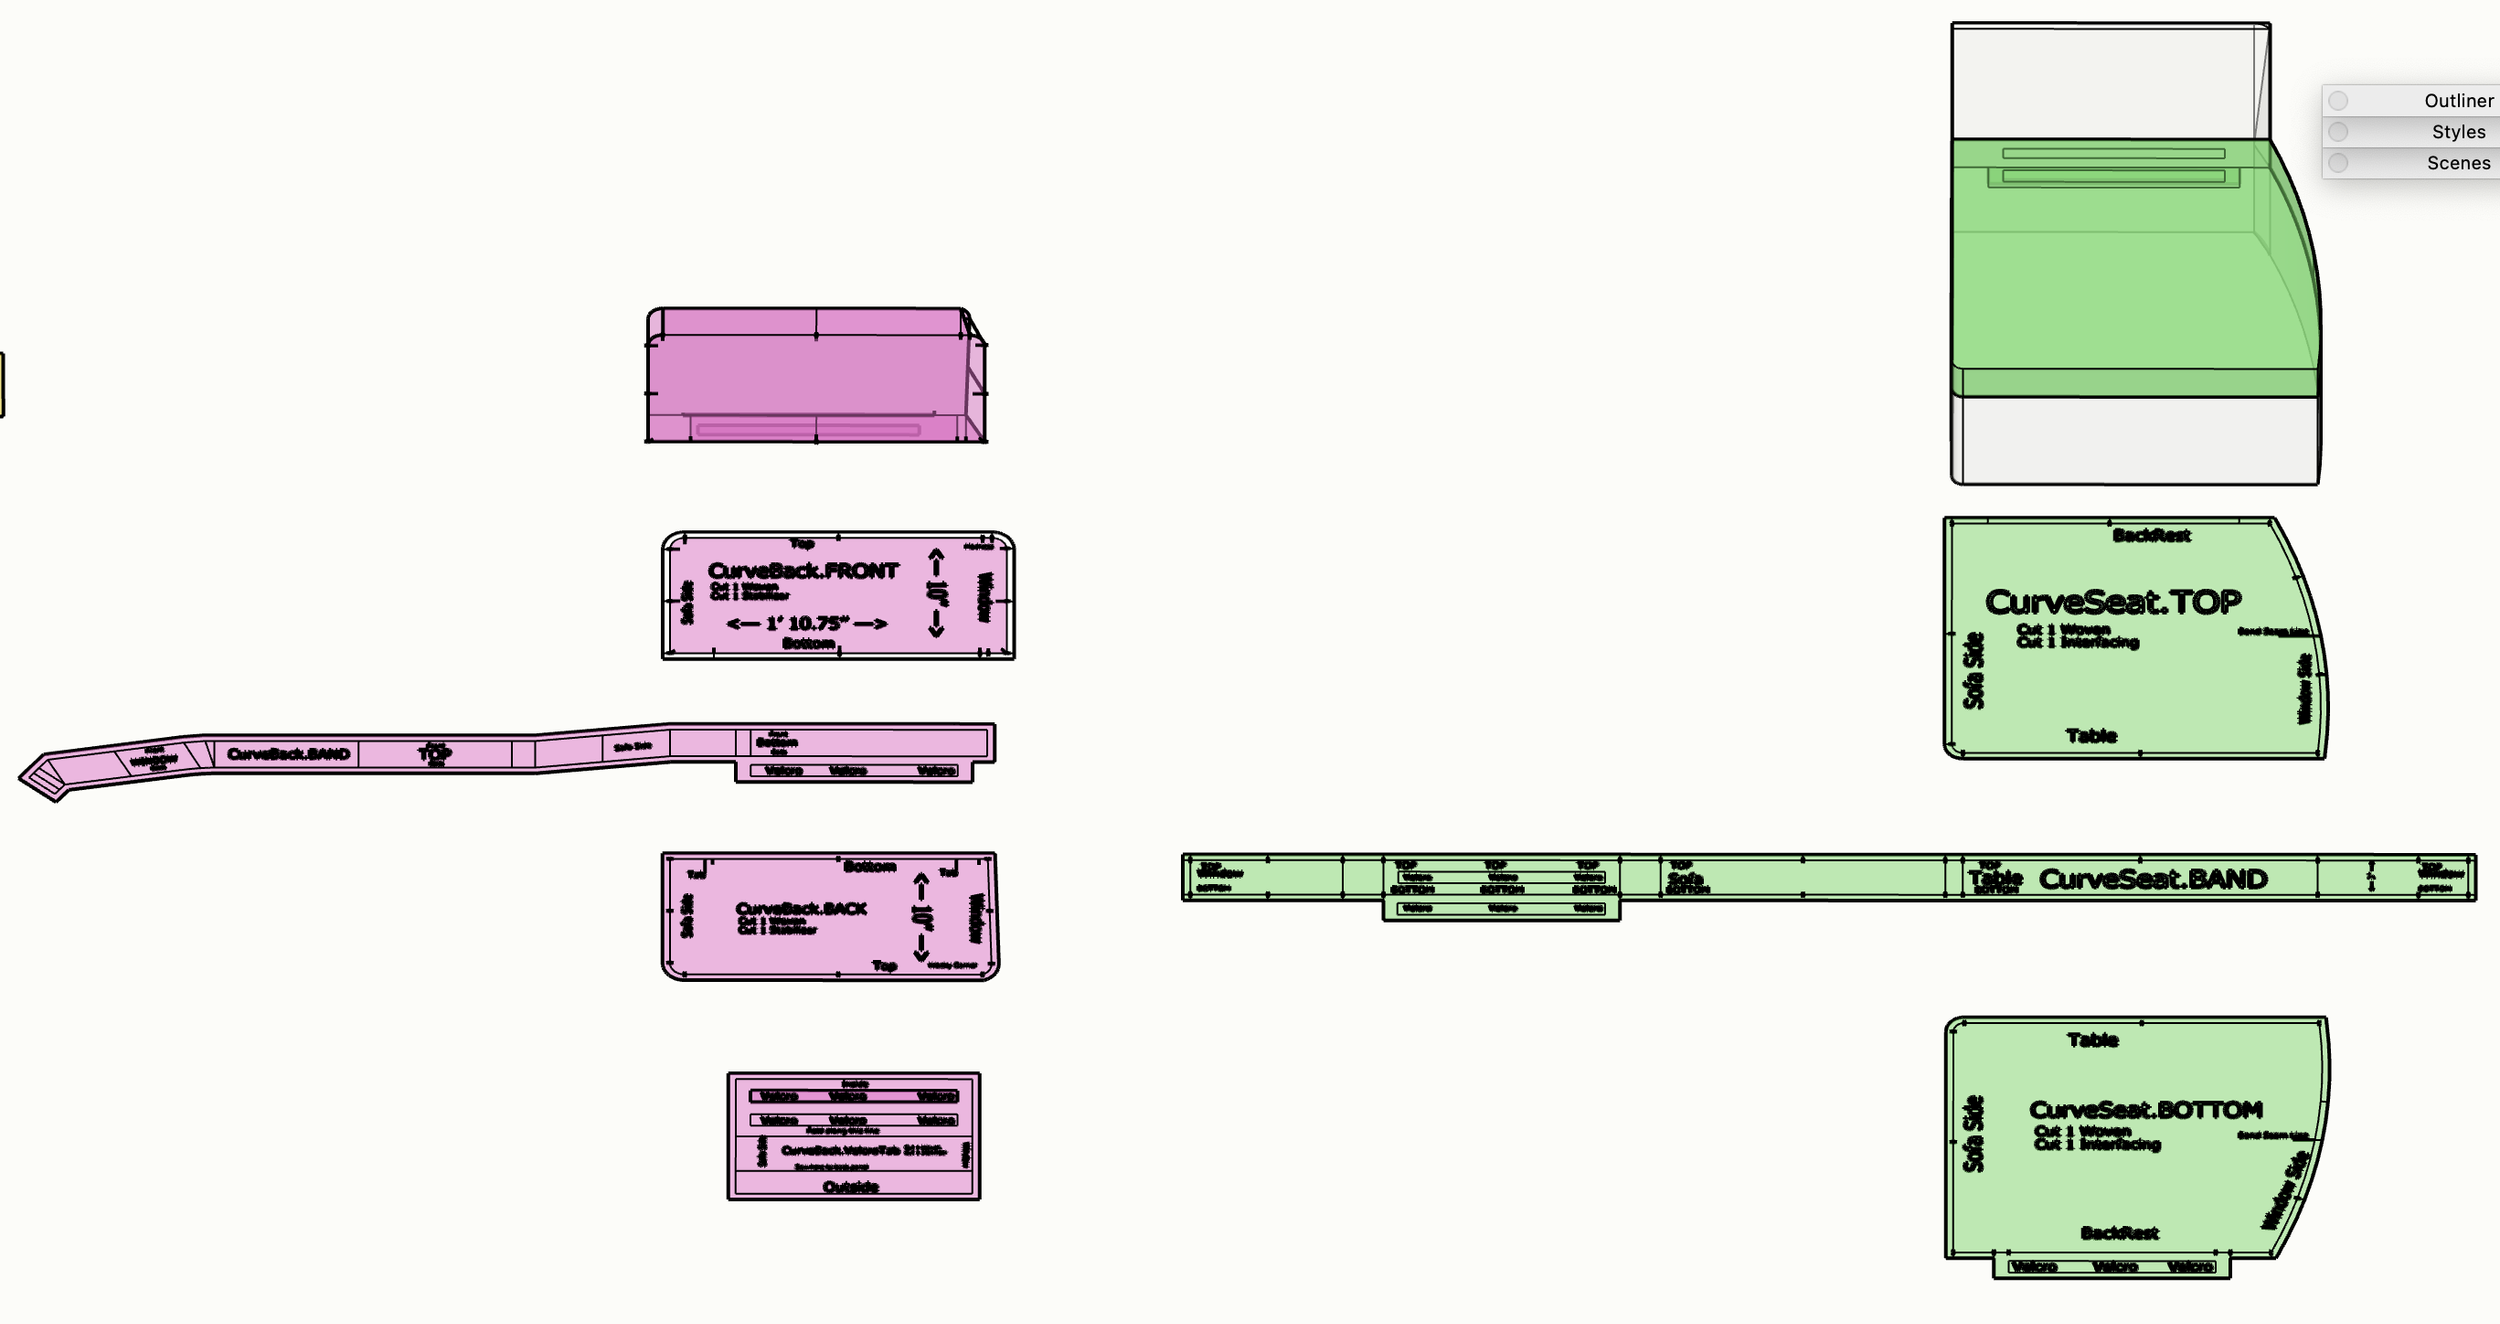
The design phase had many hurdles. First, each complete cushion set had to sit, correctly sized, within the given wooden structure. That meant that I had to factor in seam allowance thickness, tab thickness, and stuffing inflation. Every side had to be labeled so that I knew how to assemble it later. Since there was a slight recline on the wooden seat backs, the cushion backs did not have parallel sides. The cushions tapered, which led to some complex dimensions. This “peeled orange” effect was Not an automatic Sketchup feature (though there are pluggins that claim to do it - they didn’t work on these complex shapes) I had to manually figure out every exact radius with pinpoint accuracy. If the points didn’t line up, the patterns wouldn’t line up later.
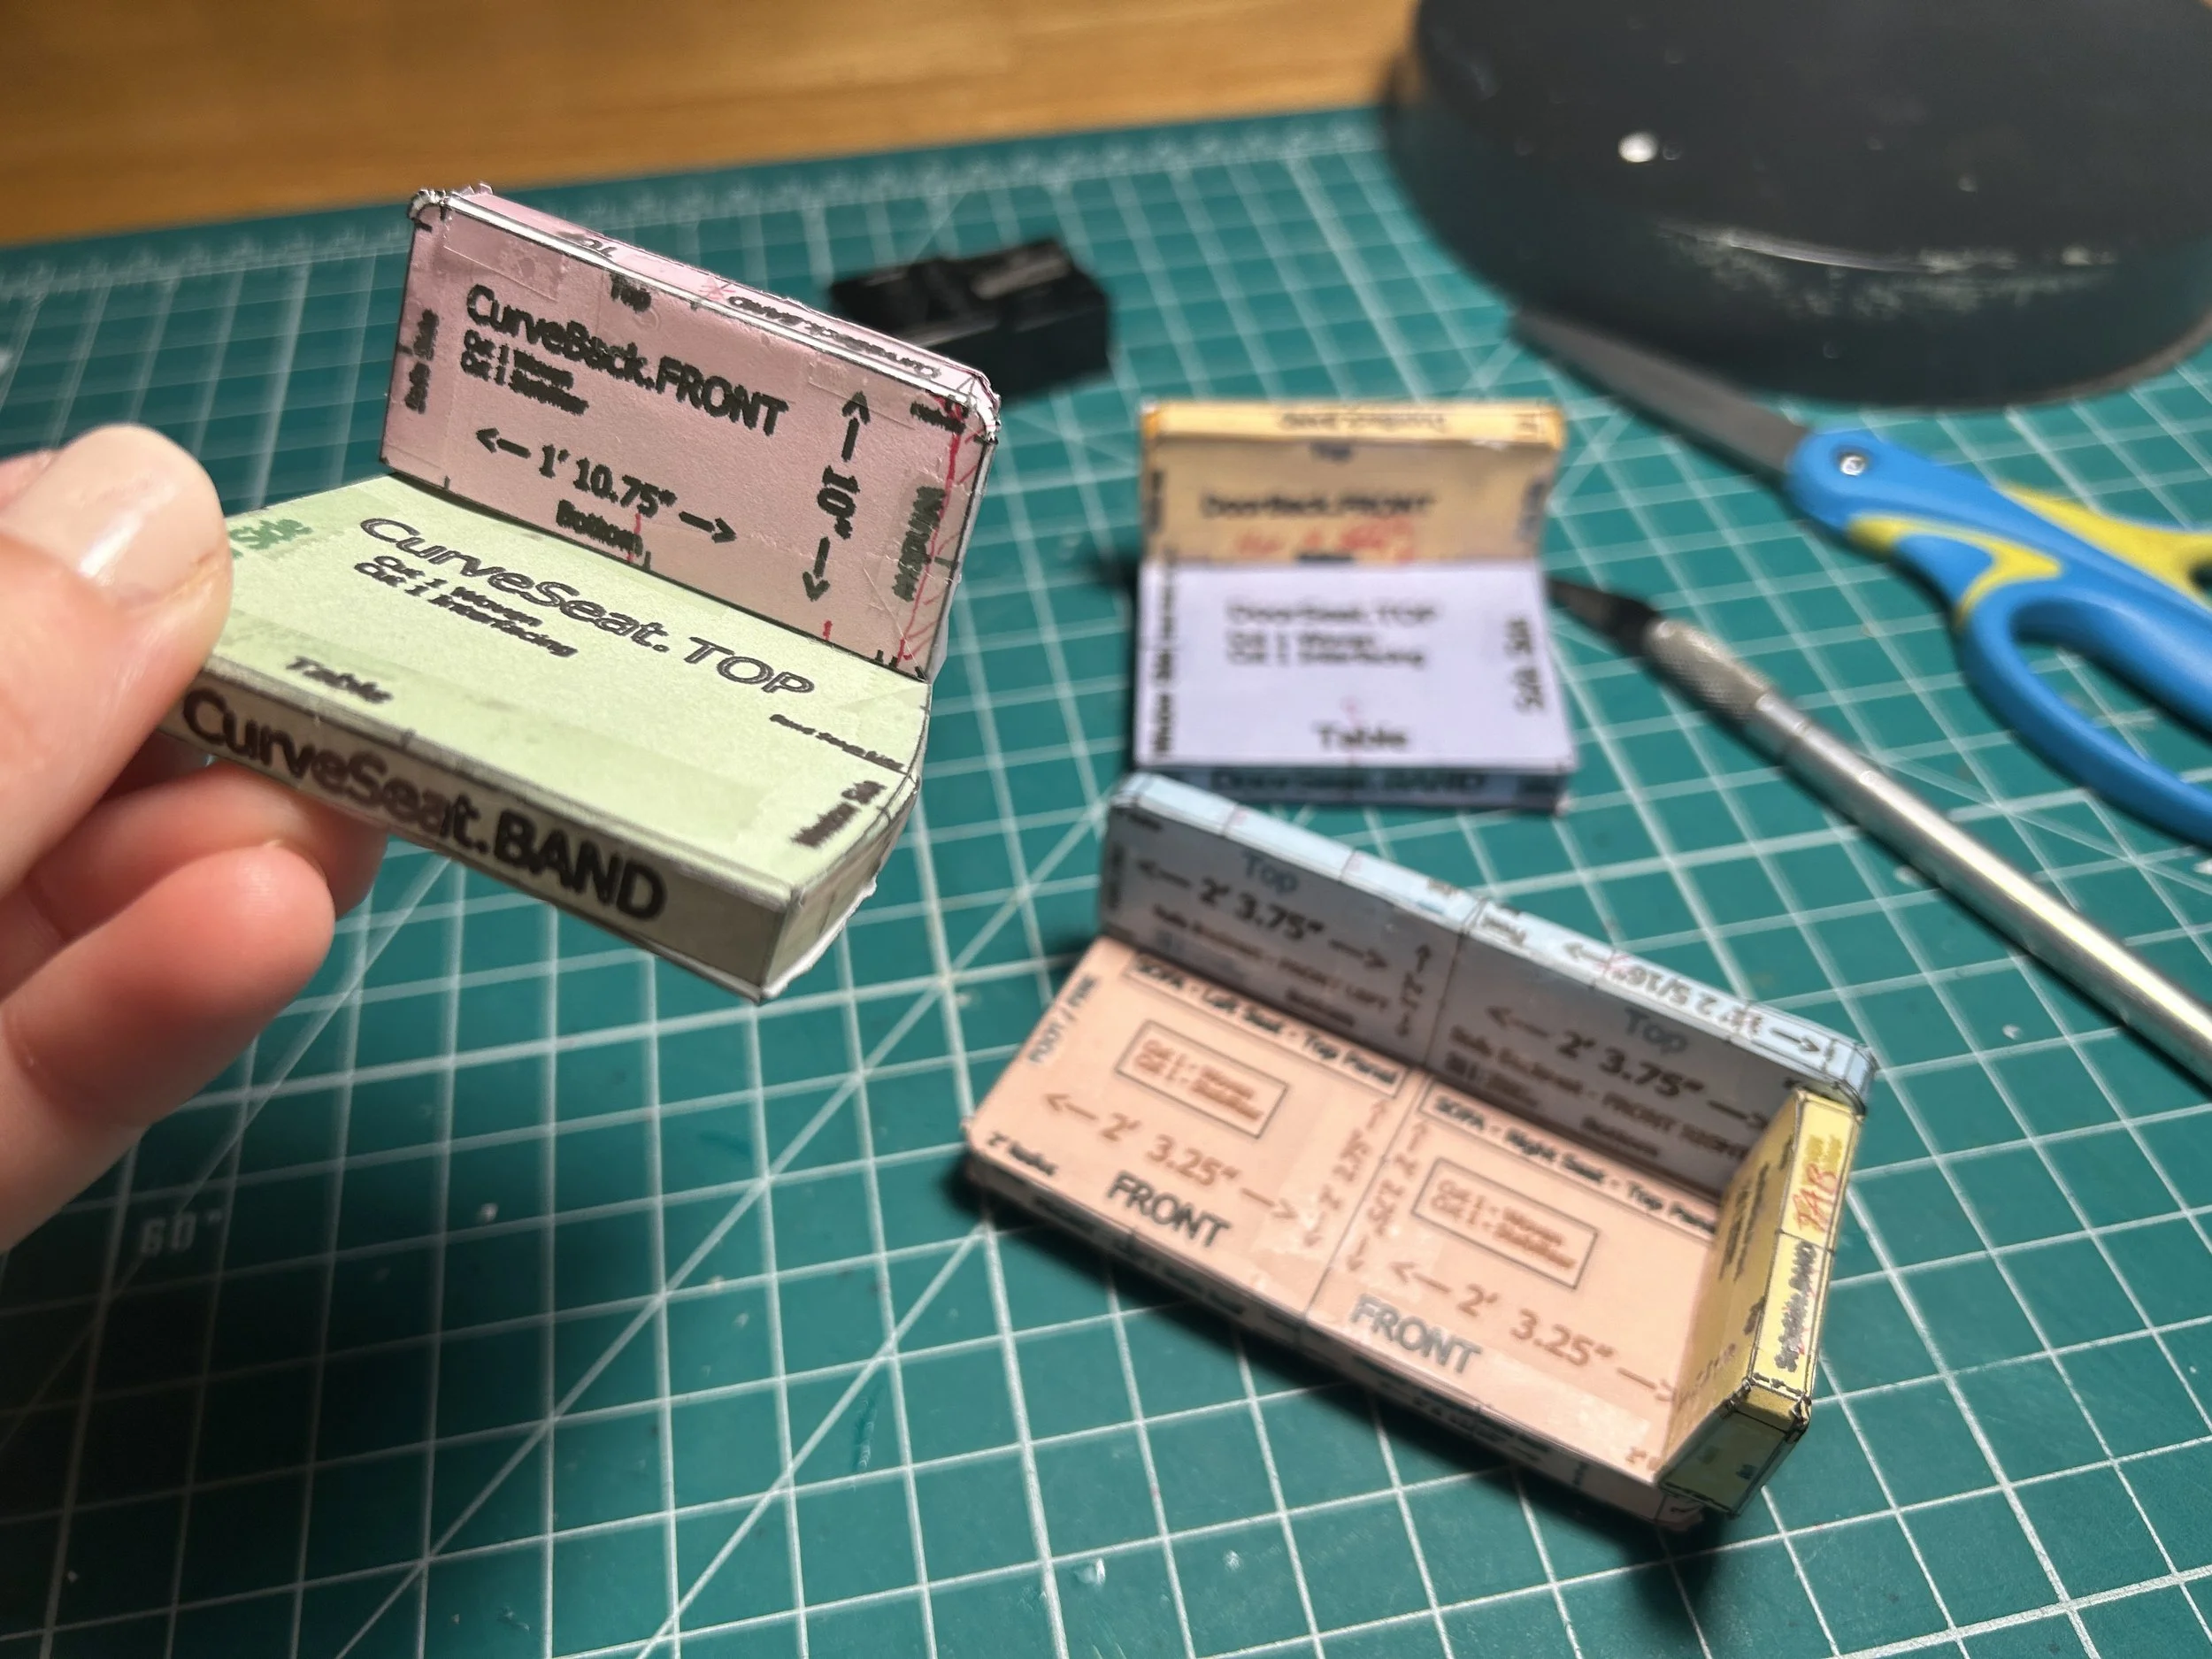
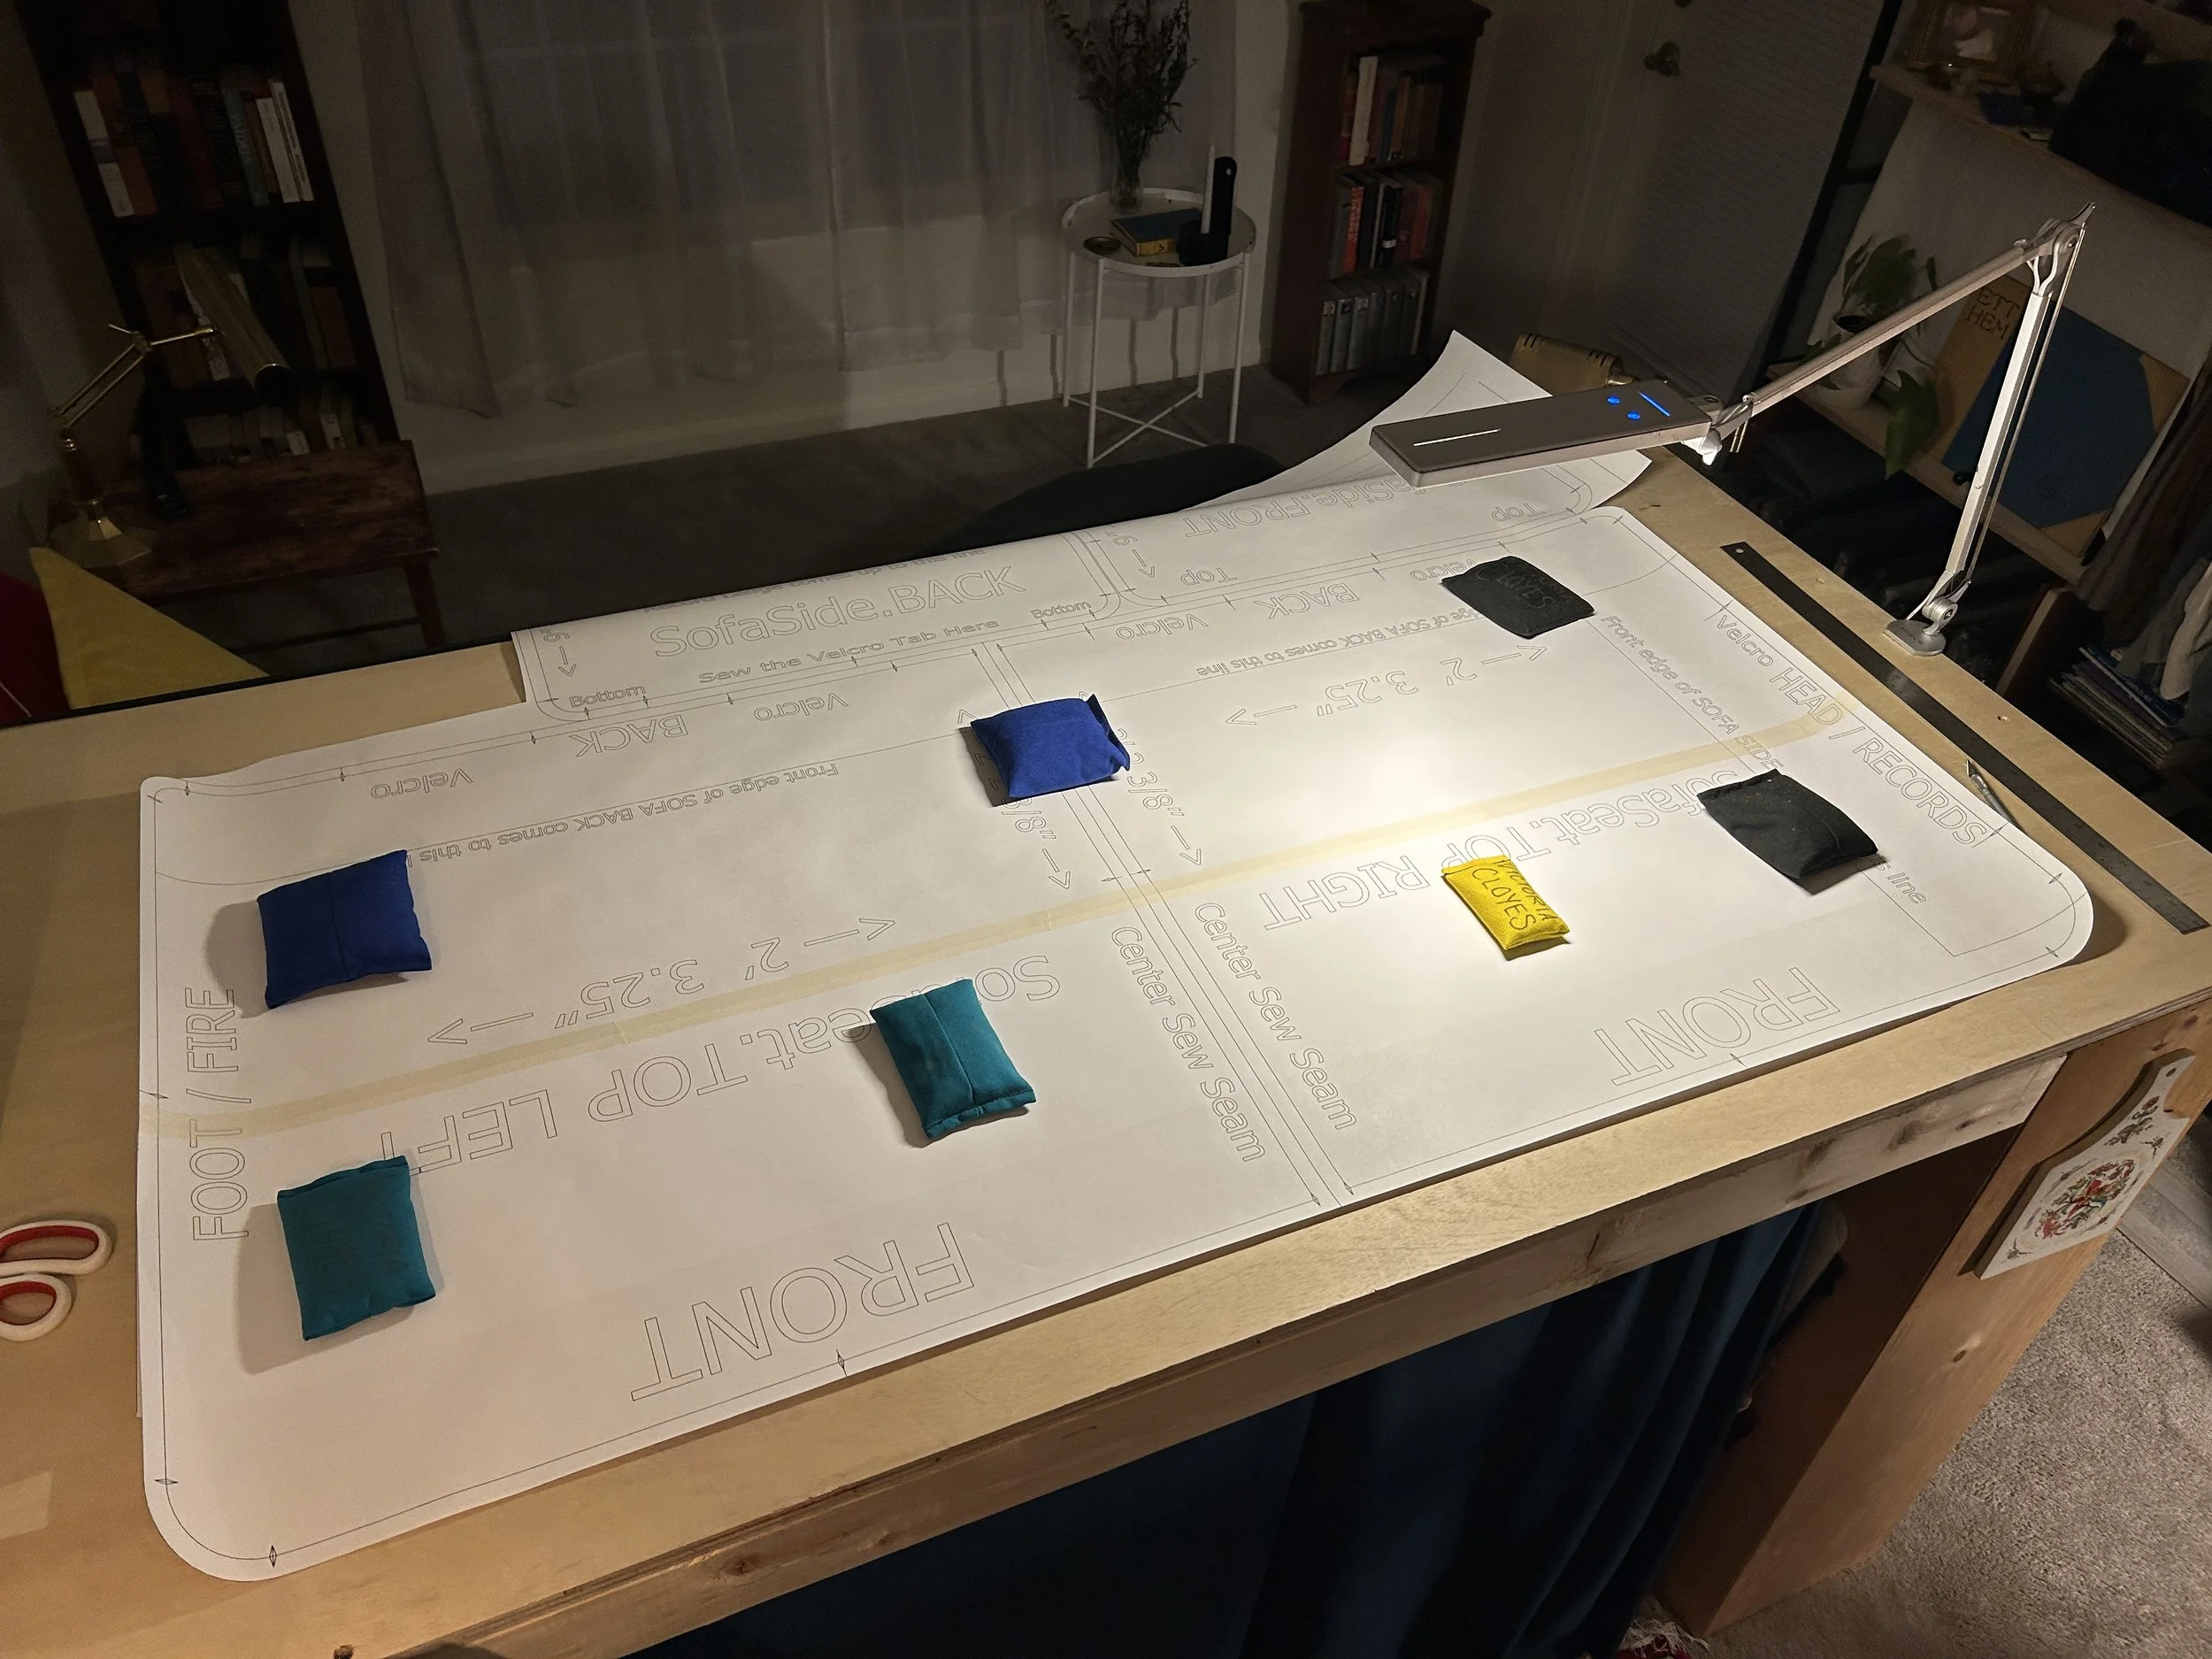
Besides making sure the patterns would function, I also wanted to make sure they would be proportionally pleasing and comfortable. I decided I would print out tiny versions of the cushions. This would enable me to check that all my points were lining up, and that I had everything oriented correctly. I ended up doing this many times, editing slightly with each iteration. Many, many hours were devoted to this, but it turned out to be critical to the success of the final upholstery.
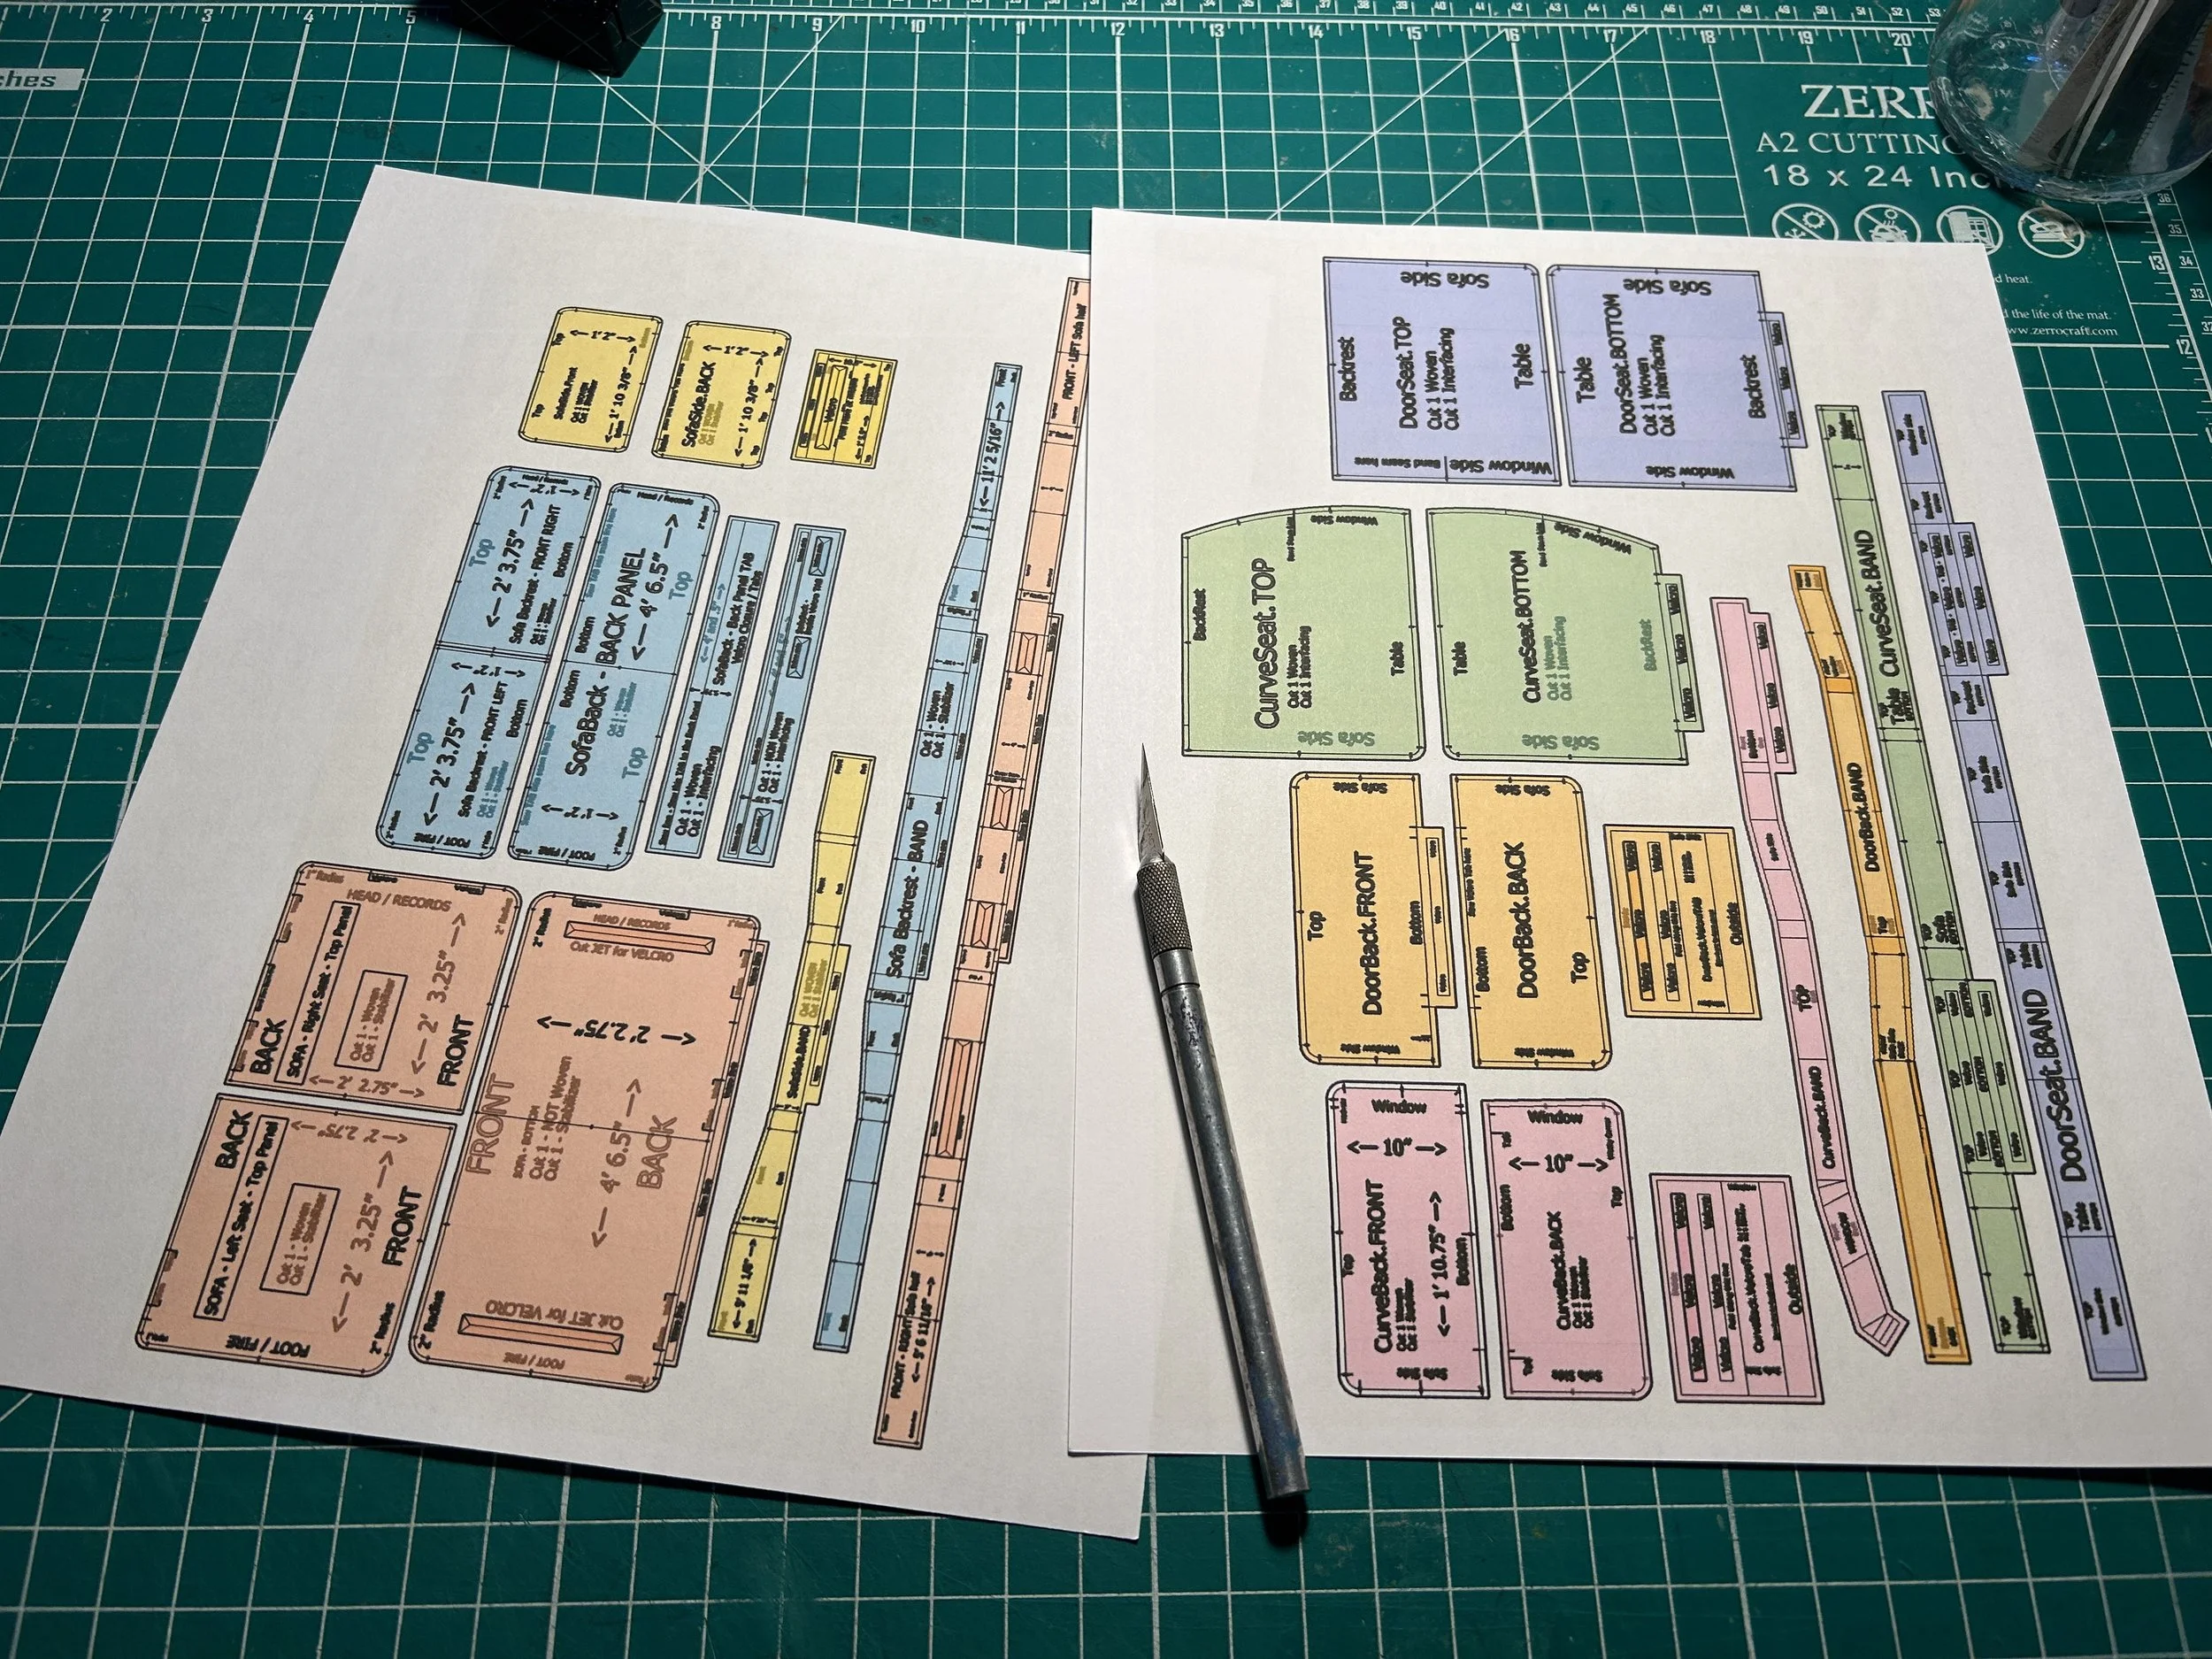


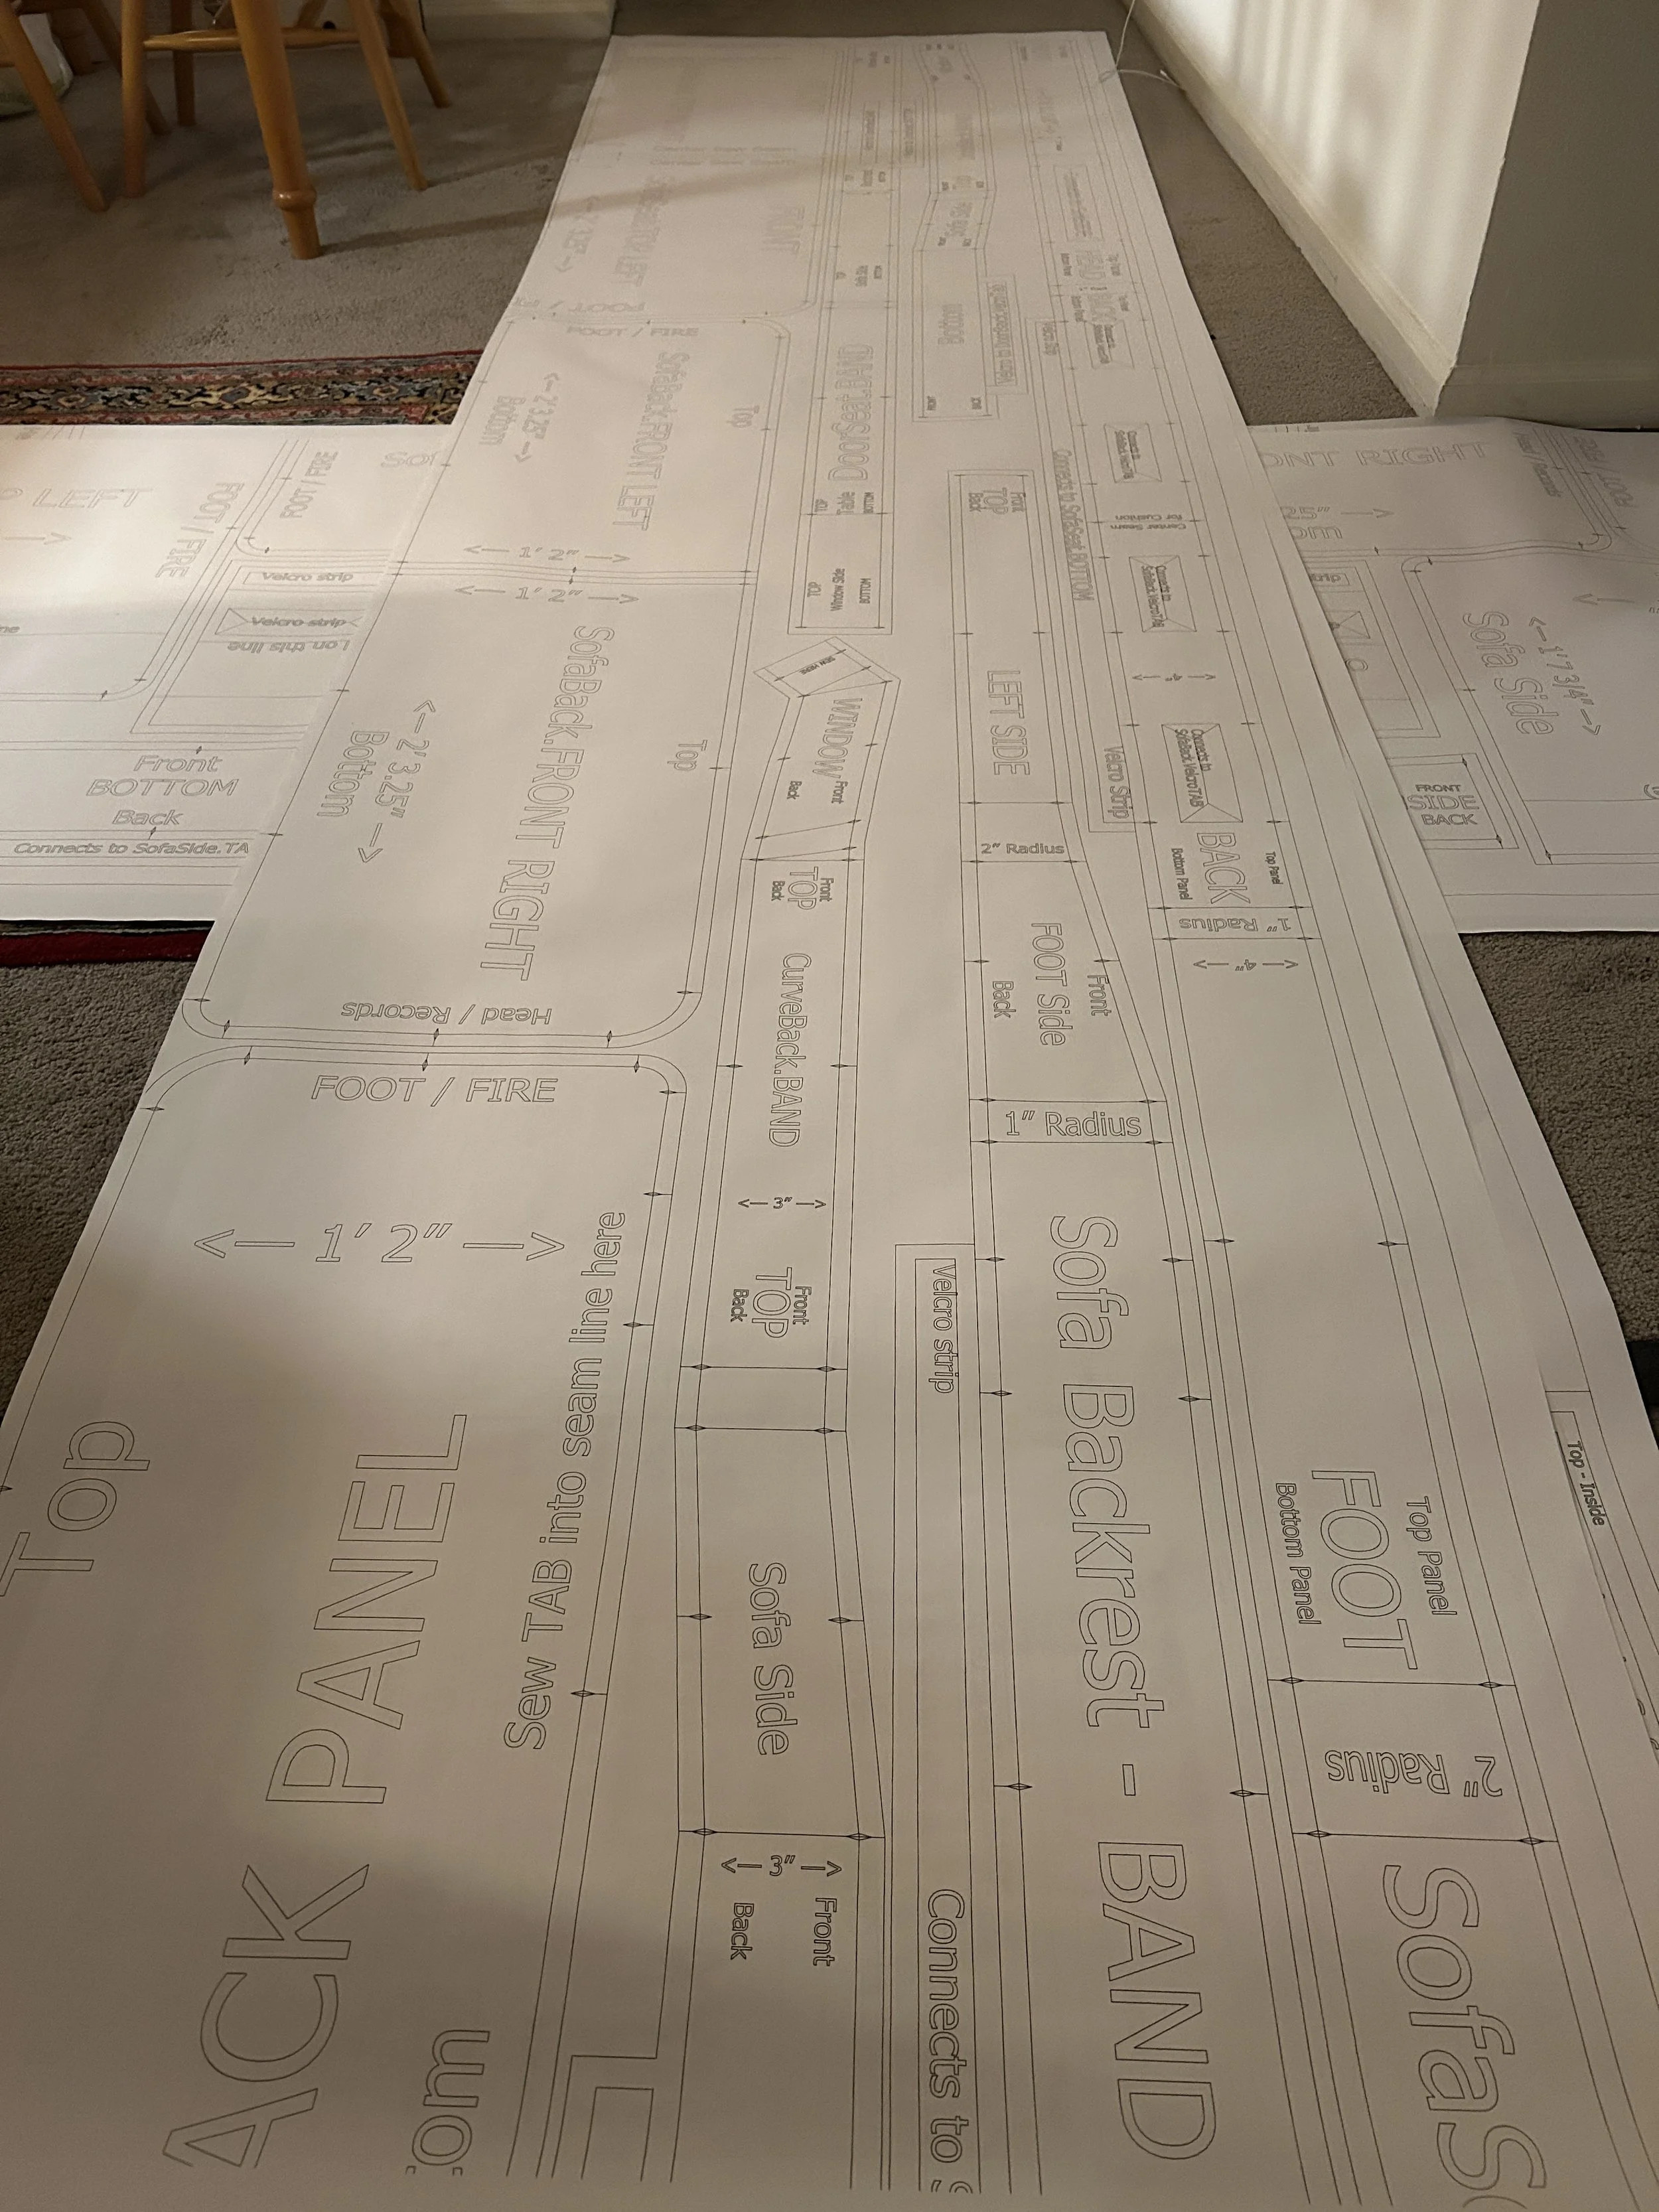
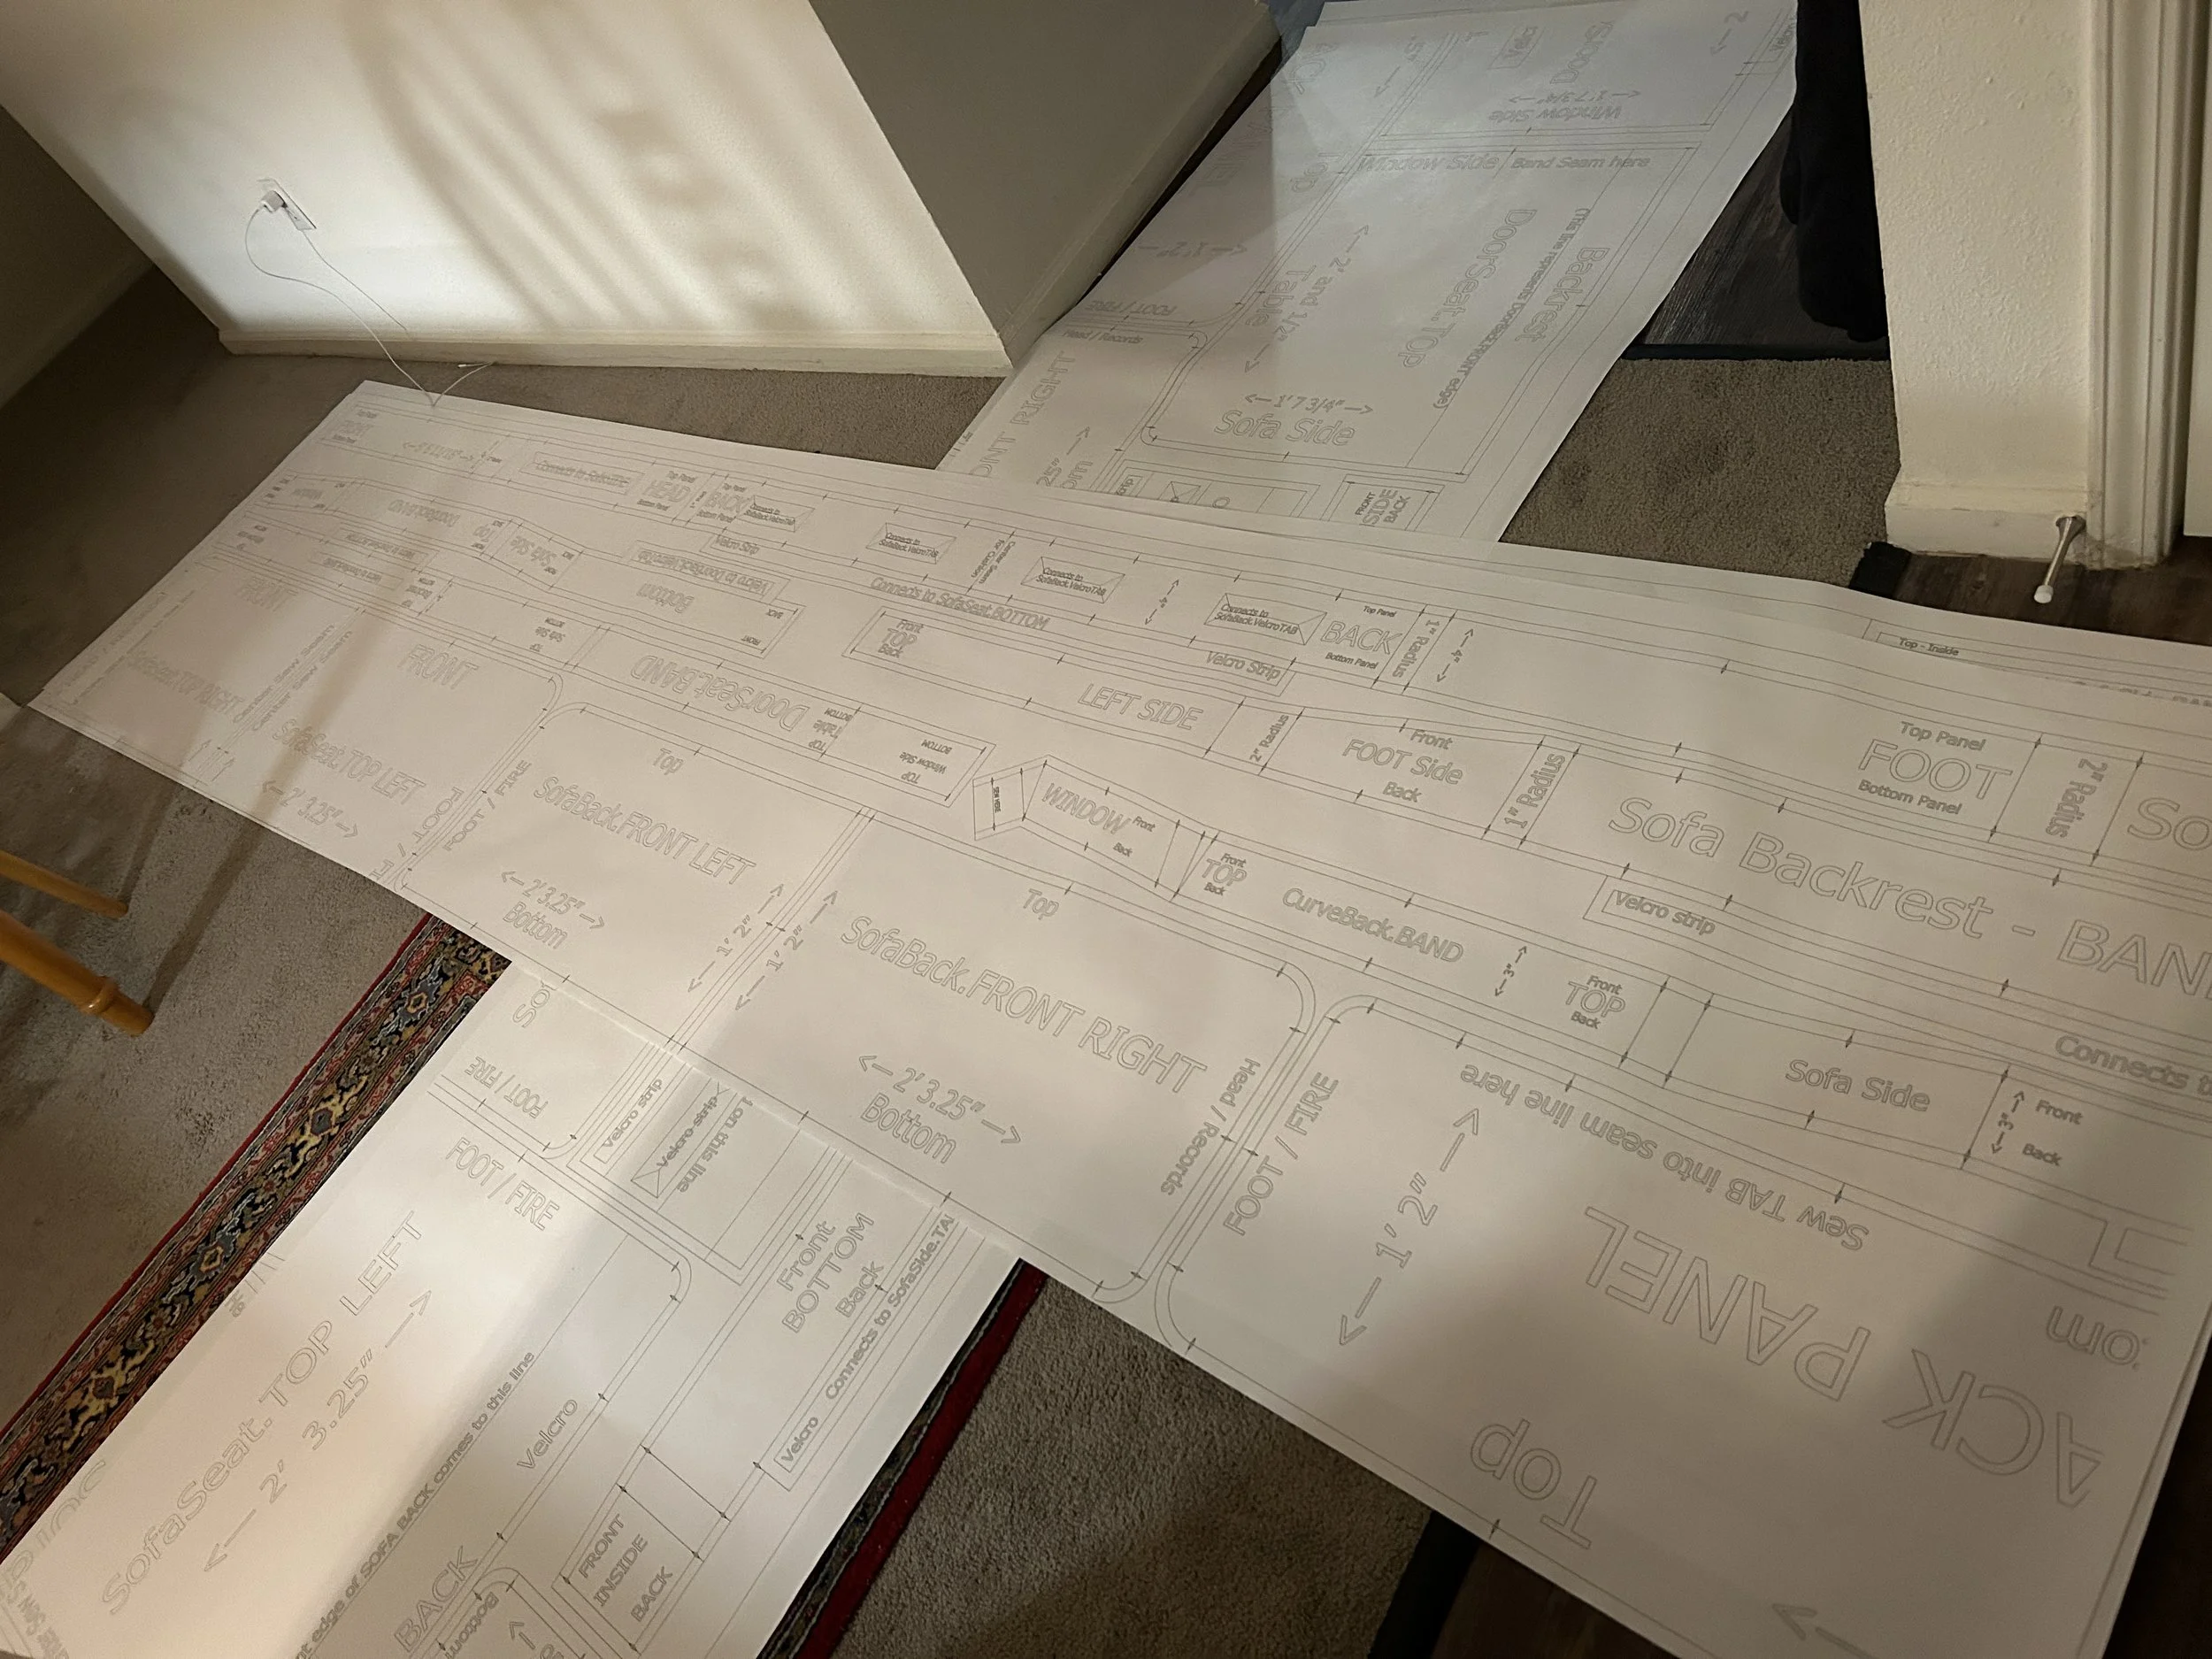
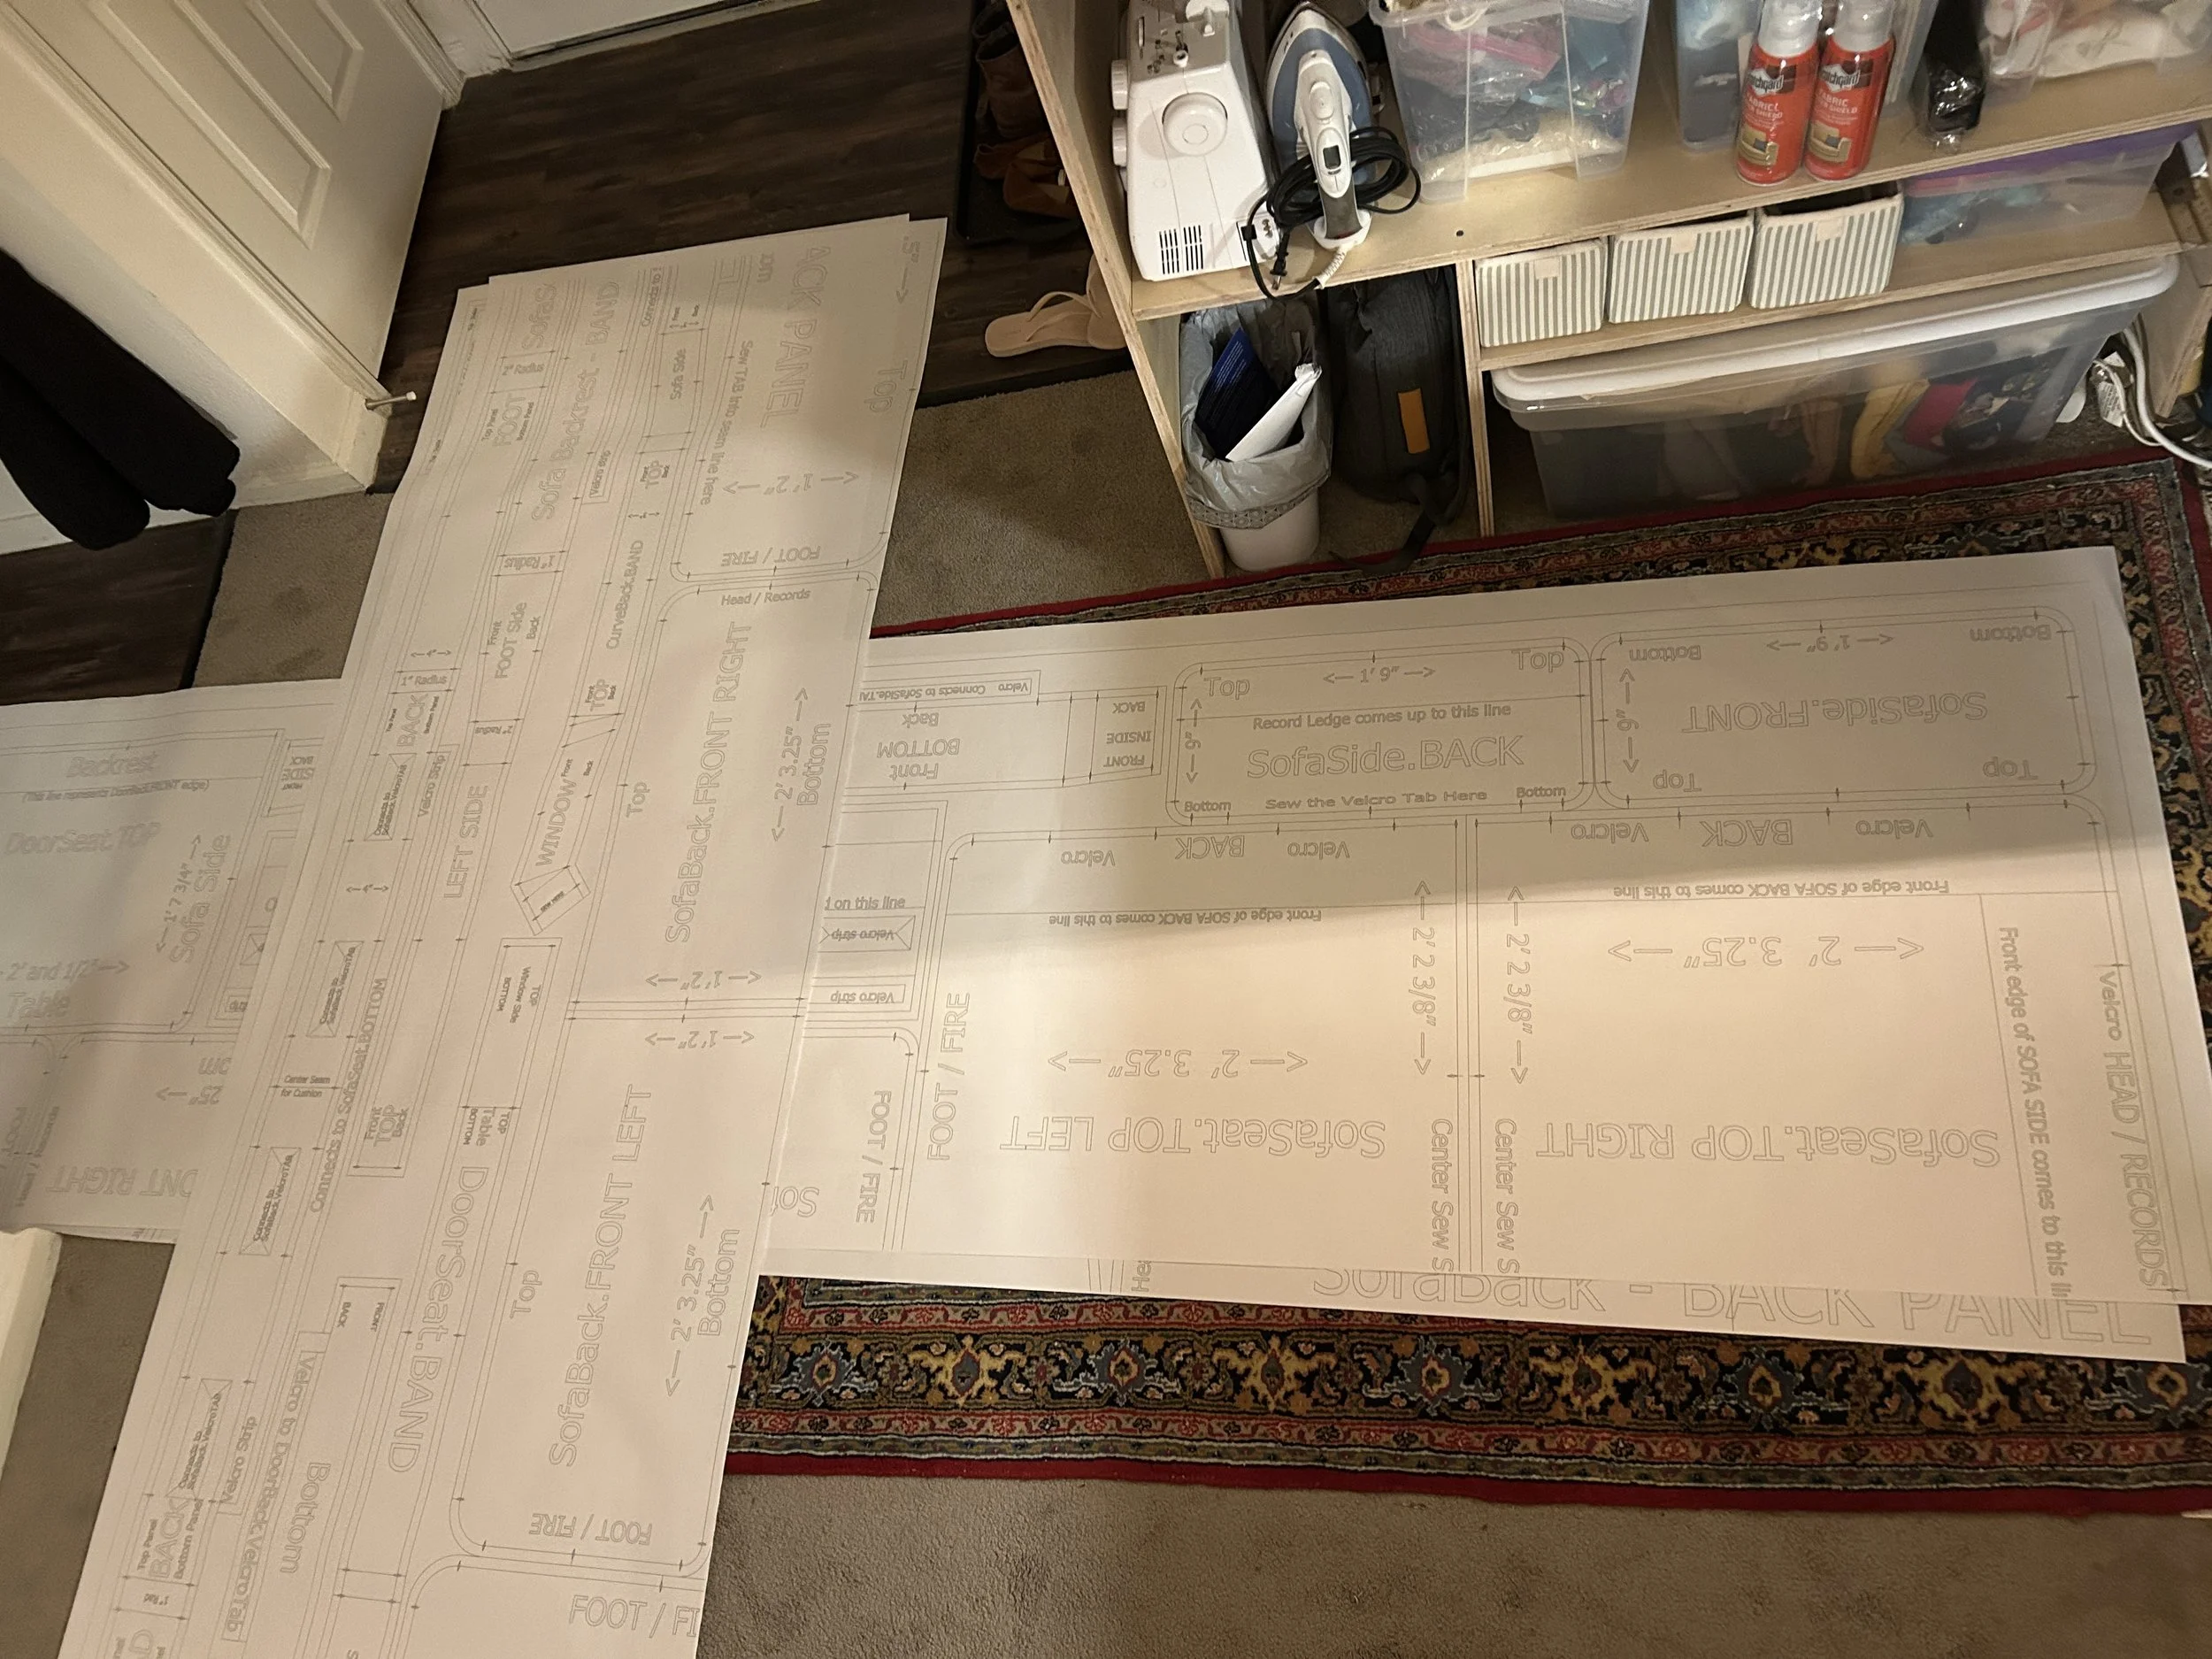
Once I felt good about the proportions, relationships, and sewing points for every cushion - it was time to think about the real fabric. I bought the entire bolt of upholstery fabric that Joanns had - before I did all this work. We knew we liked it, and I hoped it would be enough. It ended up being Comically close… I had Daniel mail me back the sample piece I cut for him to audition in the airstream. Every inch would be required. I tetrised my sketchup pieces onto the digital bolt, and prepared to print out the pieces on the plotter at Staples.

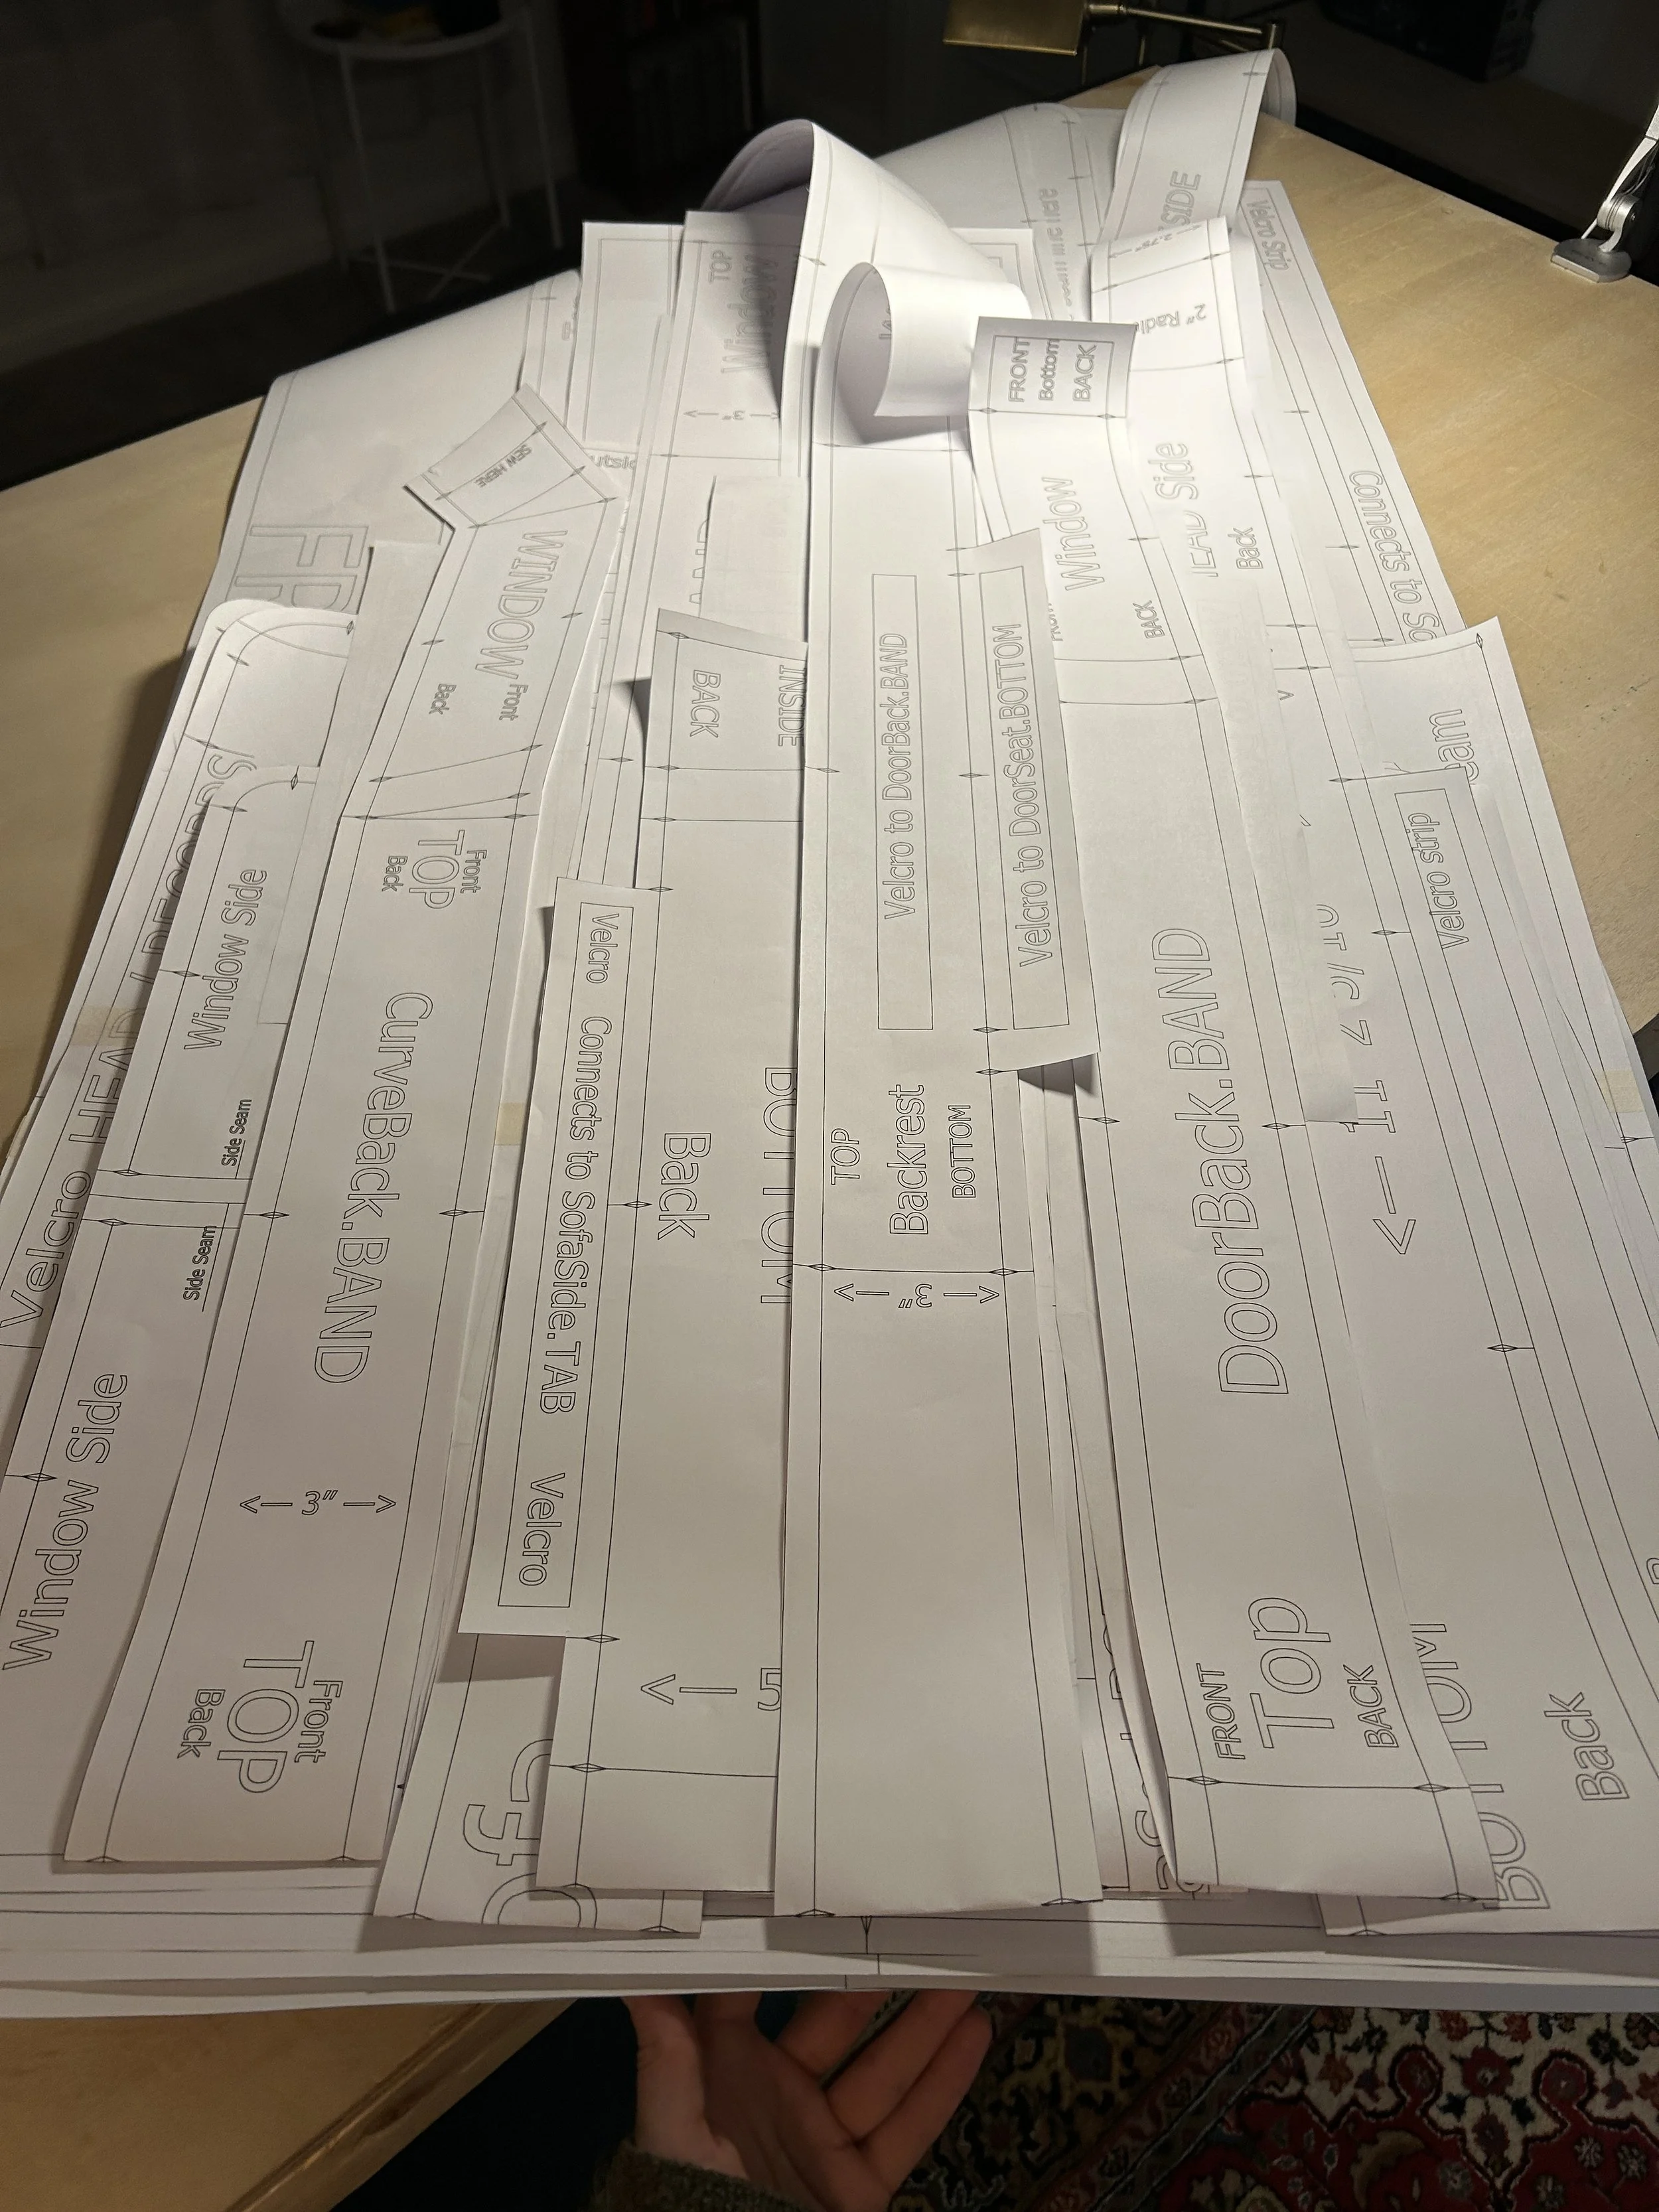
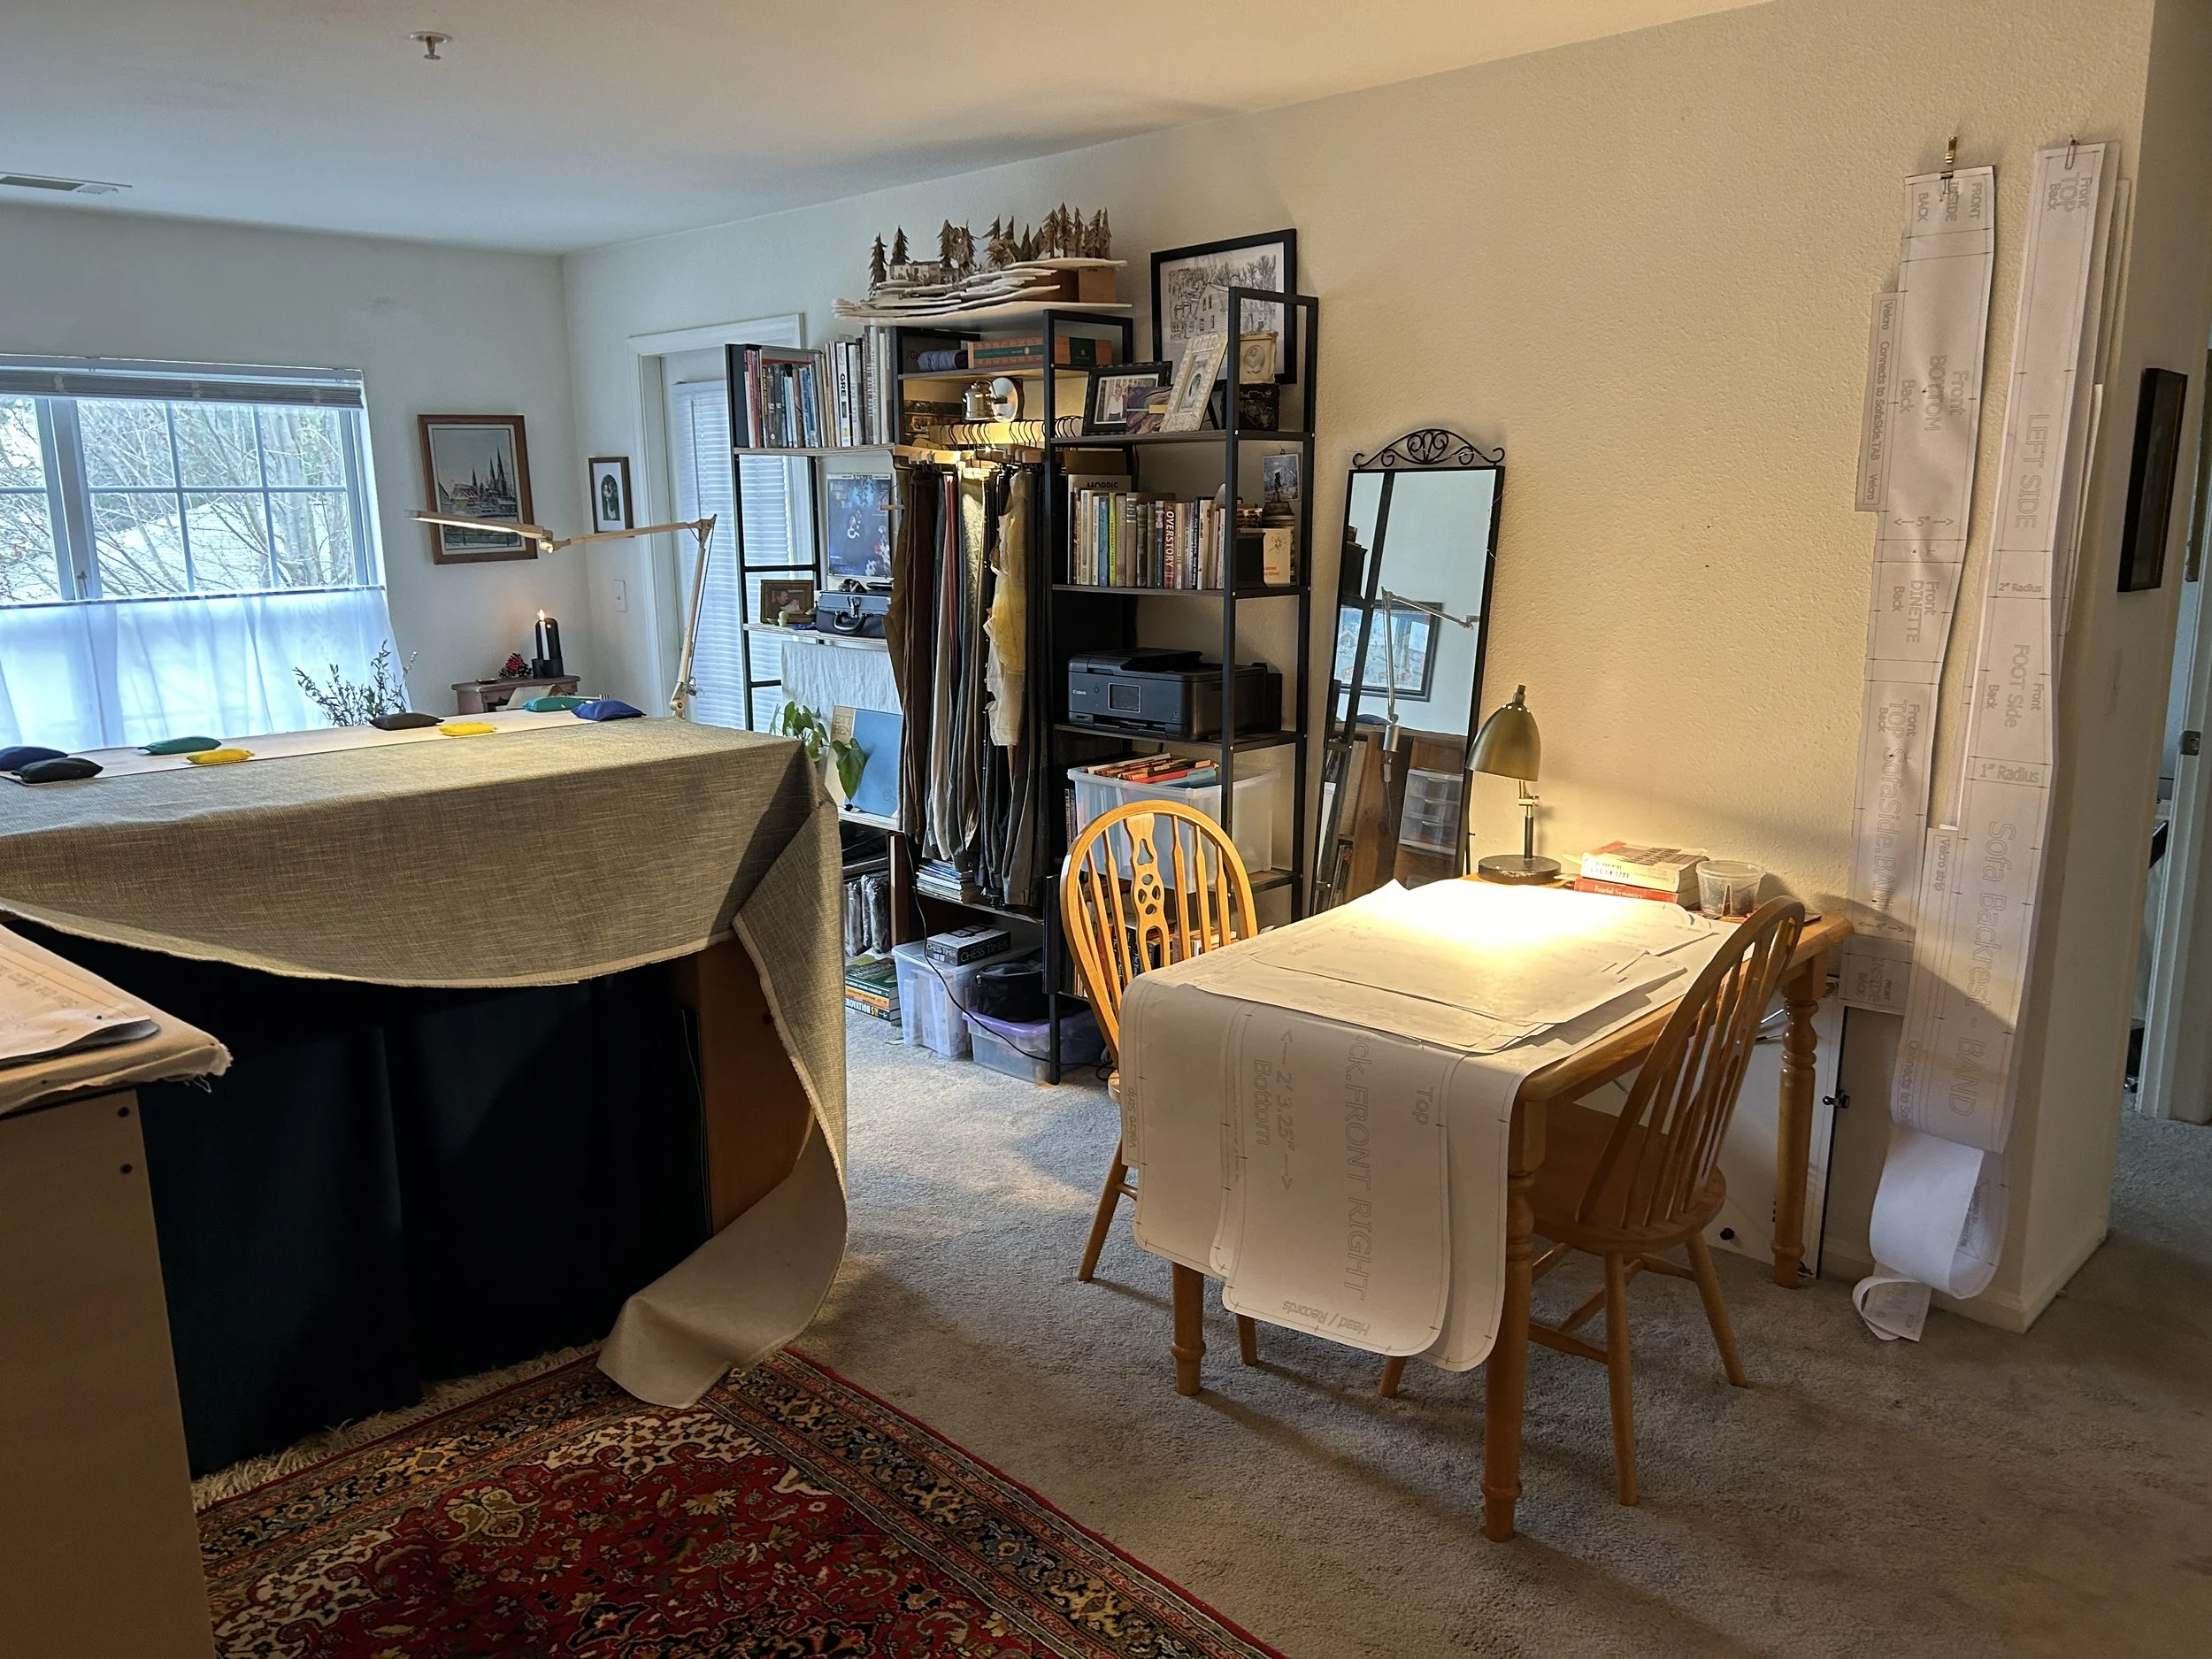
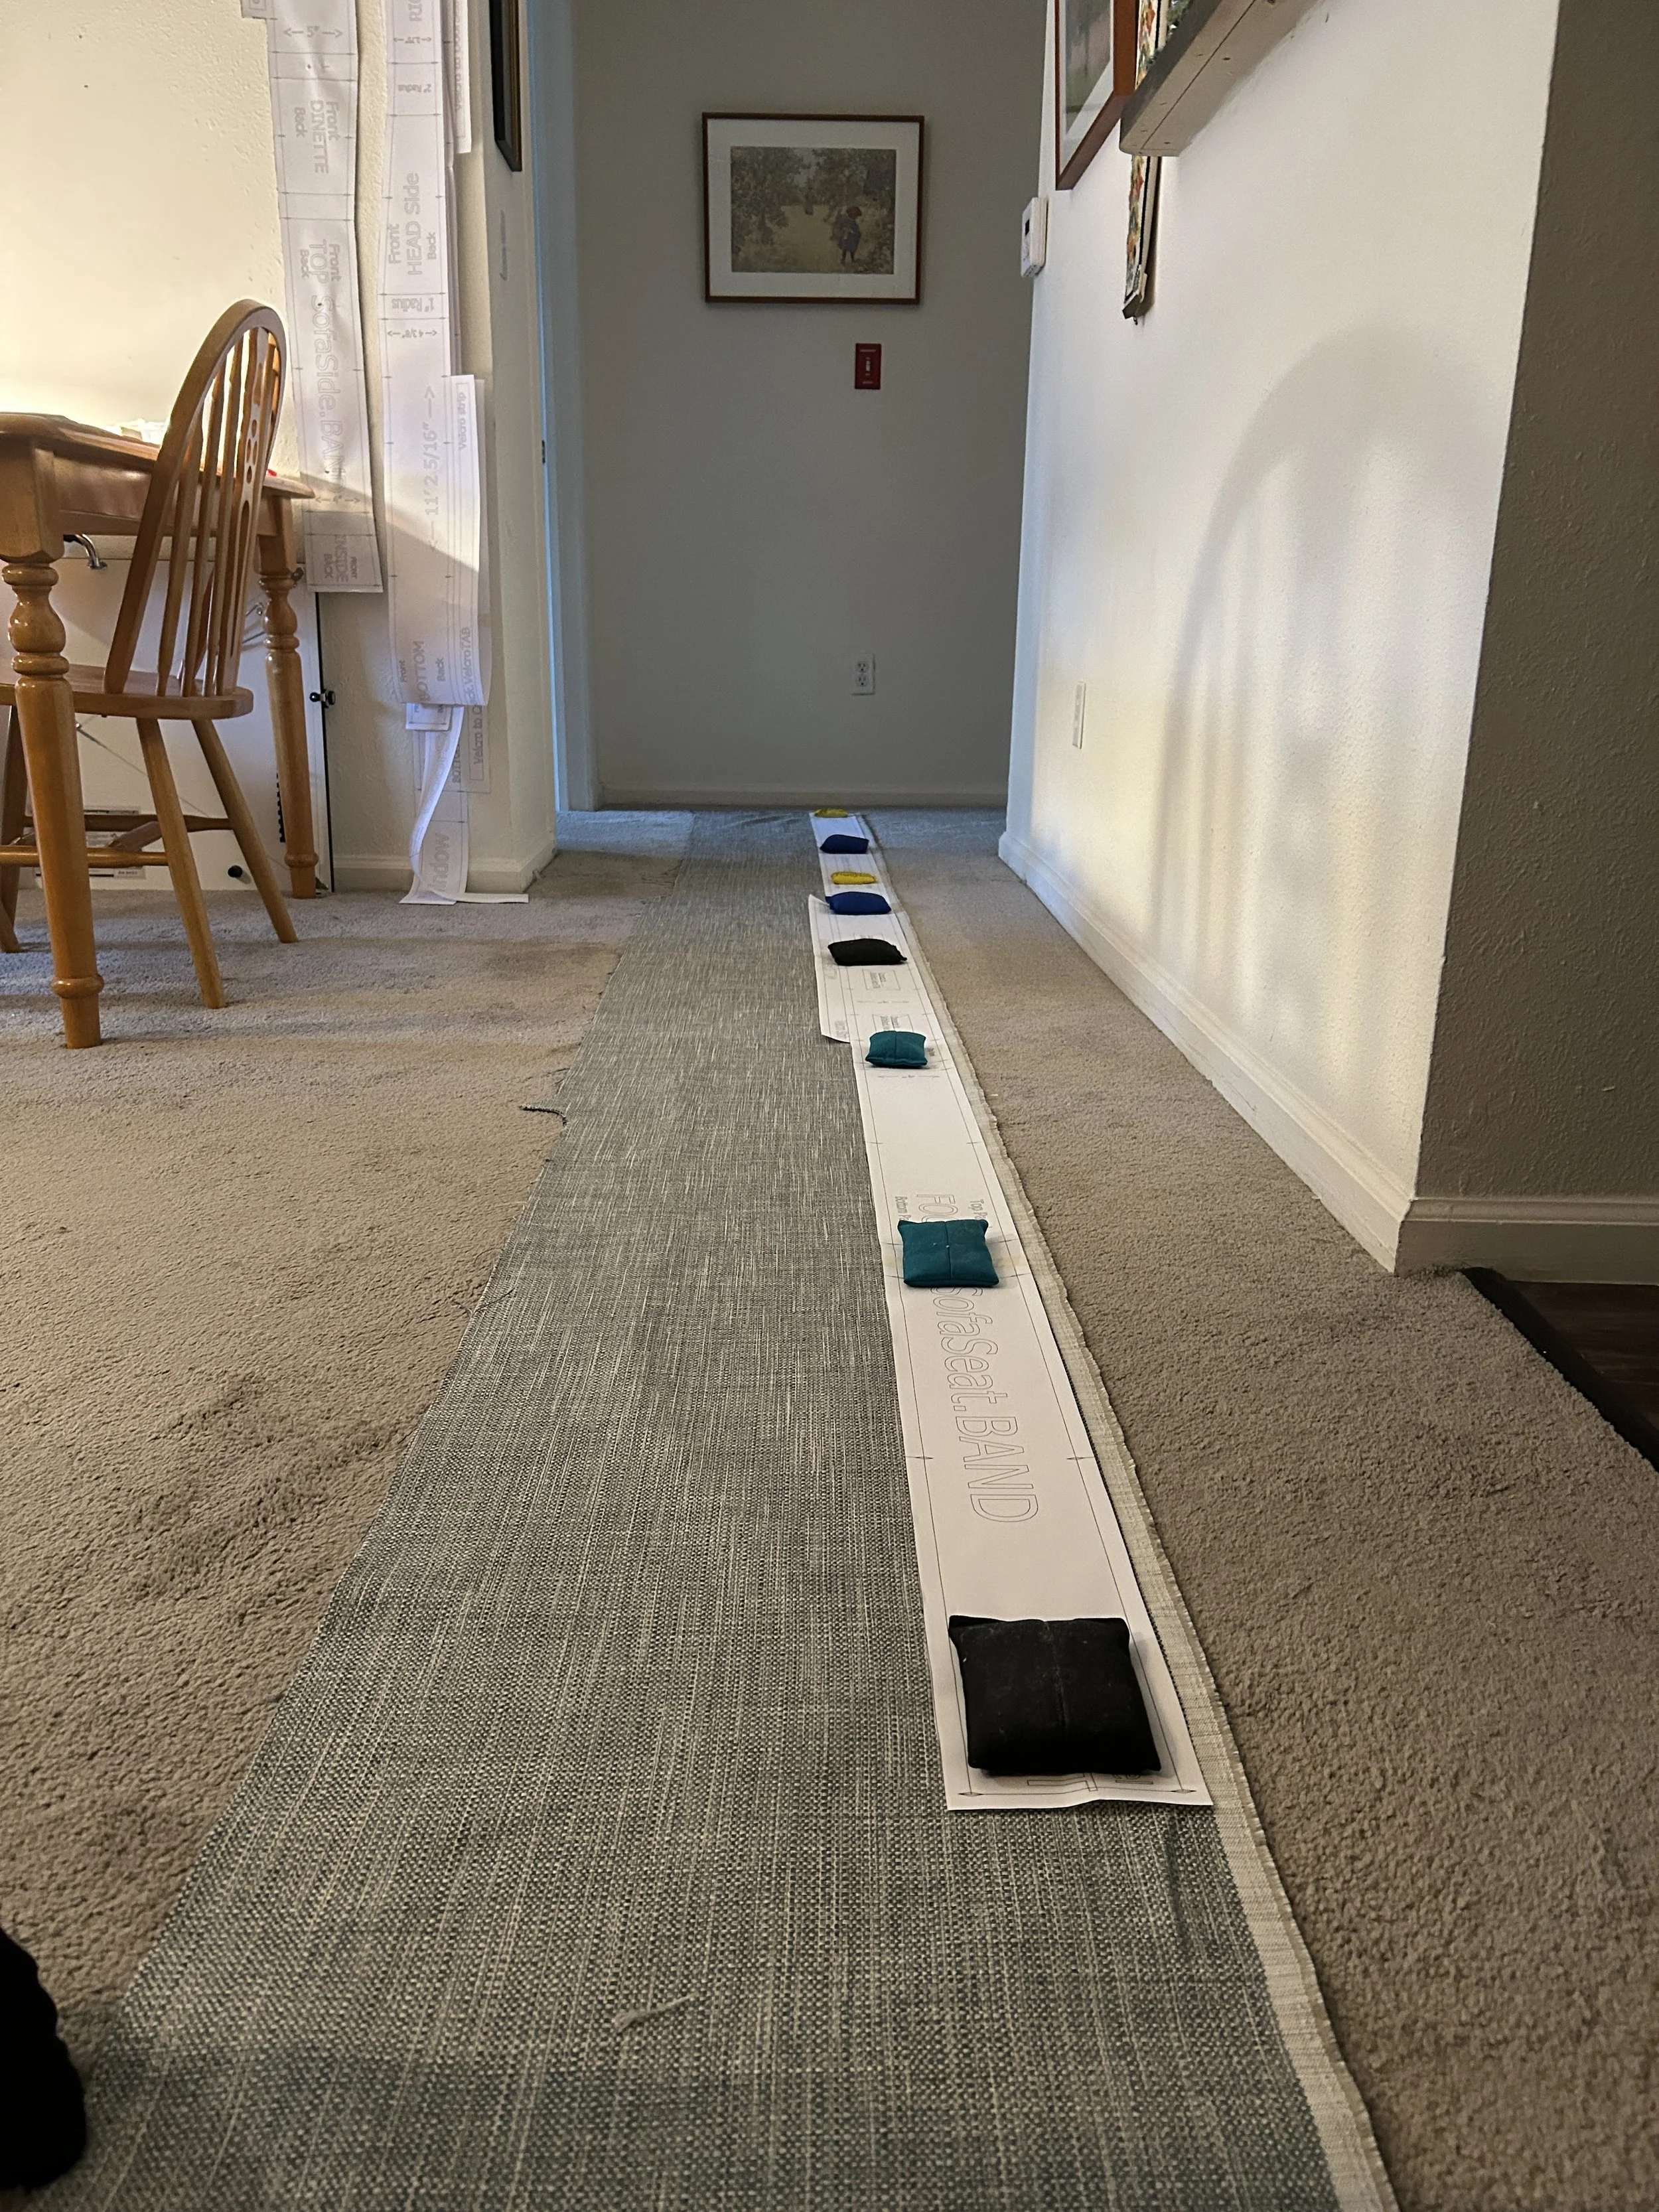
After many trips to Staples, and many formatting efforts - the tech and I figured out how to print everything in scale. I would end up having to tile, tape and cut multiple overlapping pieces. They were so long, I had no floor space in my apartment long enough to accommodate them. I had to cut and assemble in phases, praying that nothing got confused in the process.

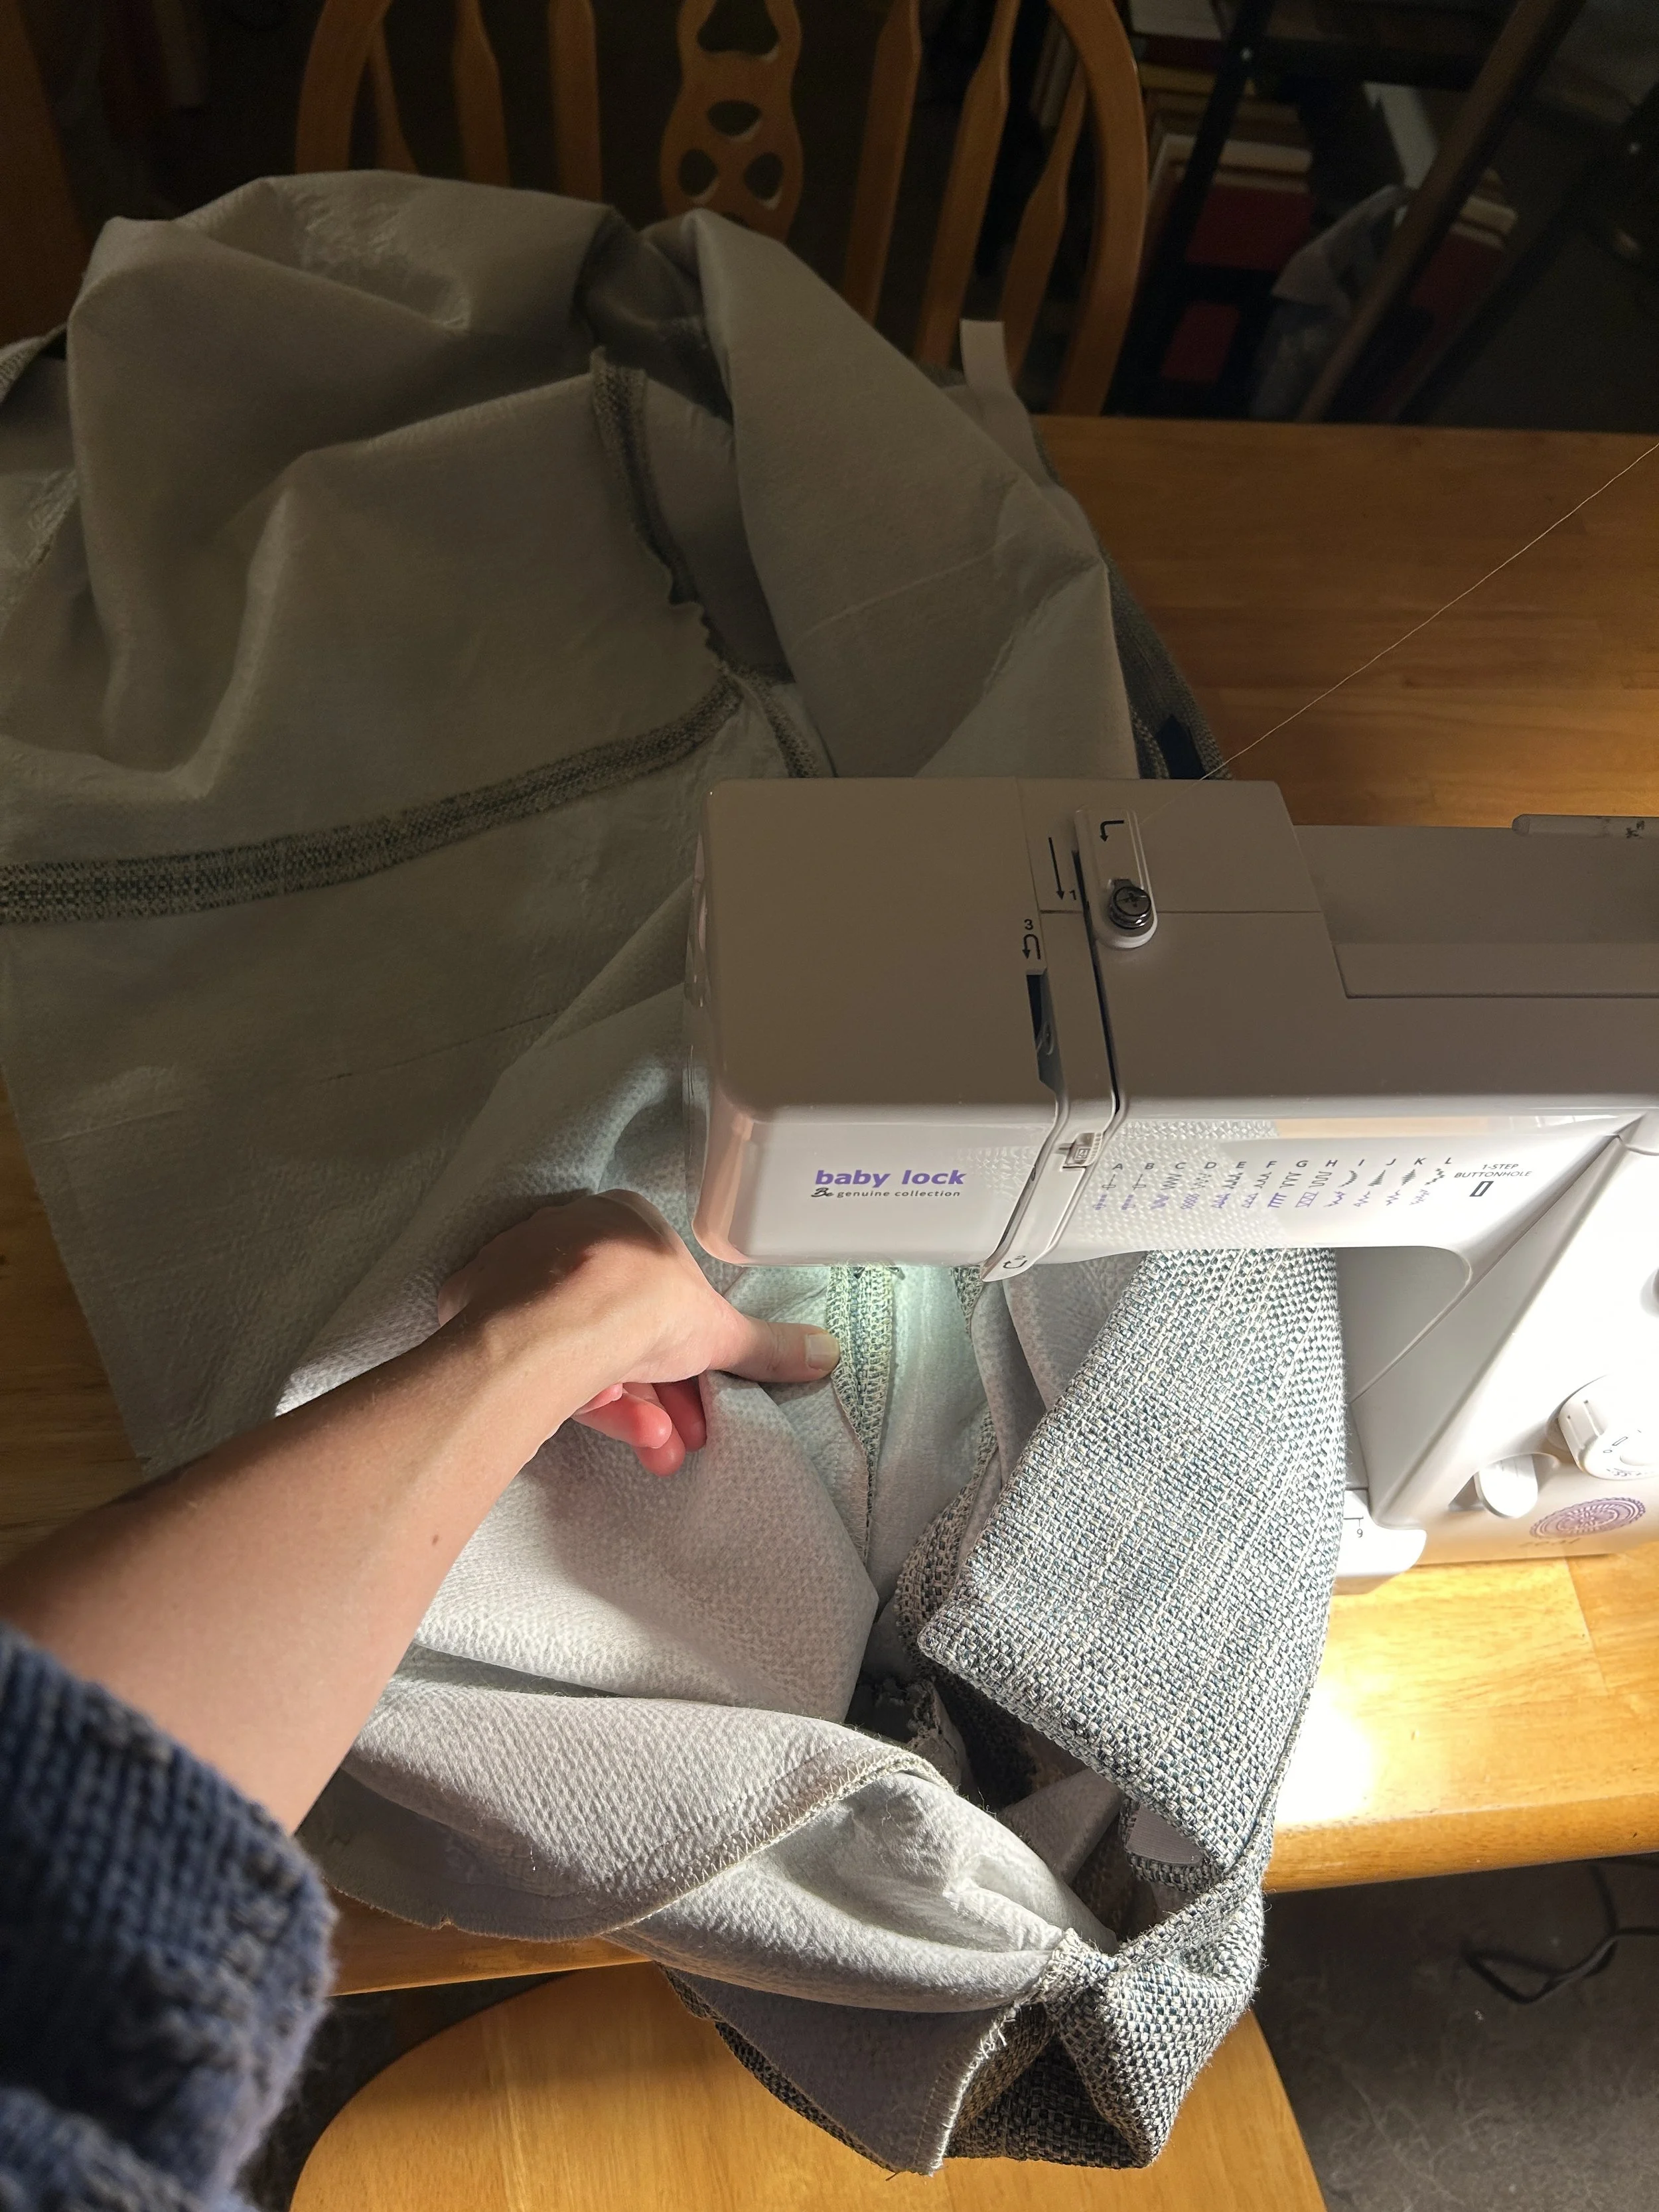
Now it was time to cut the real fabric. I was so nervous. First, I affixed fusible interfacing to stabilize everything. Then, I started cutting. It took many days just to cut all the pieces. There was no margin for error. Somehow, somehow! Every piece was successfully cut correctly, and every notch lined up exactly. Hallelujah.


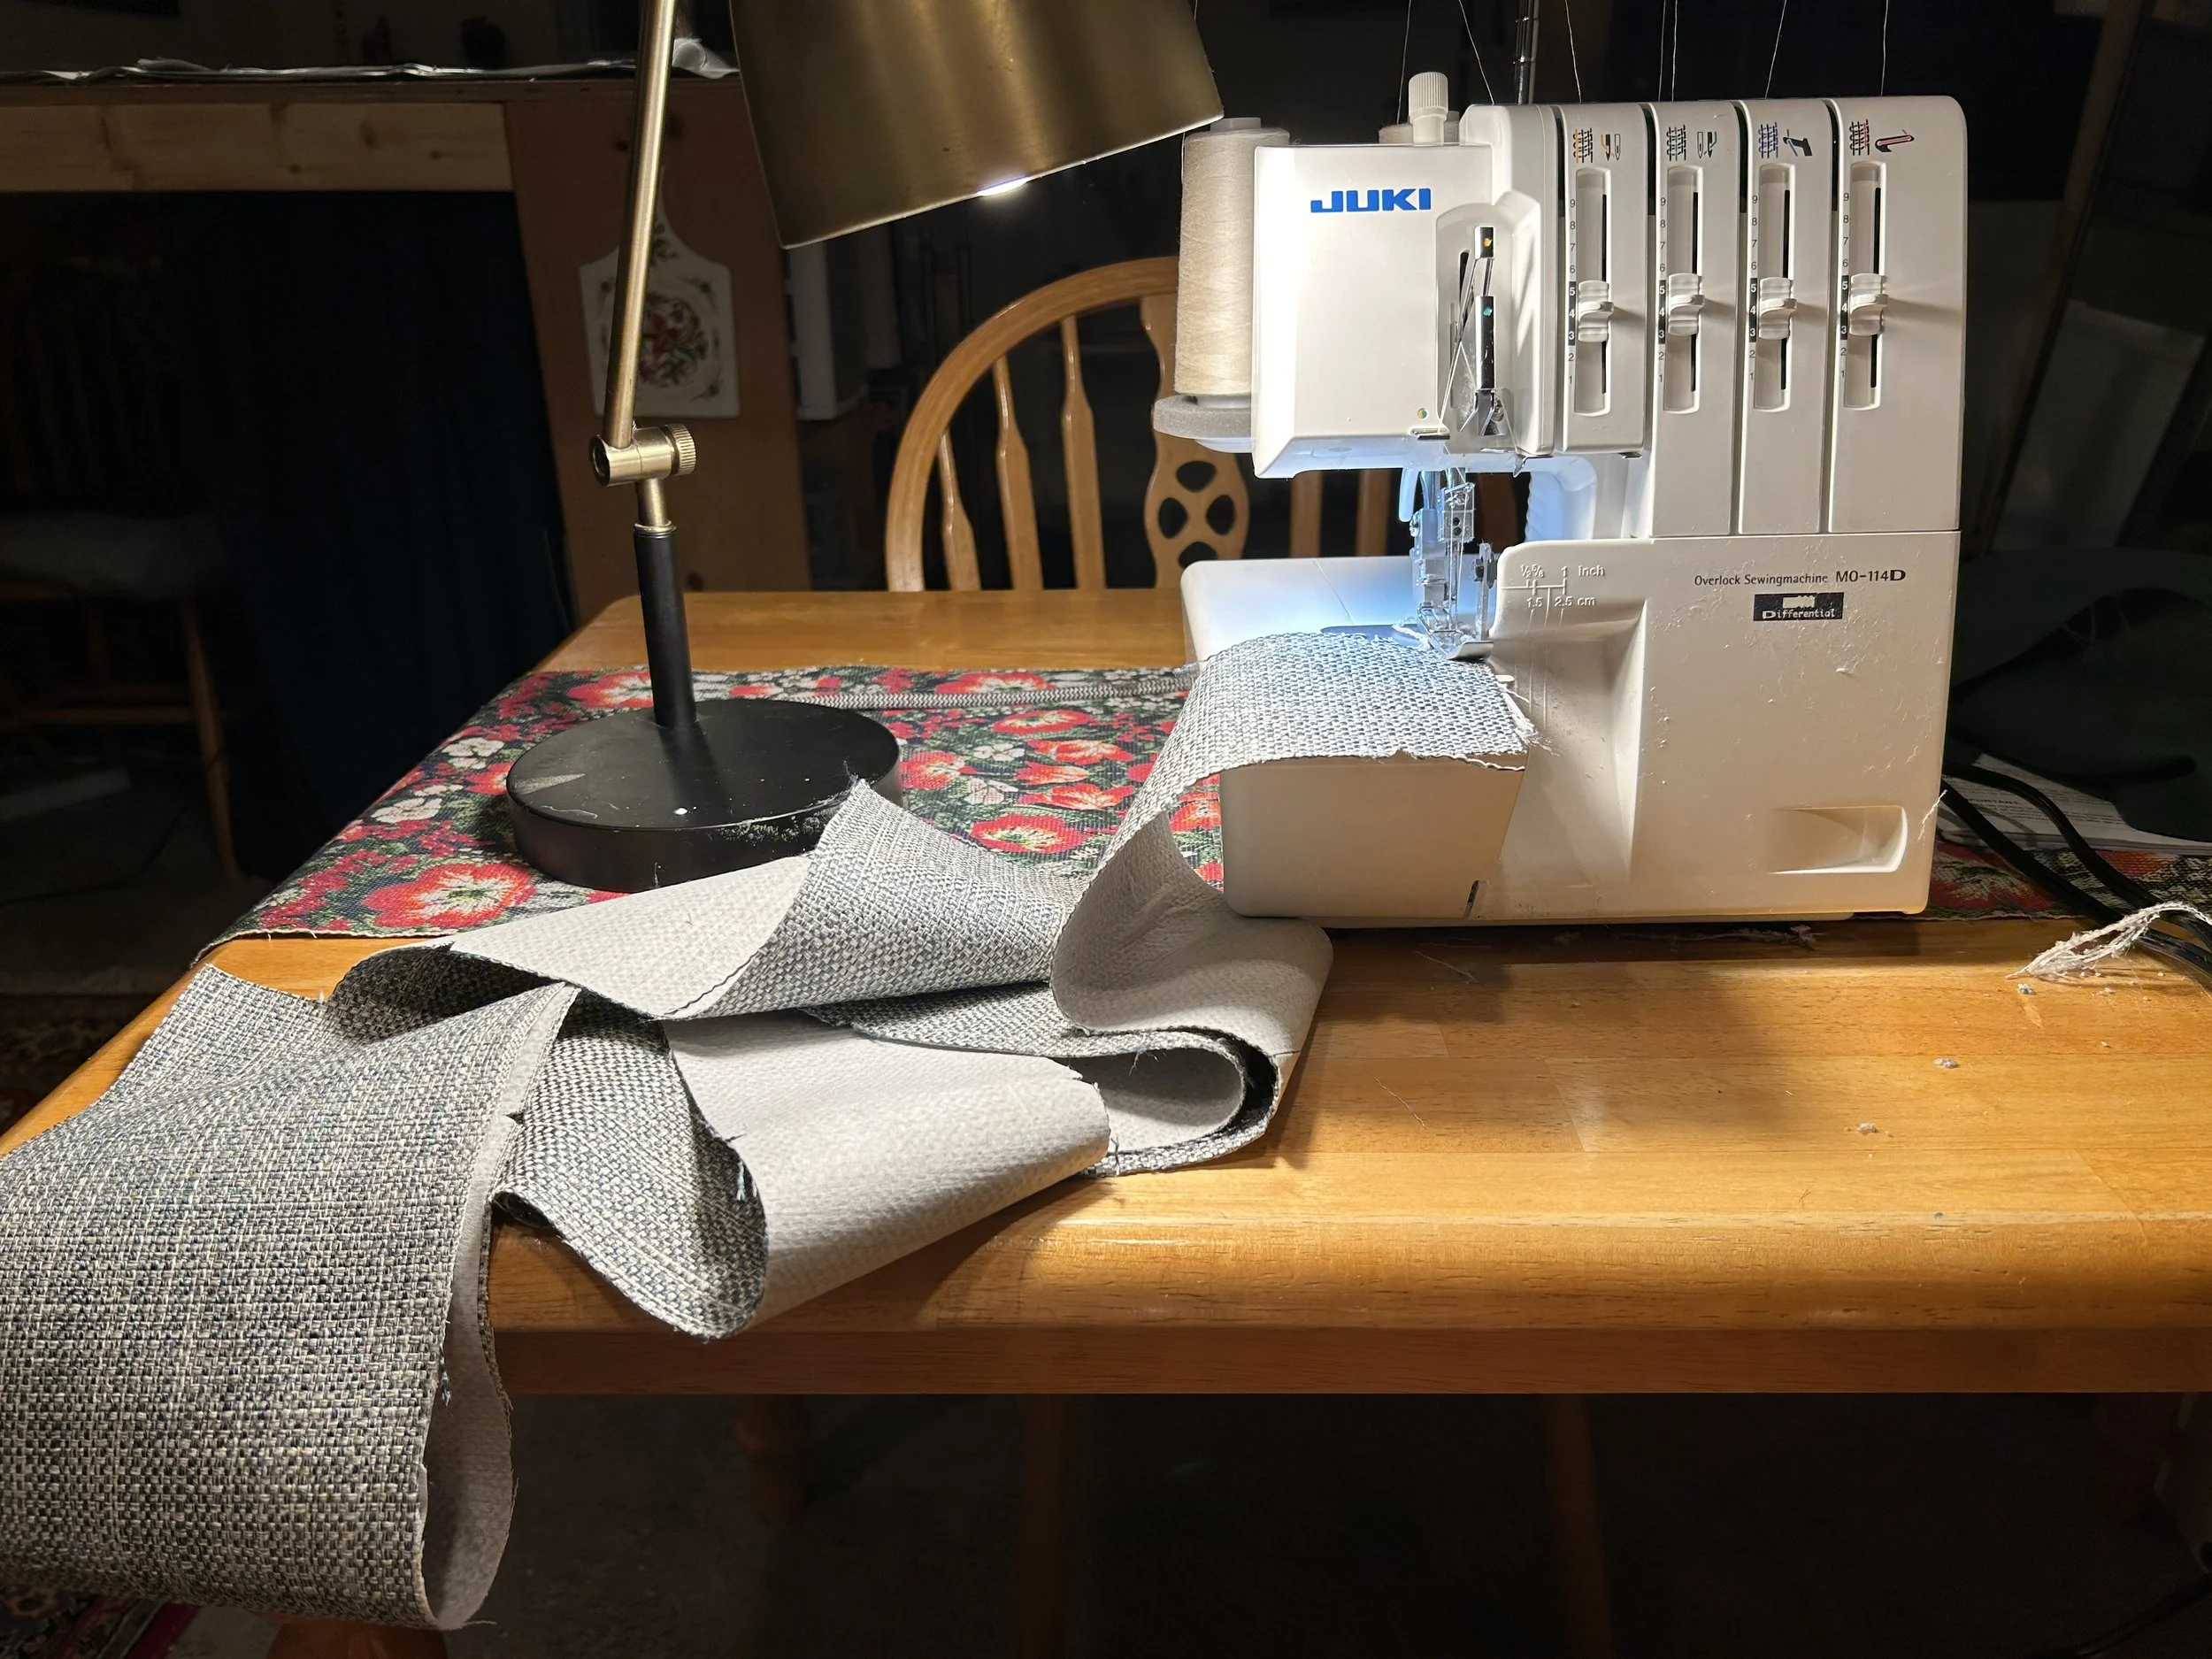
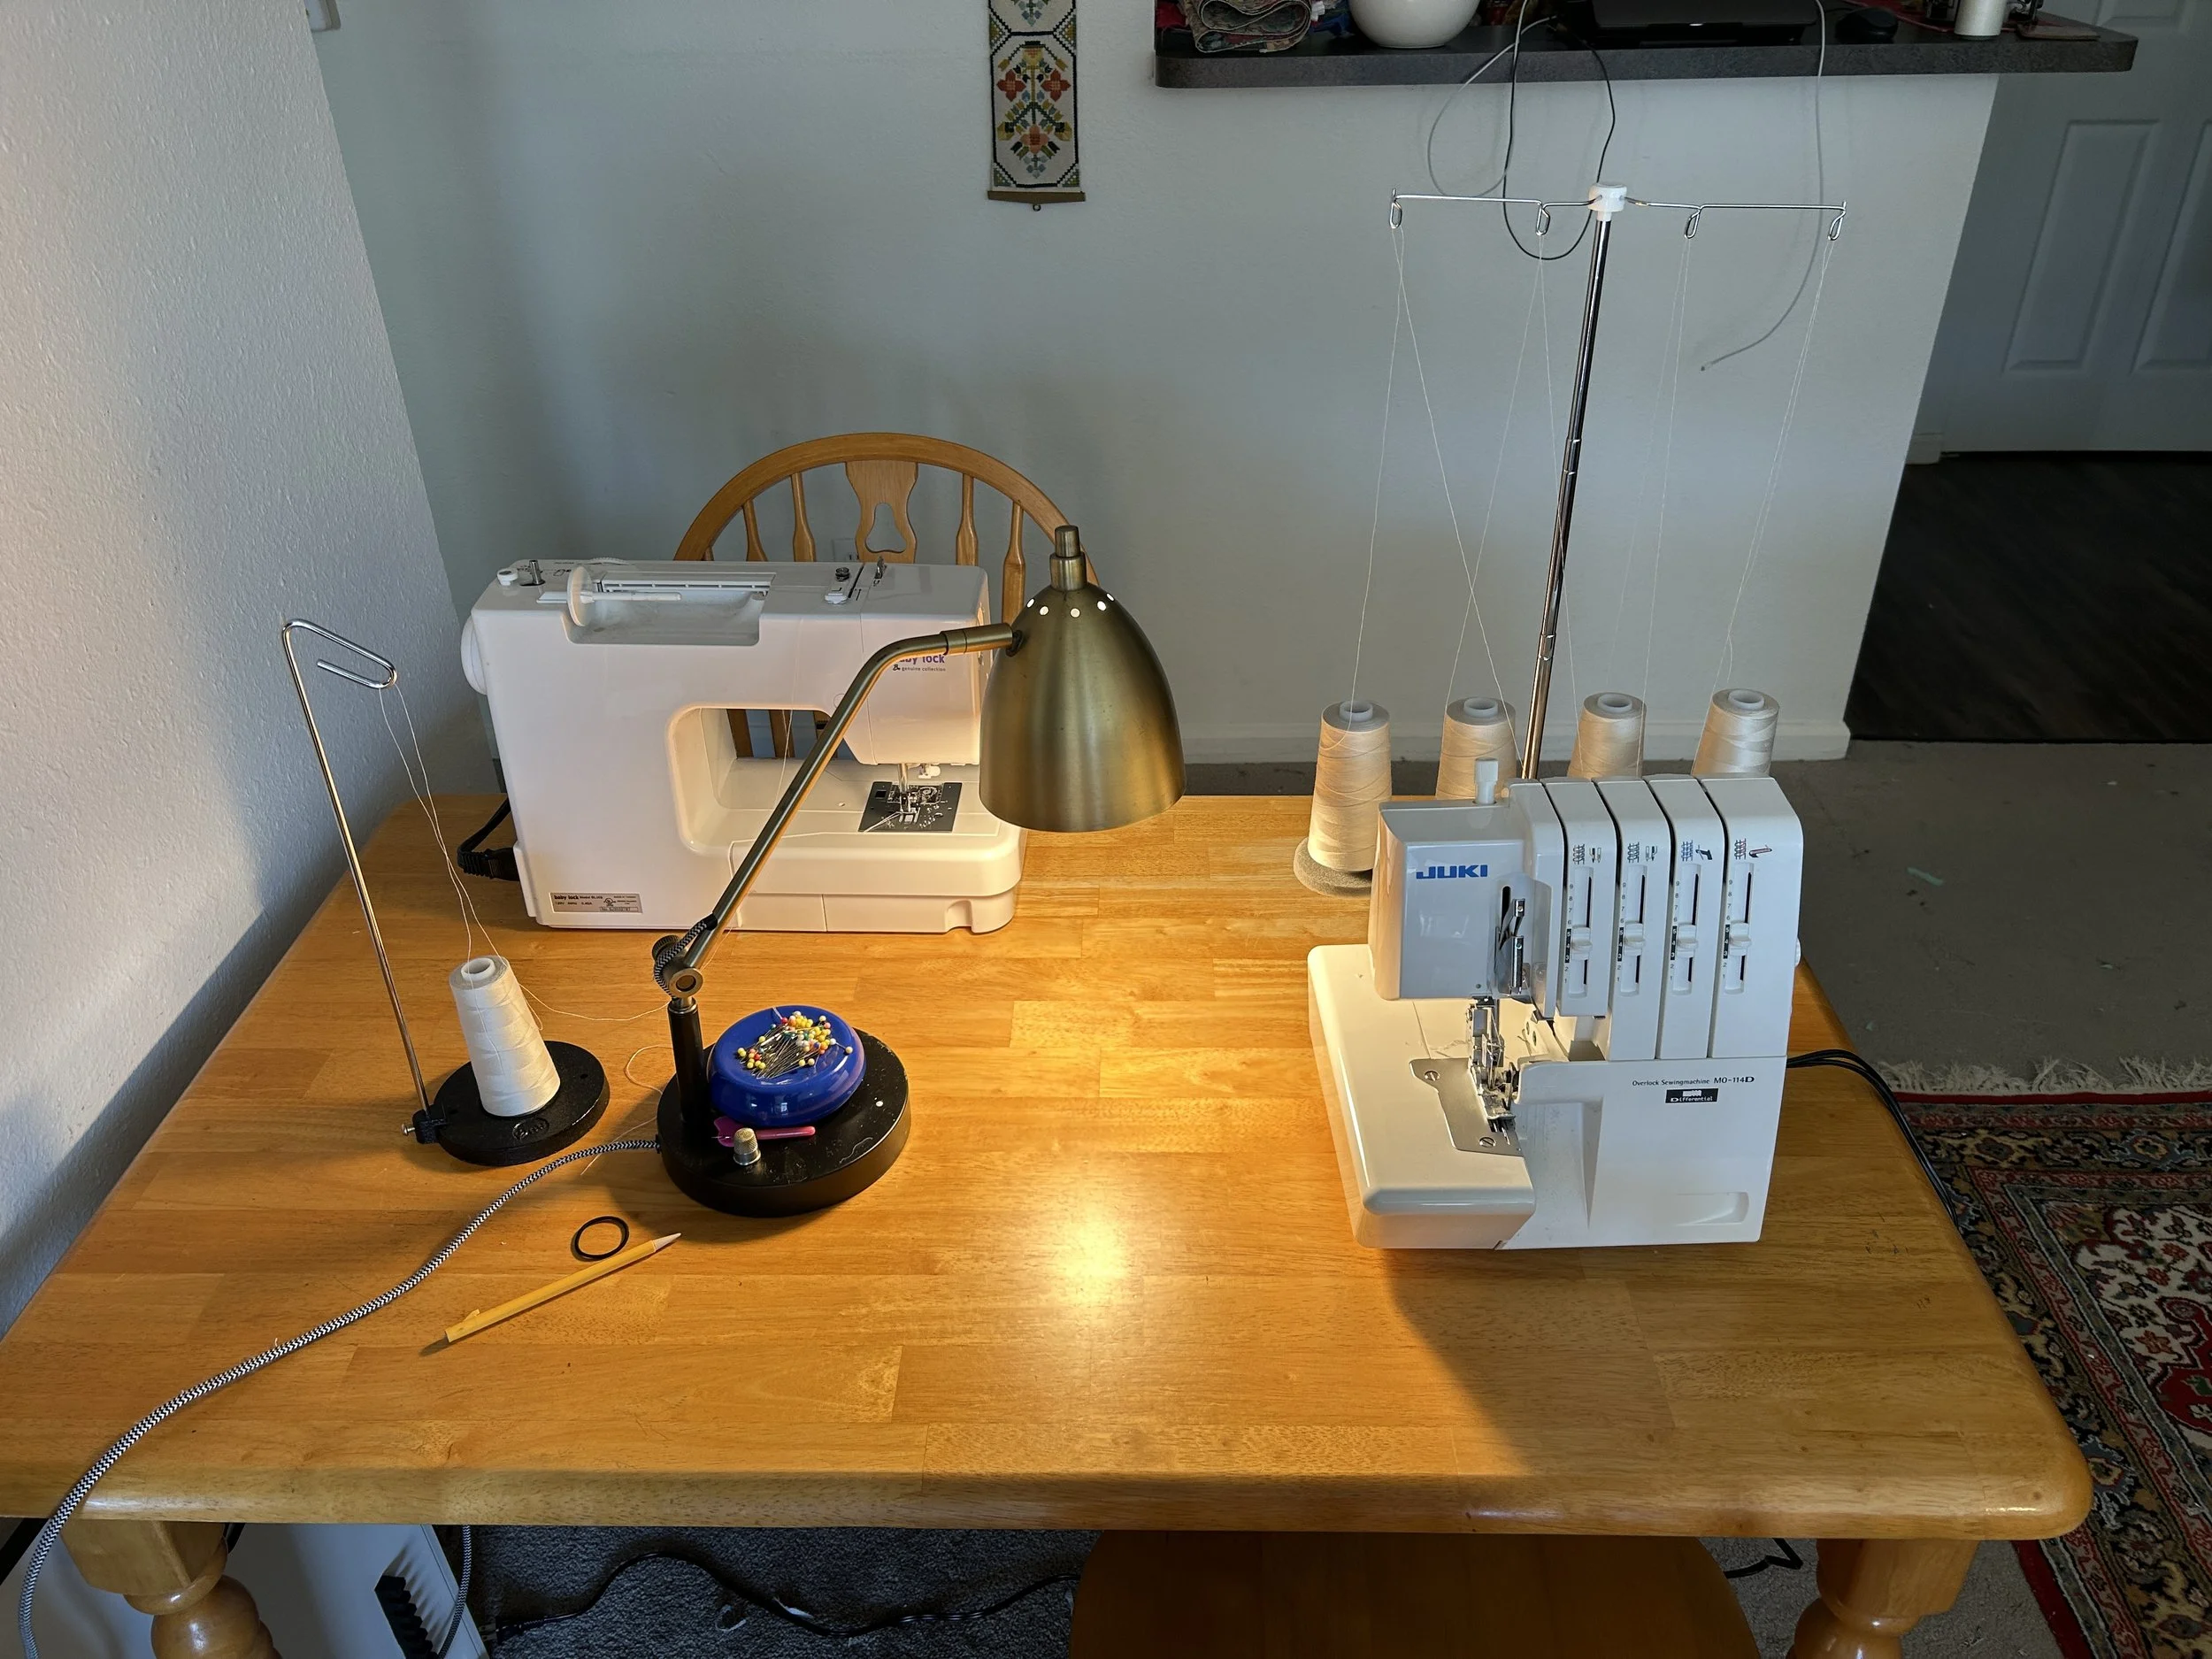
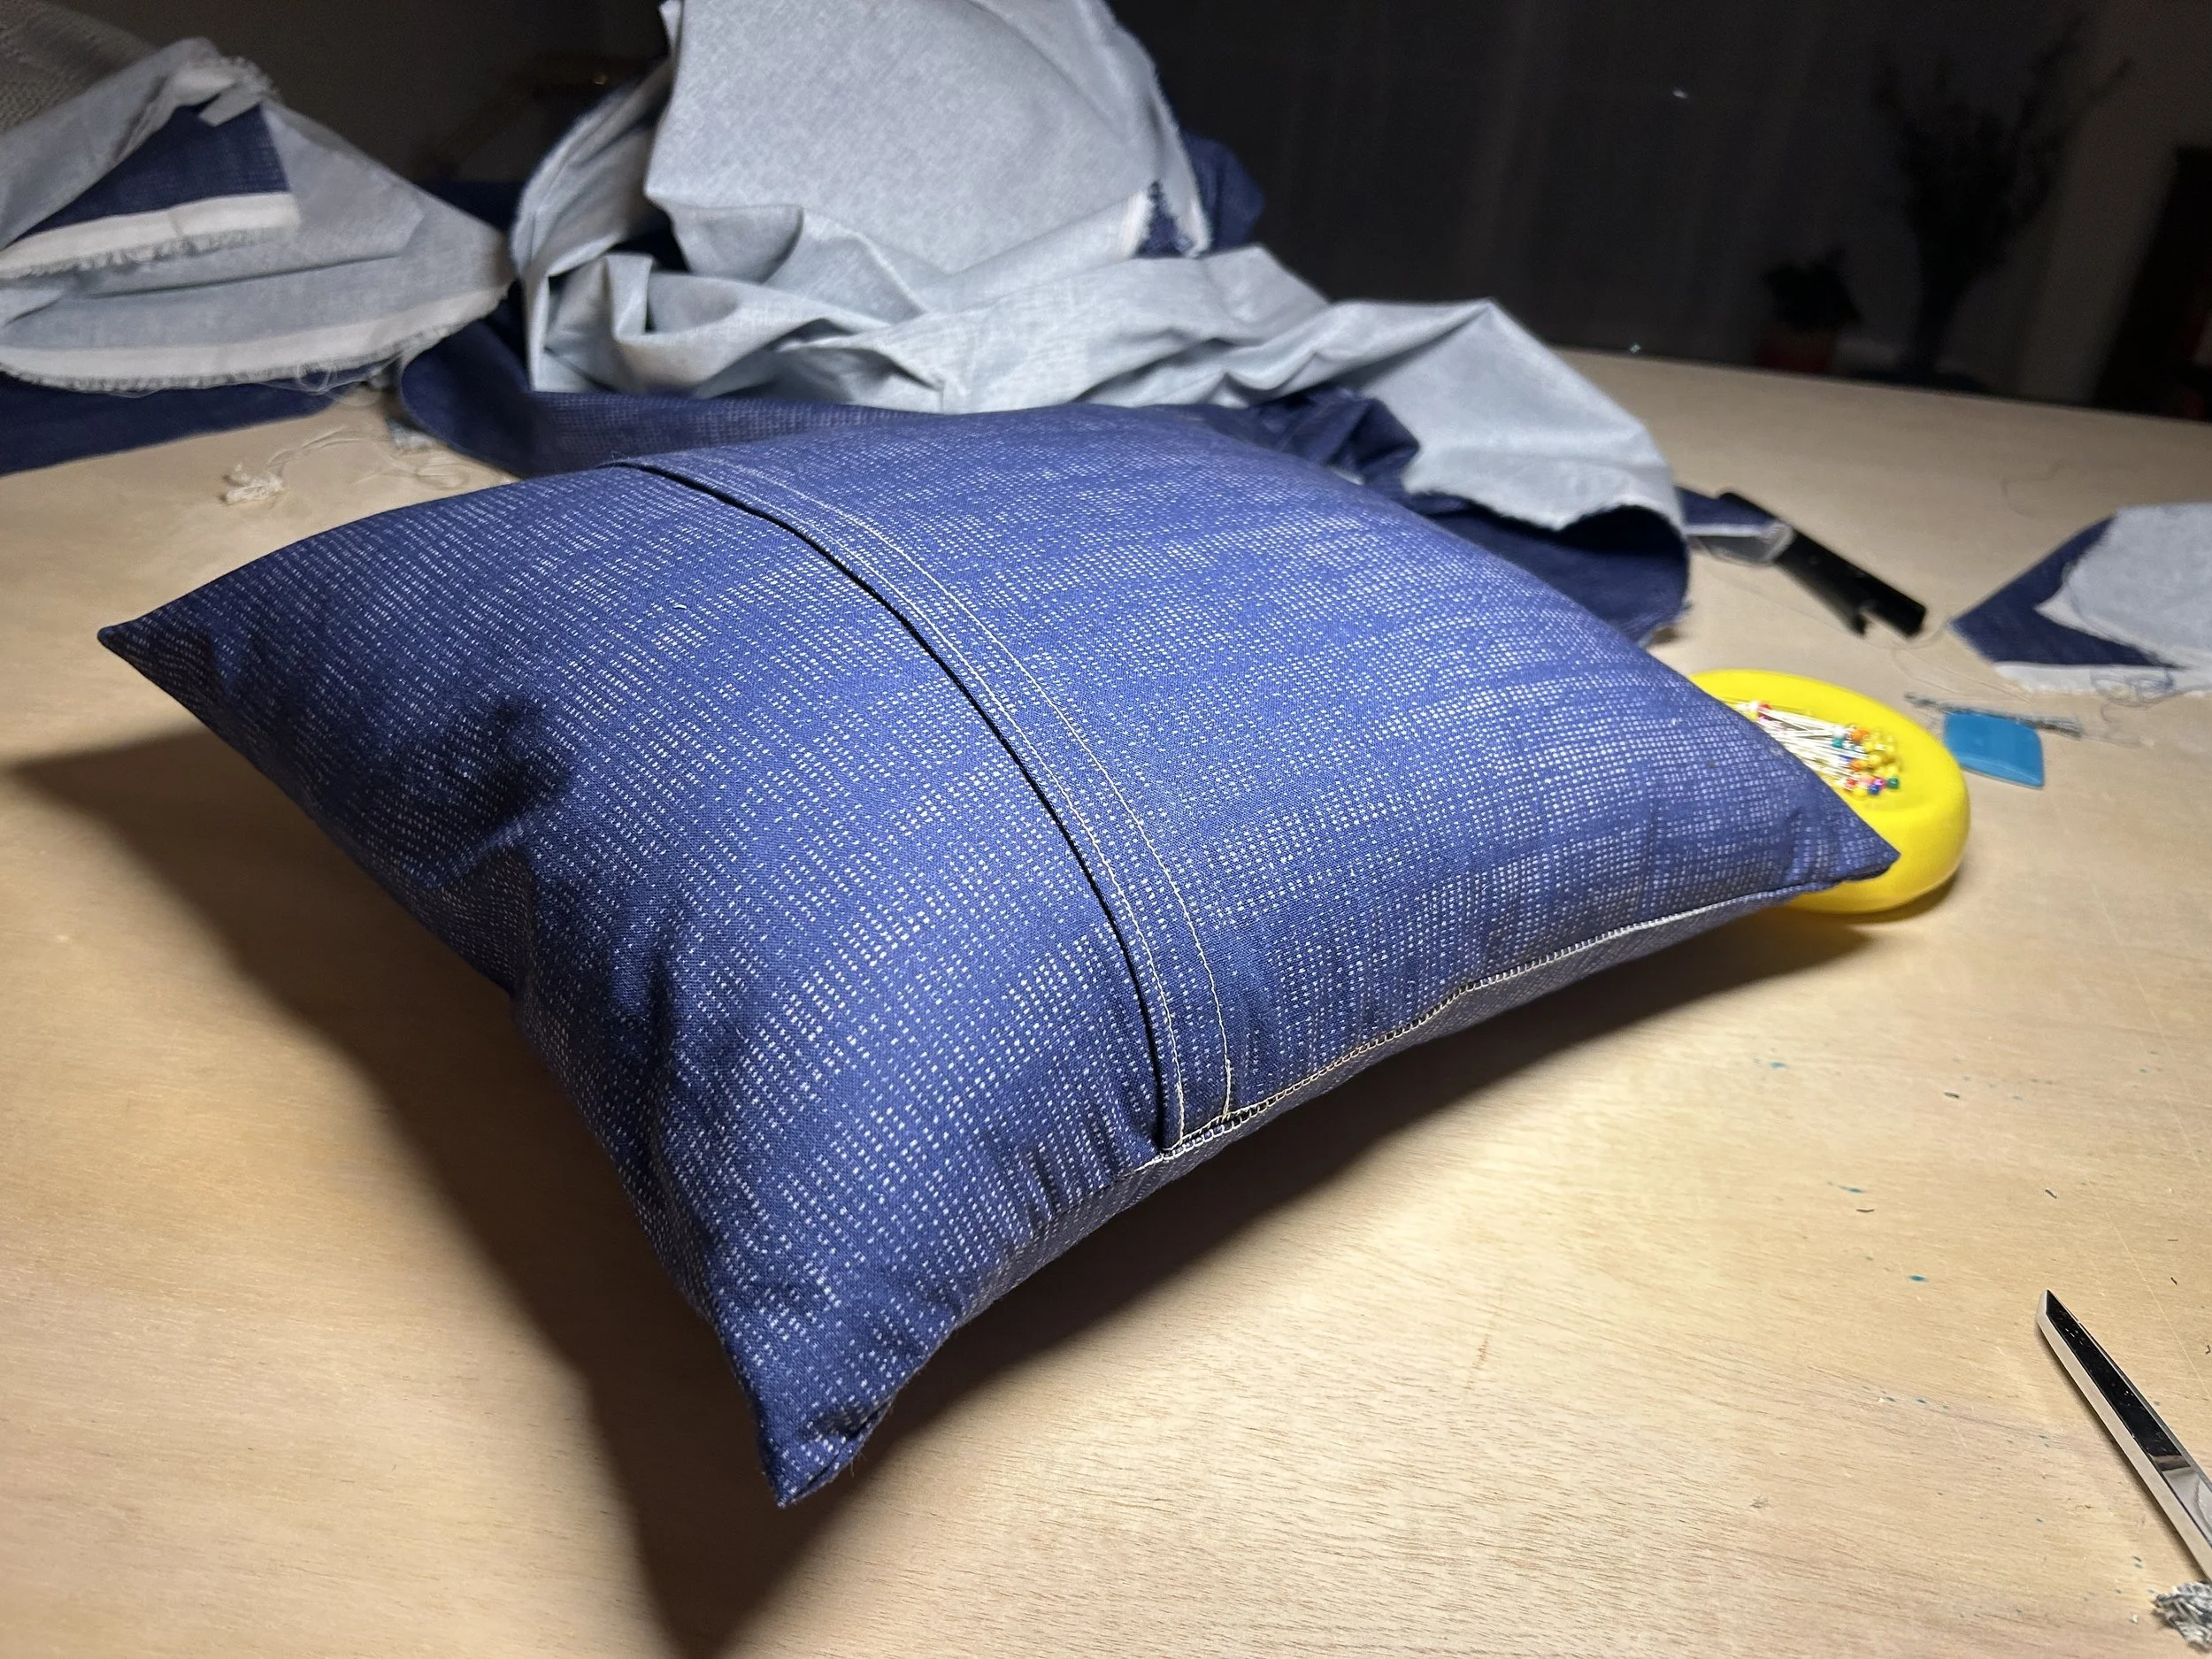
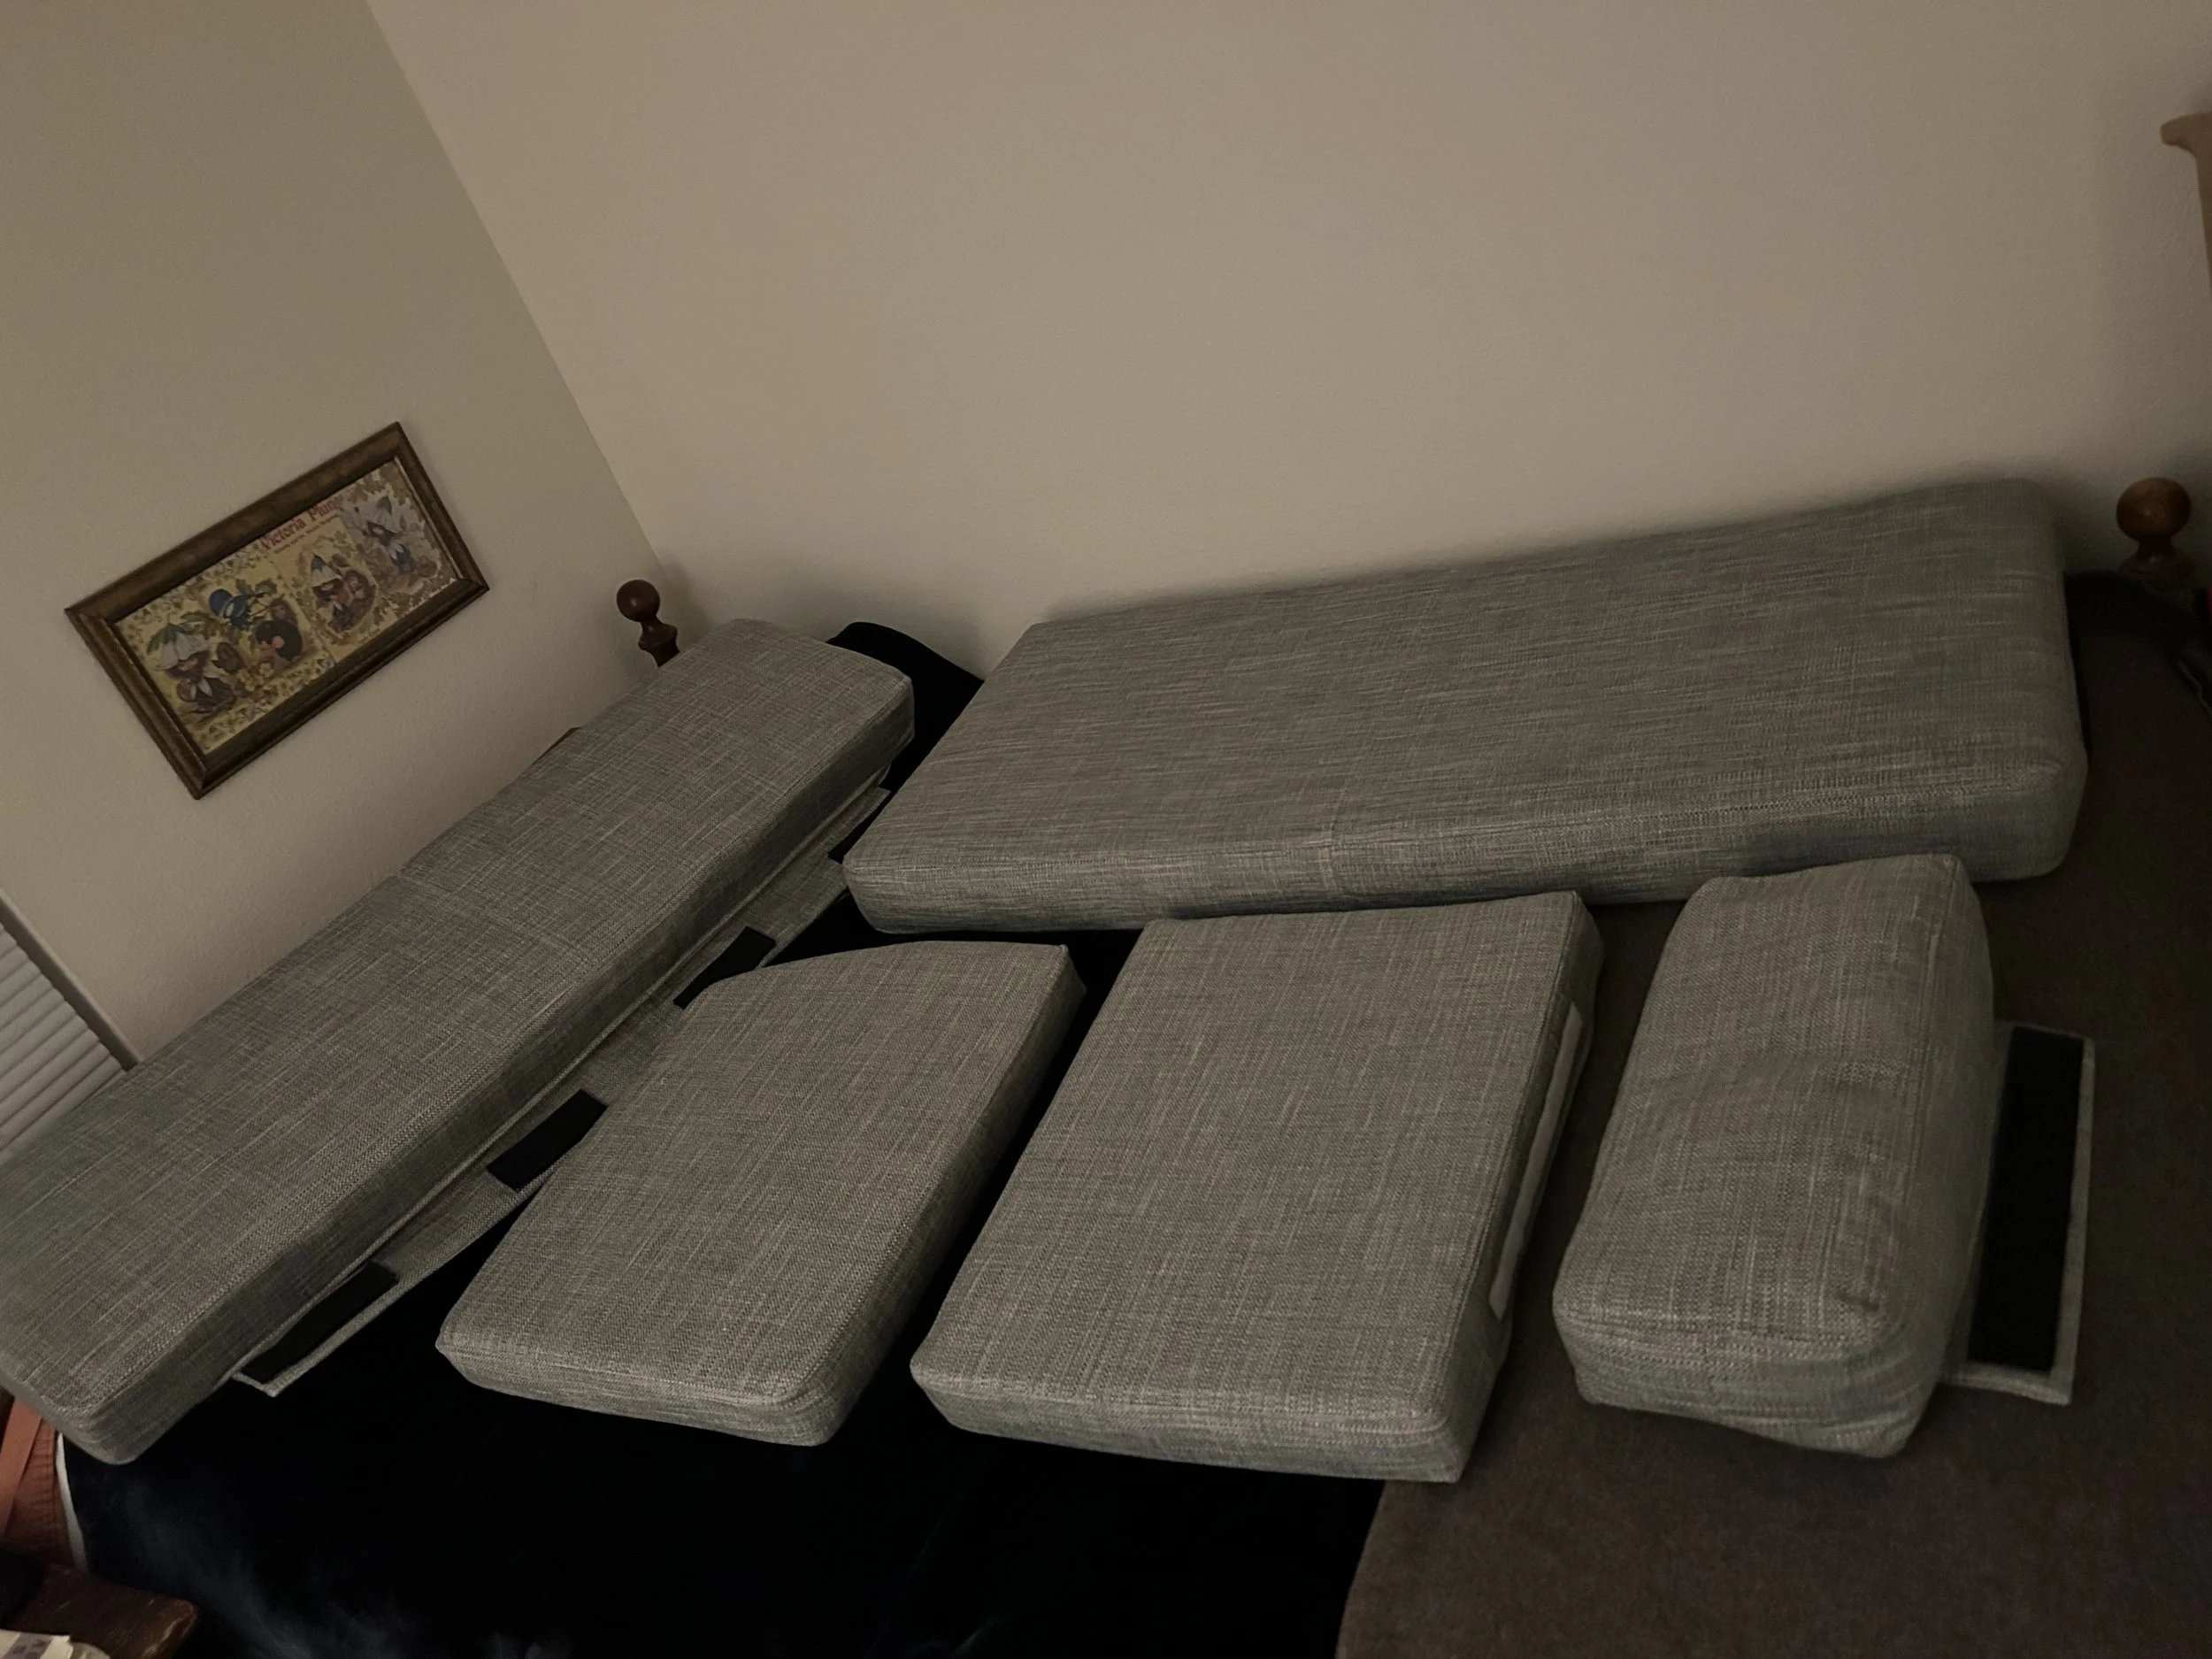
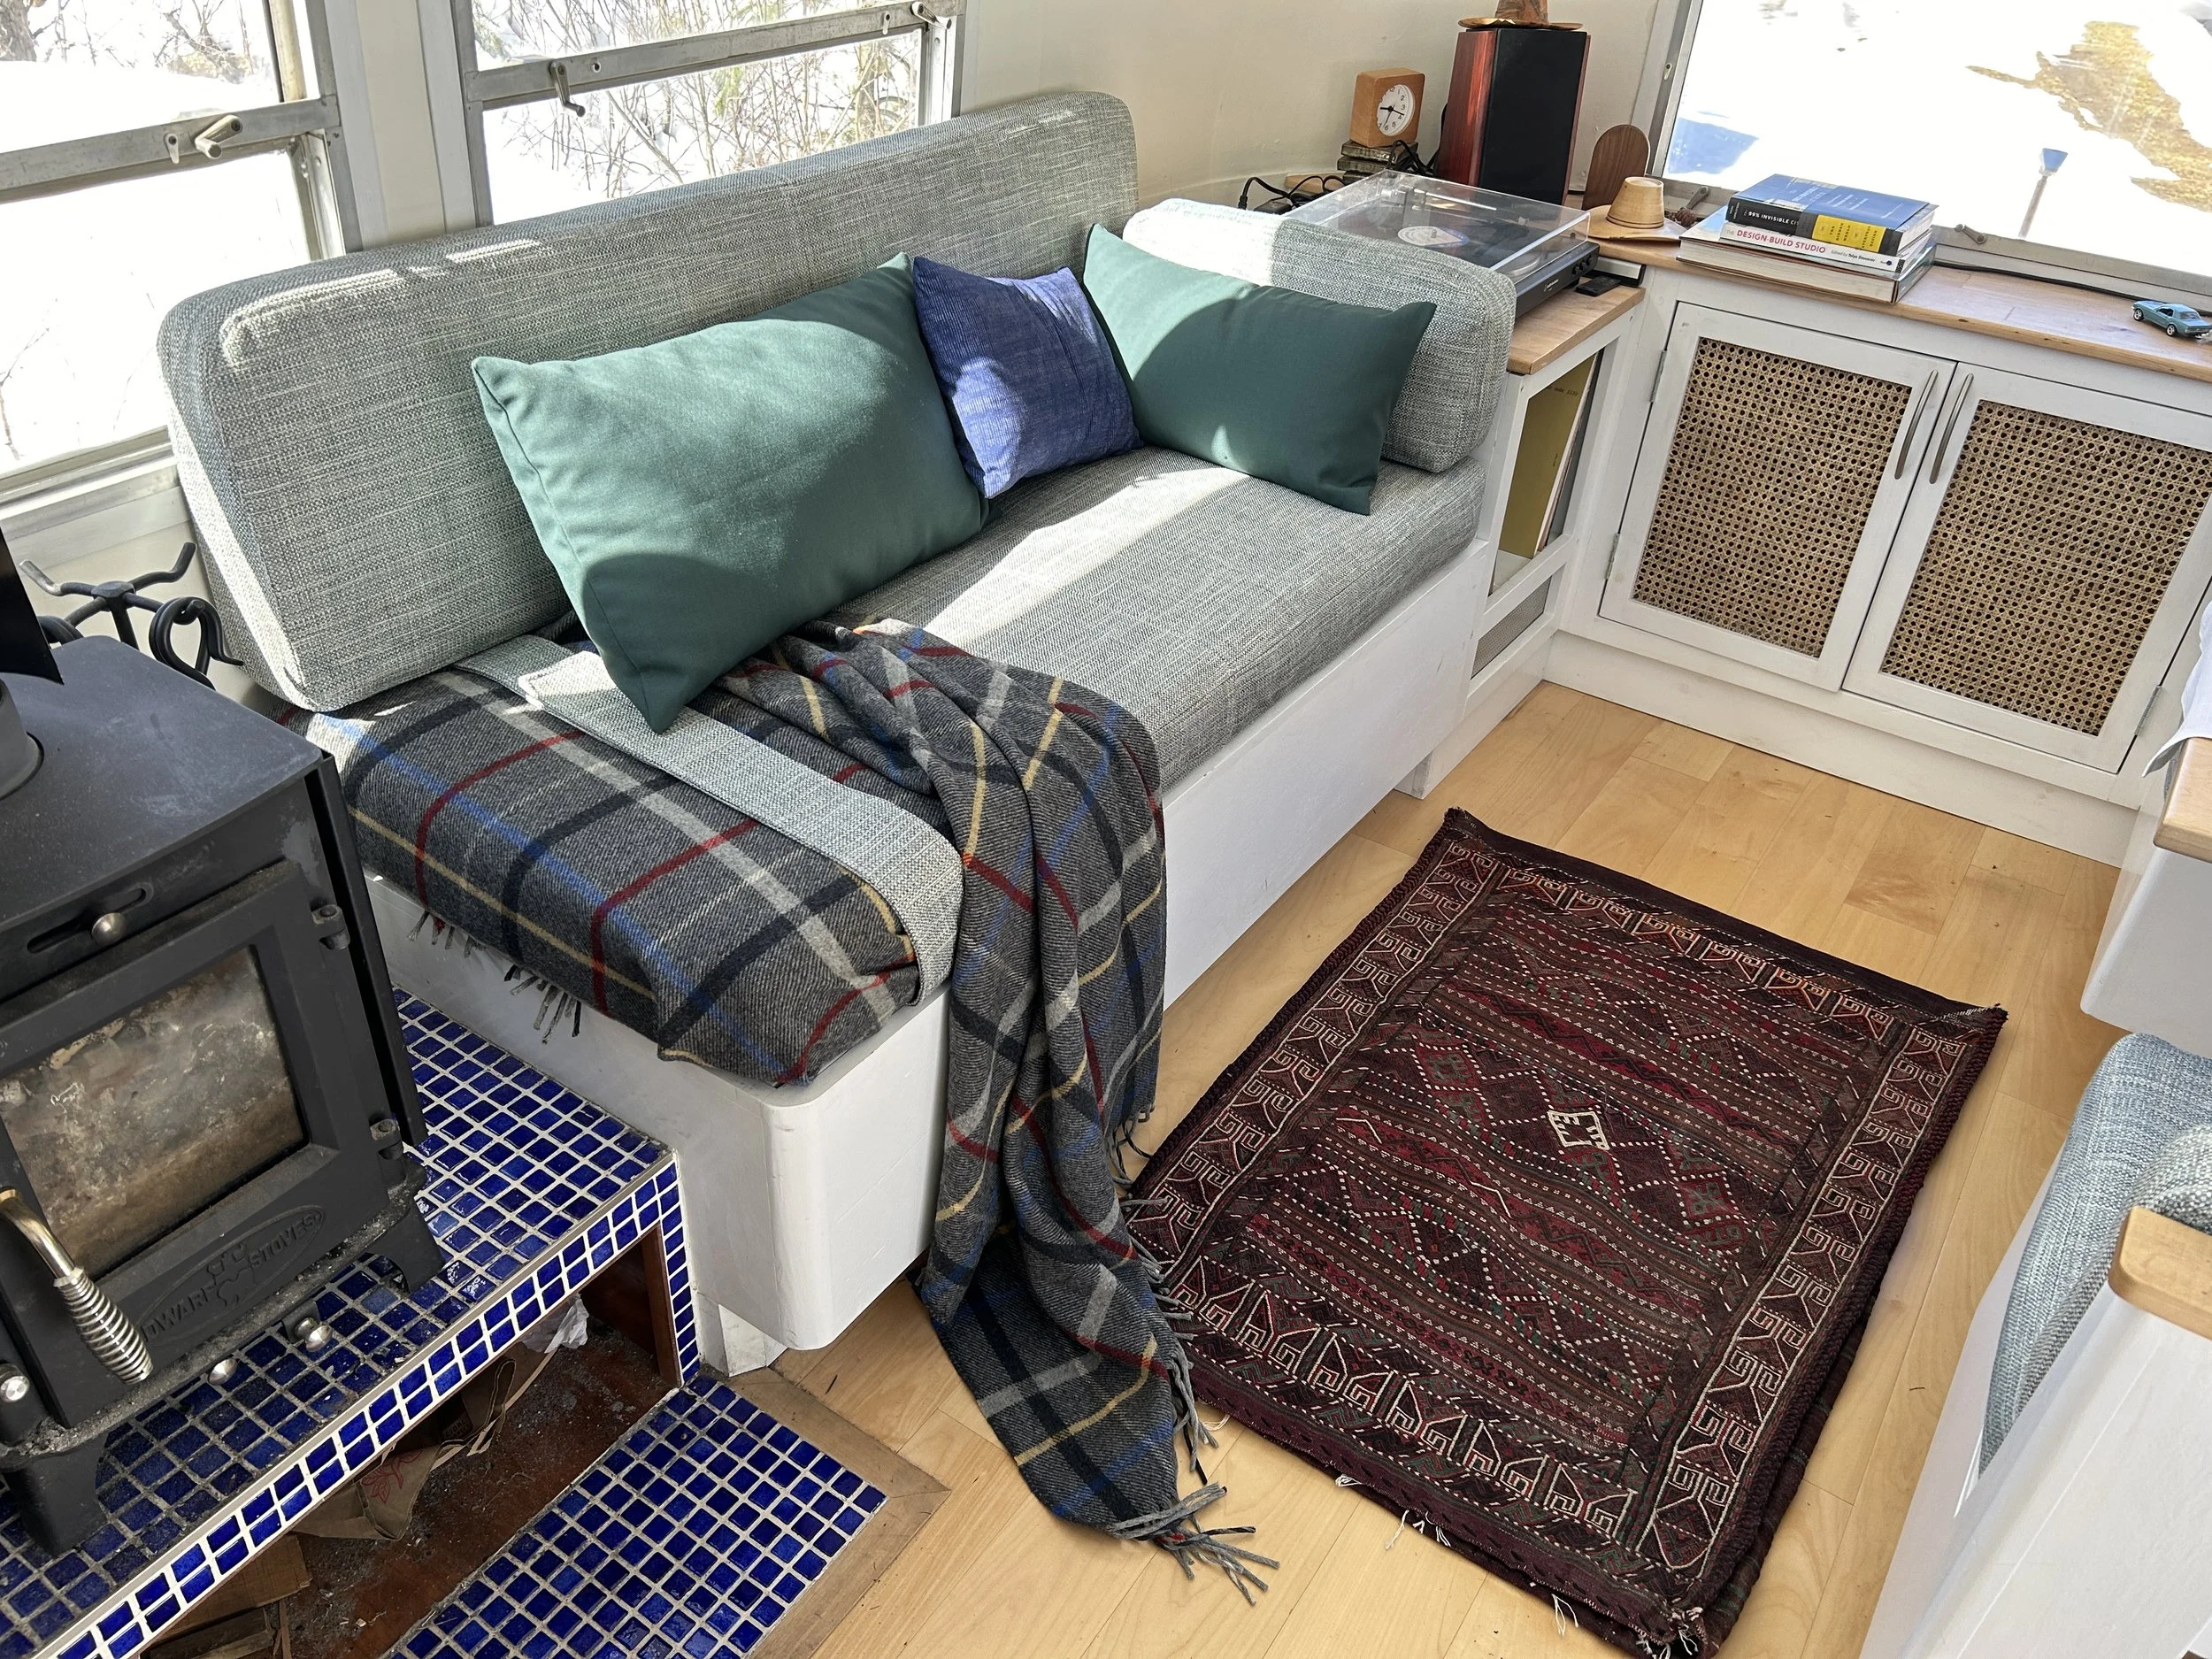
Sewing came next. I purchased a new beautiful serger in honor of this project. I knew it would be very important for the trouser work I intended to do after the upholstery was complete. Seam by seam, the pillows took shape. I attribute the success of this phase, to the fastidiousness of the design phase. It was comforting to have all that work validated as Completely Necessary. The sewing probably took a week, all told. I ended up pressing and sewing each side of every seam. I thought it would give all the edges a polished clean look. It ended up creating a bit of structure for corners, since I opted away from piping. I felt very happy with the result, and thought it might be harmonious with Airstream’s aesthetic.


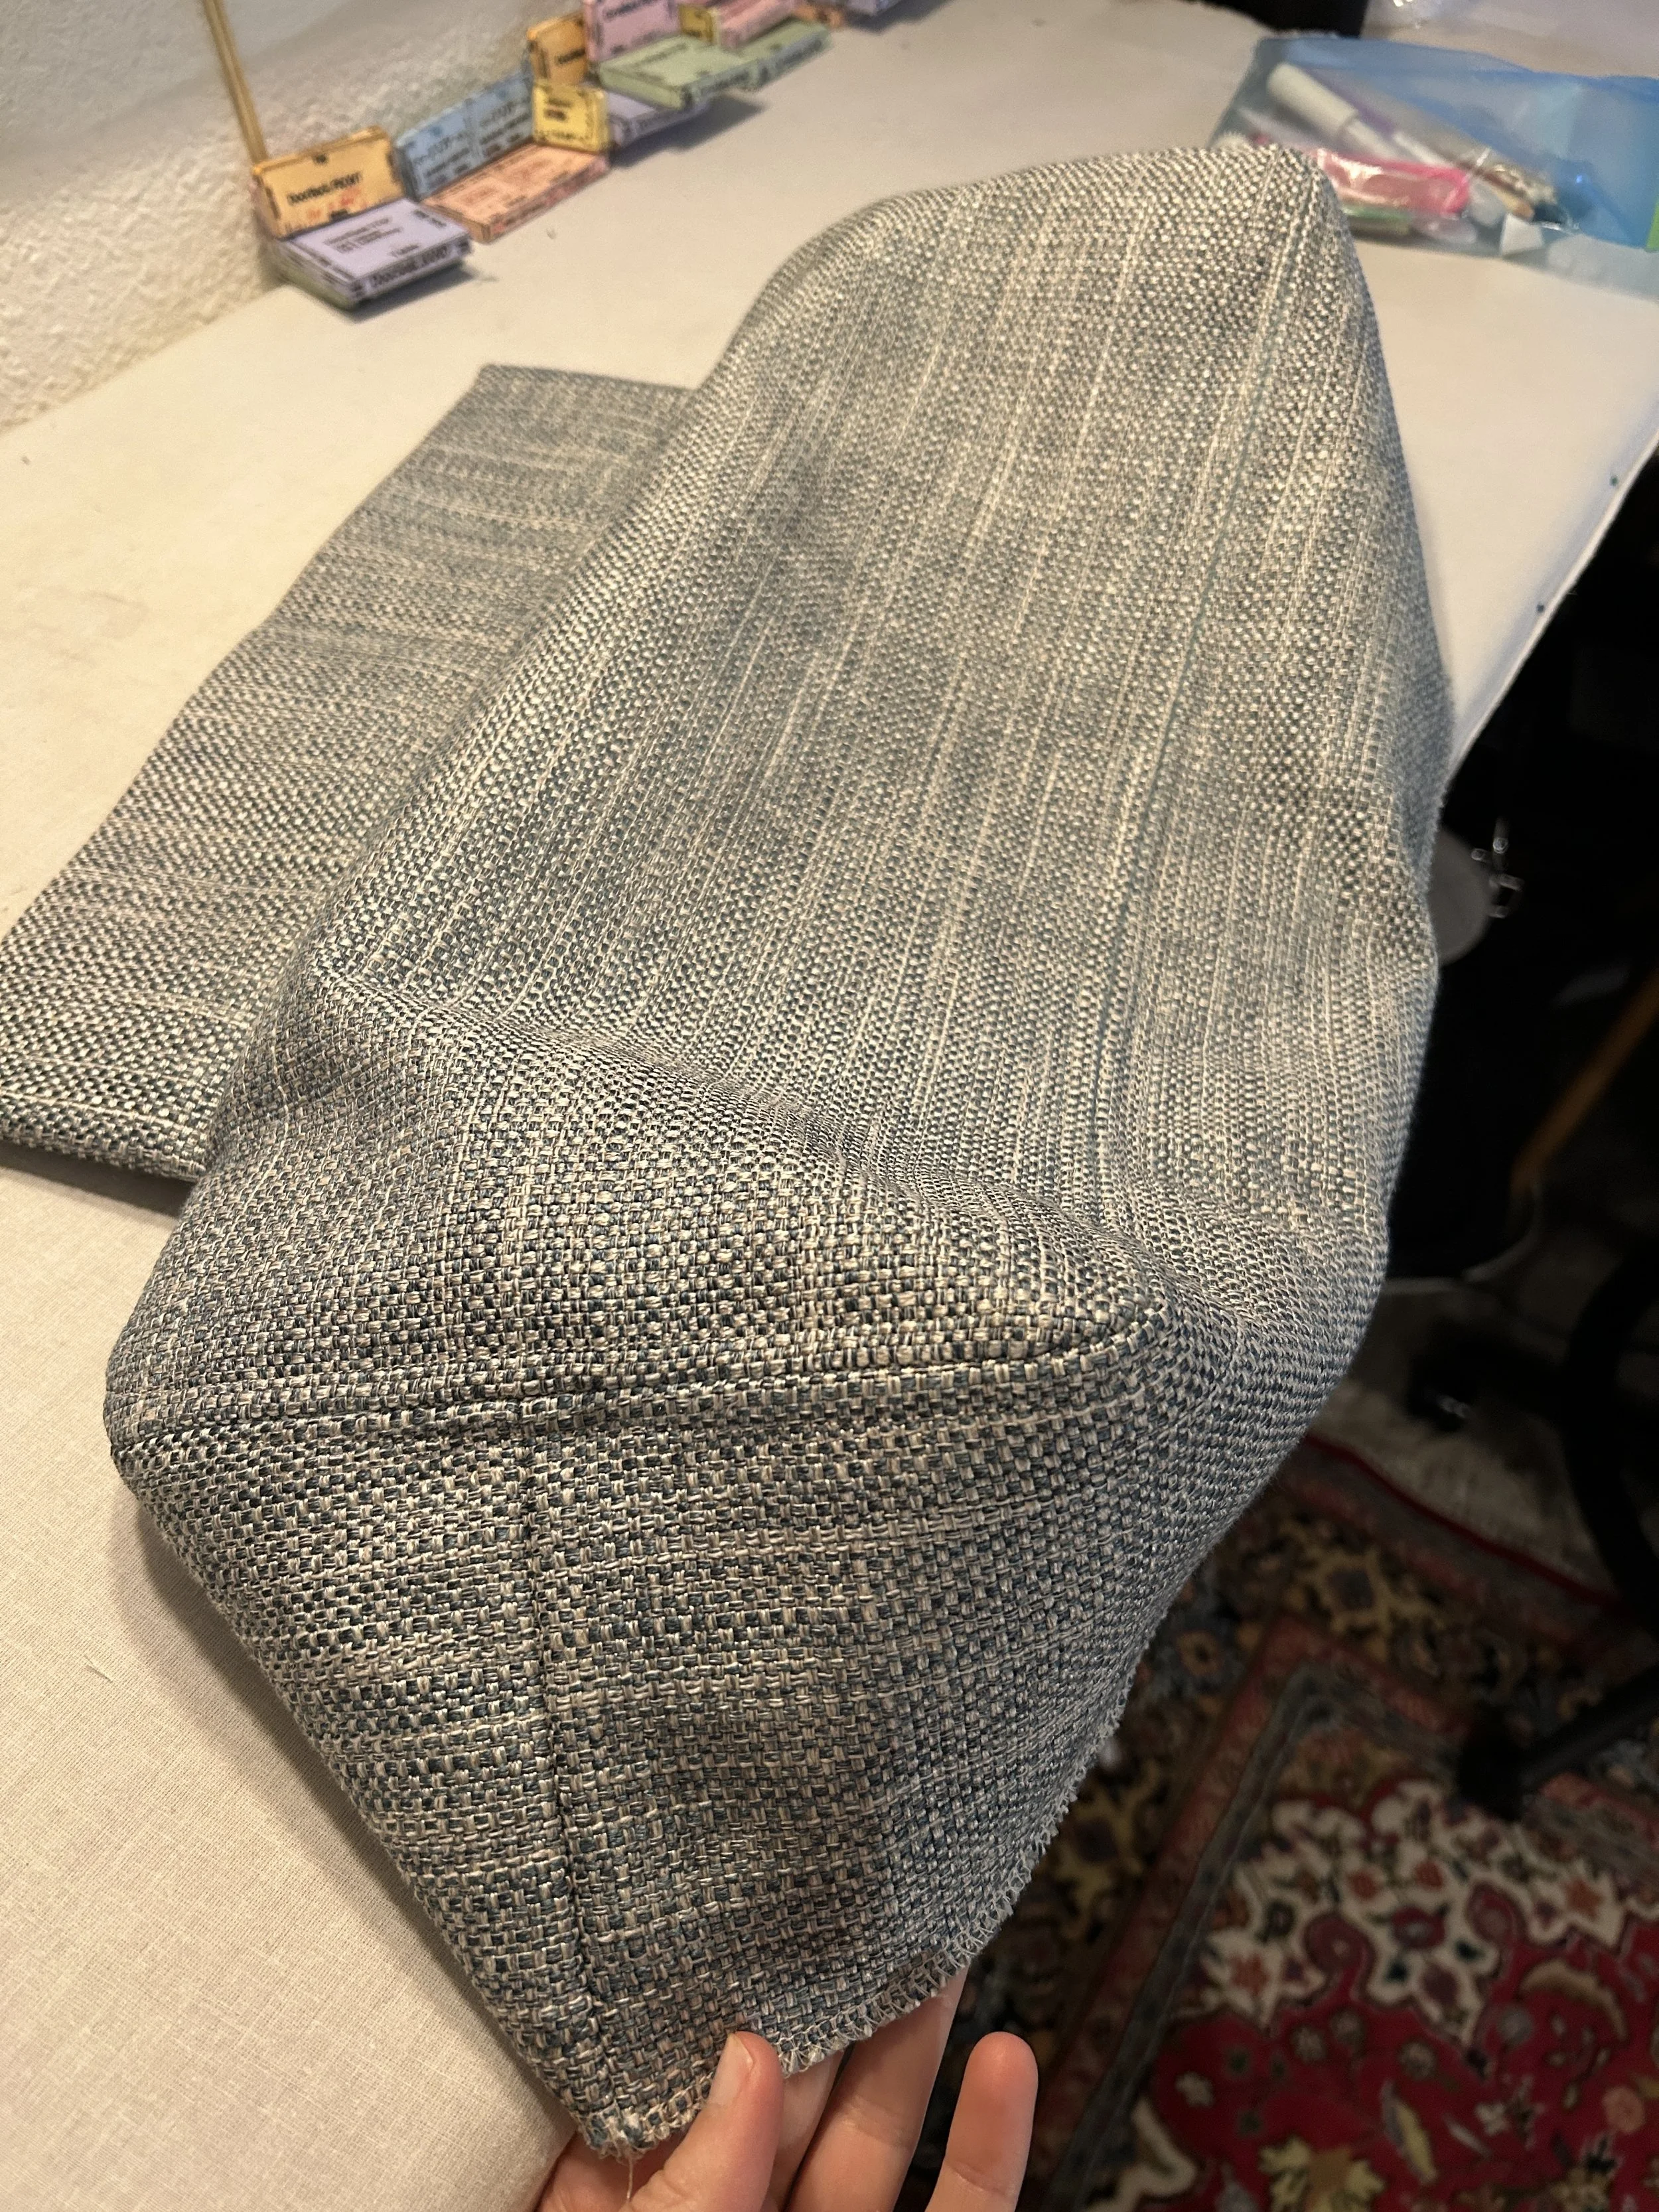
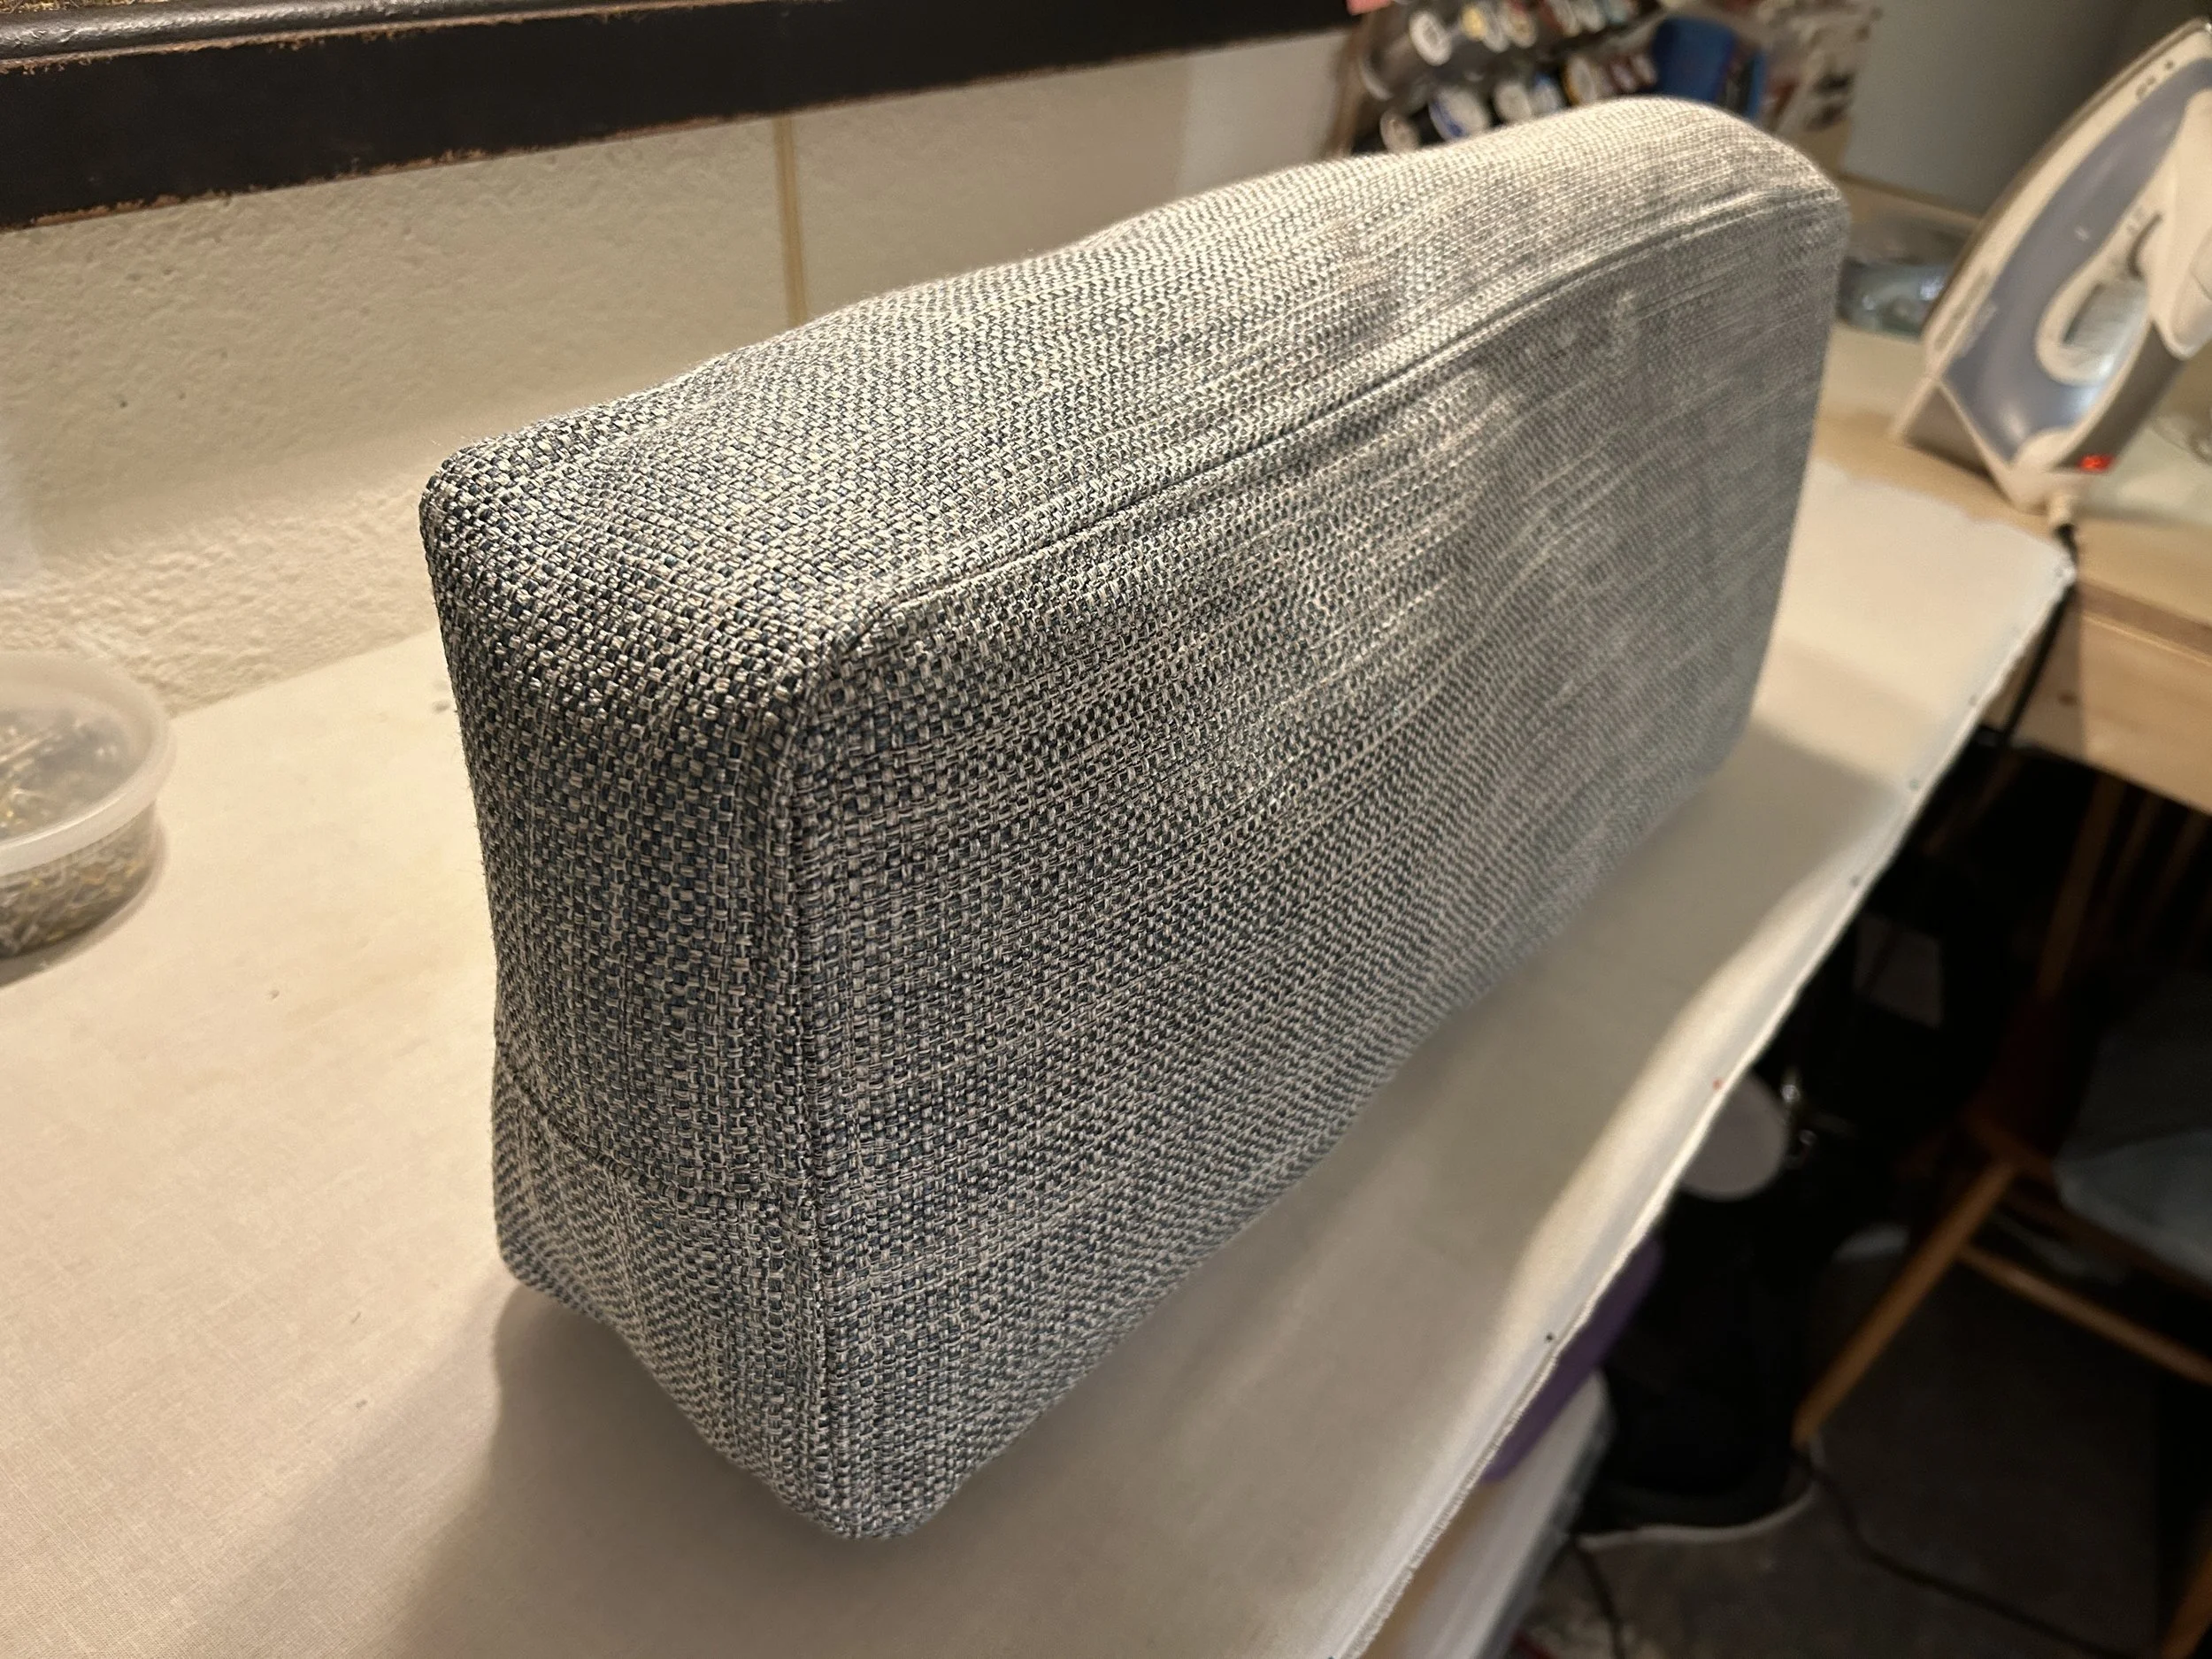

Then it was time for the stuffing. I purchased semi dense foam from Joanns, as well as a layer of batting for comfort. I also bought some pillow blanks to make some throws. All the foam was cut by hand with a four inch razor. That was exciting at times, haha. No deadly accidents, blessedly. I honestly feel like there were protective energies keeping me safe and focused through every step of this project.


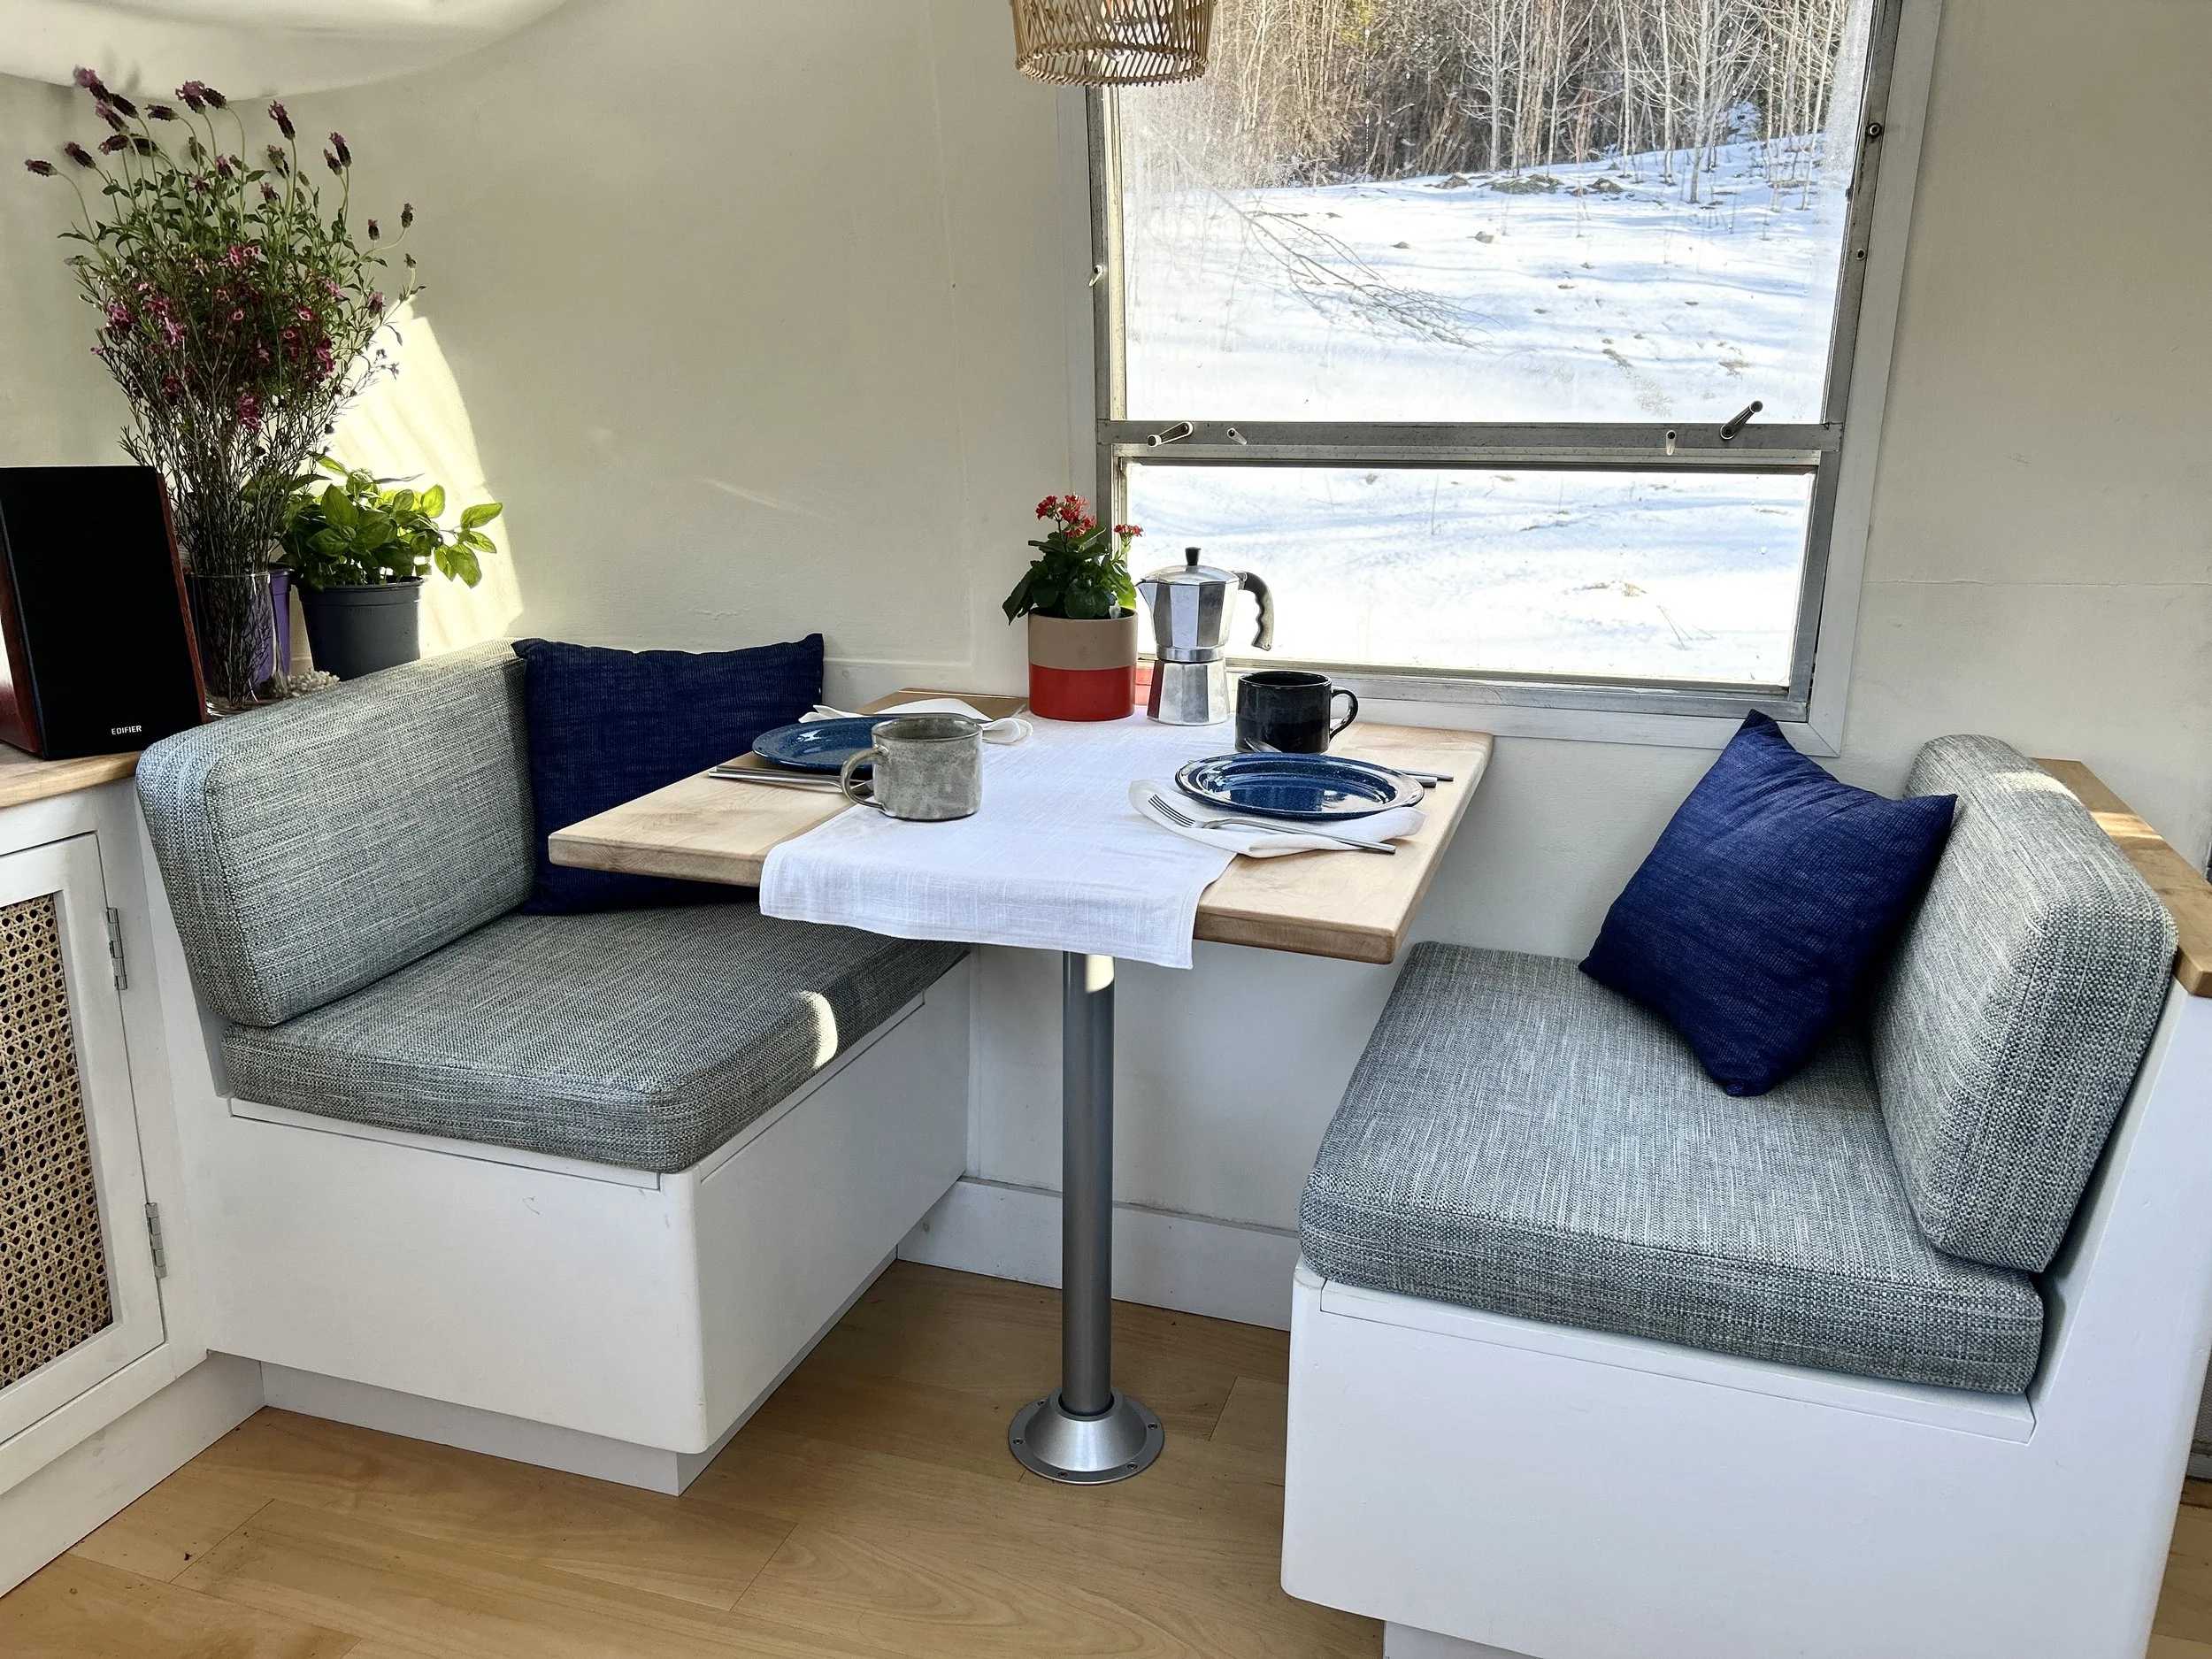
The airstream was located in Northern Vermont. I decided I would finish the upholstery in time to deliver it on the day of the Total Solar Eclipse, which I had never seen before. I brought lots of set dressing with me, including flowers, dishes, custom place matts and napkins, books and coffee. I also brought a vintage Pendleton blanket. This was a present, but also part of my design to protect the edge of the sofa from the stove. I figured since the Joann fabric was not entirely natural, it would be good to have 100% wool as a barrier. I designed a custom strap to hold the blanket securely. This would make it easier to clean, if soot accidentally got on the blanket.
It had snowed when I arrived at the remote airstream location. I had to park up a hill and walk everything down. I also sprayed everything with a waterproofing fabric, to try and protect the fabric from condensation drip stains. I made sure there was spot care upholstery cleaner left in his cupboard and care instructions for the cushions.

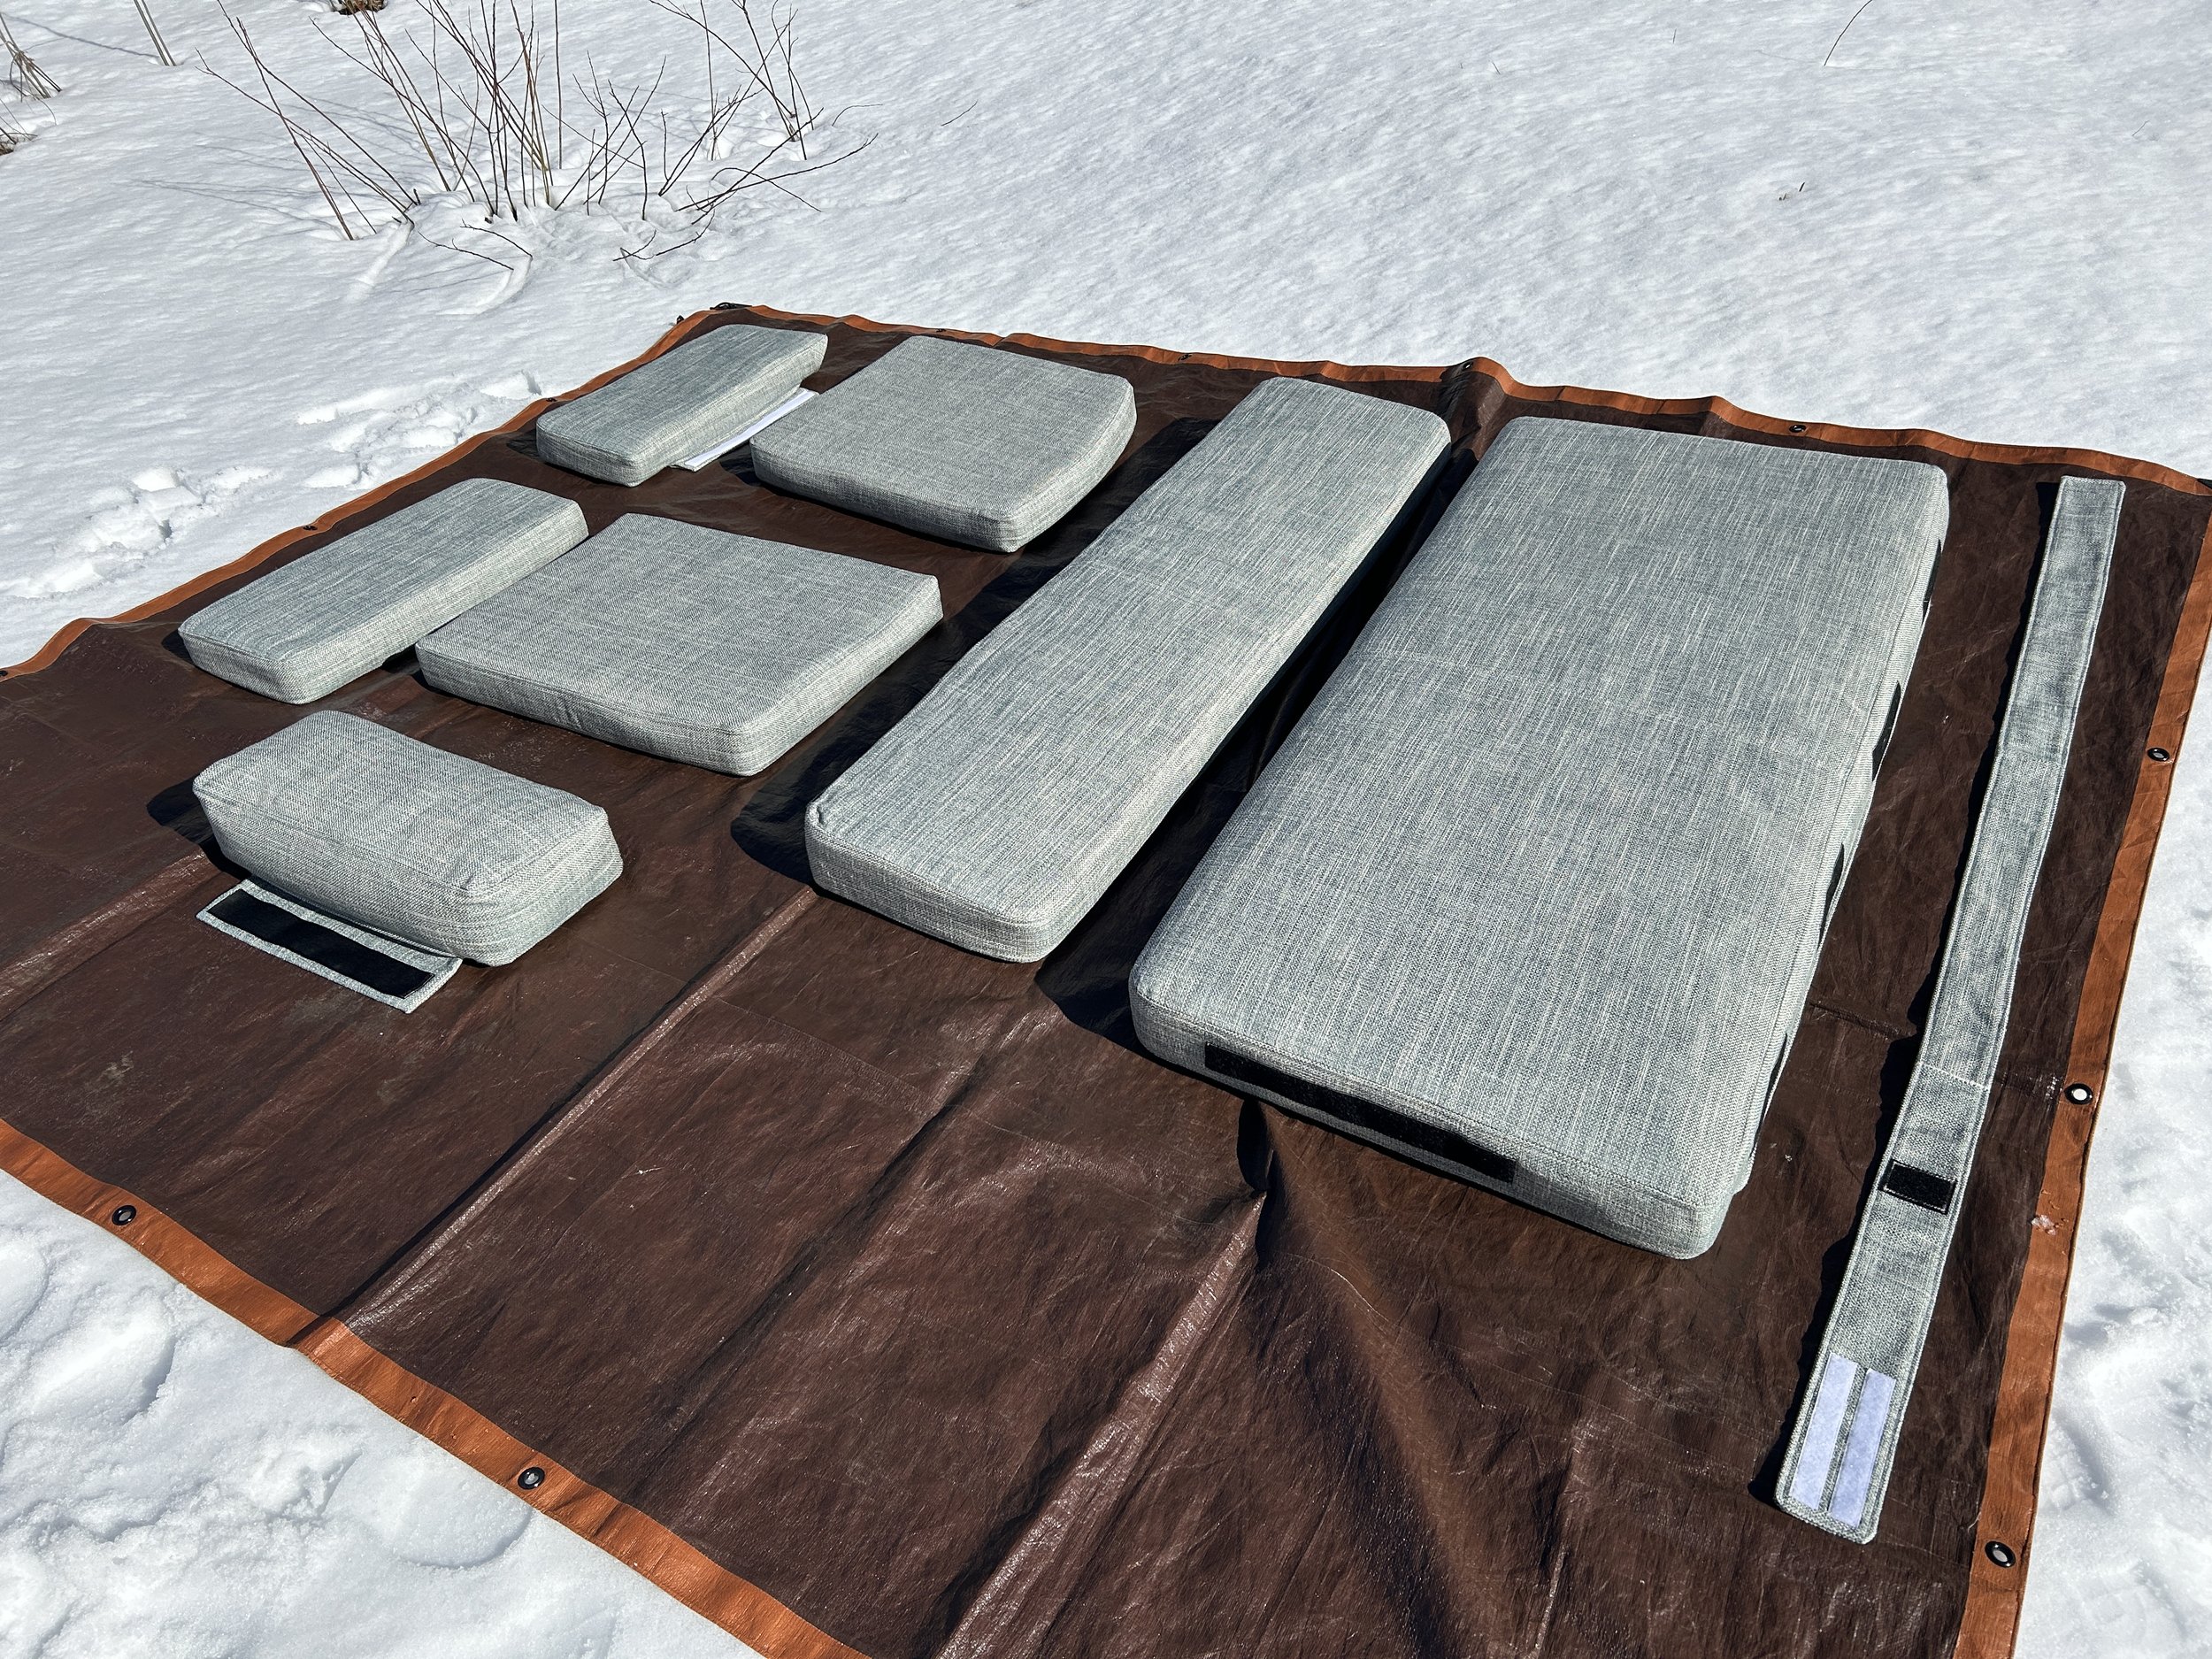


Here are the final pictures I took of everything dressed in. I included the “Before” picture again, just for fun comparison, as well as one picture of the exterior. His airstream is truly a beautiful home. I felt so lucky to have such bright sunny weather for my photos! The whole ground plain was acting like a wonderful bounce, evenly lighting everything. Such a gorgeous, wintery day.


All in all, the installation was successful. My friend was traveling during the project and was excited to be completely surprised. He didn’t see a single process picture during the entire design and construction phase. What a gift to have such complete design freedom! I’m grateful he trusted me to get it right. A month after installation, when he finally got to see it all, he was very excited and felt it was a correct fit for his space. This was a major relief, as I really admire his incredible skill and design execution. I was determined that this upholstery meet the very high bar he established. For me, It was a wonderful learning experience and I’m happy that he felt at home when he saw everything.